Help Documentation
Palleon - WordPress Image Editor
Installation
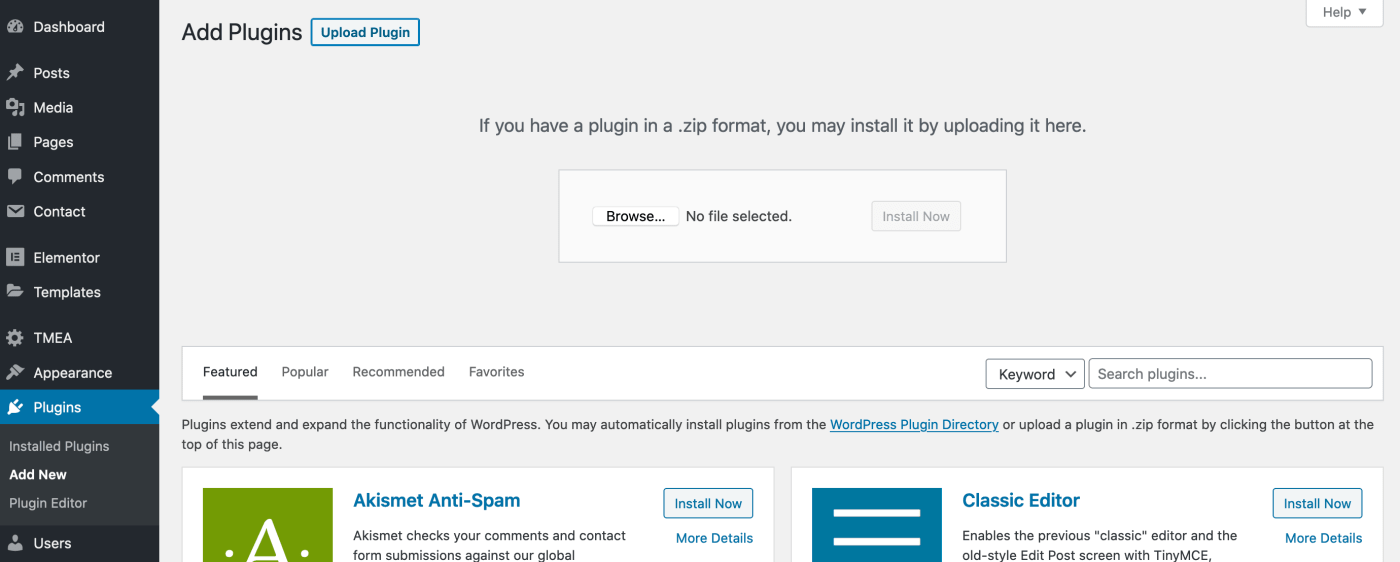
The first thing you need to do when you want to install a new WordPress plugin is to login to your site admin page. Once there, go to Plugins -> Add New. Click "Upload Plugin" button and upload the zip file from your local hard drive.
Getting Started
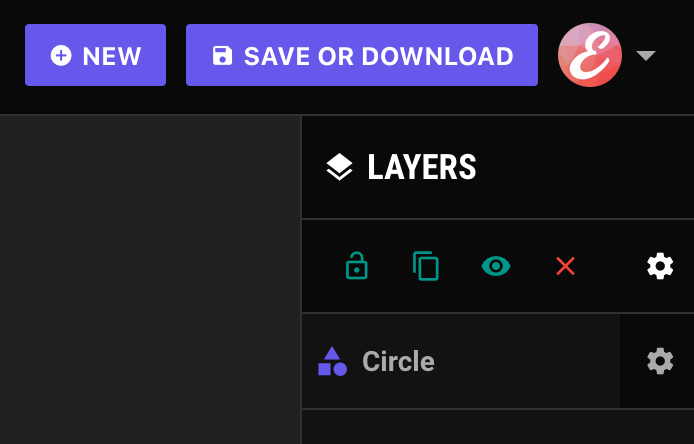
To open a new image on the photo editor, click New button. A modal box will appear;
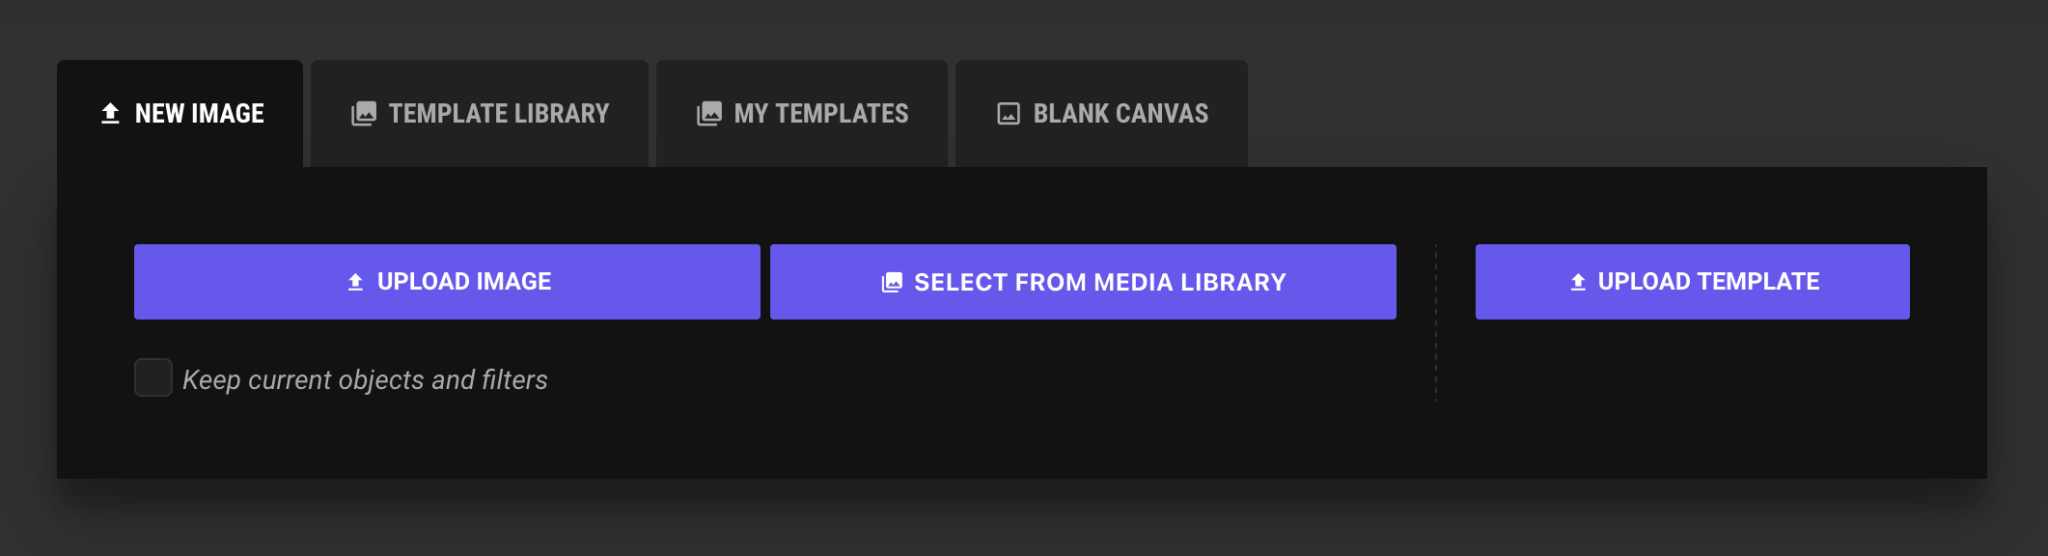
Click this upload image button to select an image from your computer.
Click select from media library button to select an image from WordPress media library.
If you have a template (.json file) which you’ve created with Palleon before, use upload template button to open it on the photo editor.
Back-End & Front-End Versions
Palleon comes with 2 versions. Front-end version is optional and can be enabled or disabled from plugin settings. No login is required to use front-end version but users still need to sign-in to use some features such as saving images, add to favorites etc.
Back-End Version
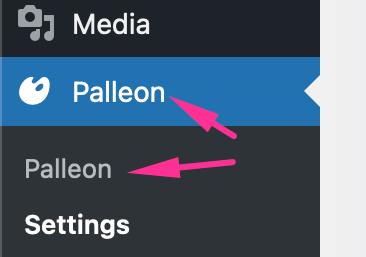
You can access back-end version from the left side menu on your WordPress dashboard;
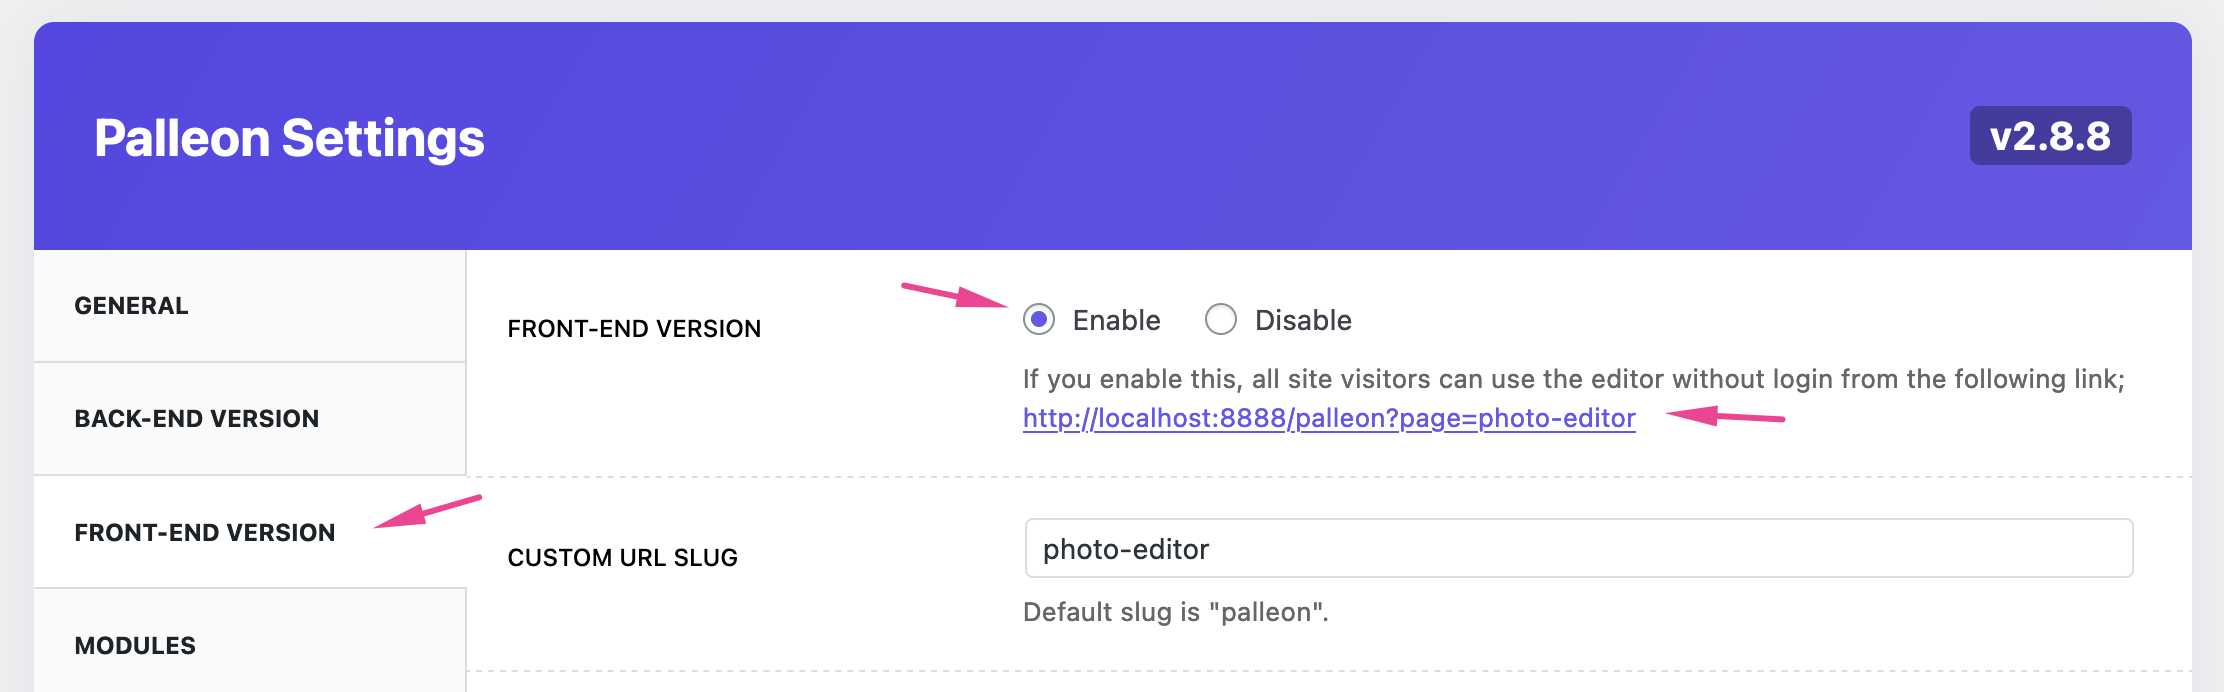
Front-End Version
First of all, you should enable the front-end version from plugin settings. You can find the url of the page under the setting;
How can I restrict access to WordPress media library?
Please go to Palleon Settings -> Logged In users;
Allow SVG Upload: Allow users to upload SVG files to the media library.If disabled, Elements -> Custom SVG -> Select From Media Library button will be removed.
Allow JSON Upload: Allow users to upload JSON files (templates) to the media library. If disabled, users can not save templates.
Media Library: Allow or disallow users to access WordPress media library. If disabled, users can not access to WordPress media library. Admins are always allowed.
Other Images: Allow users to use all images in the media library. If disabled, users can only access to their own images.
Media Library Buttons: If you disable the media library and are not using any APIs (Pexels, Pixabay etc.), you may want to hide the media library buttons.
Save Tab: If you disable the media library and are not using any APIs (For example; Imgur), you may want to hide the save tab

Max. number of files allowed: Set the maximum number of files (image and template files) allowed to be stored in your media library per user (admins and editors always allowed). Leave blank for unlimited use.
You can also set the maximum number of files allowed for a particular user;

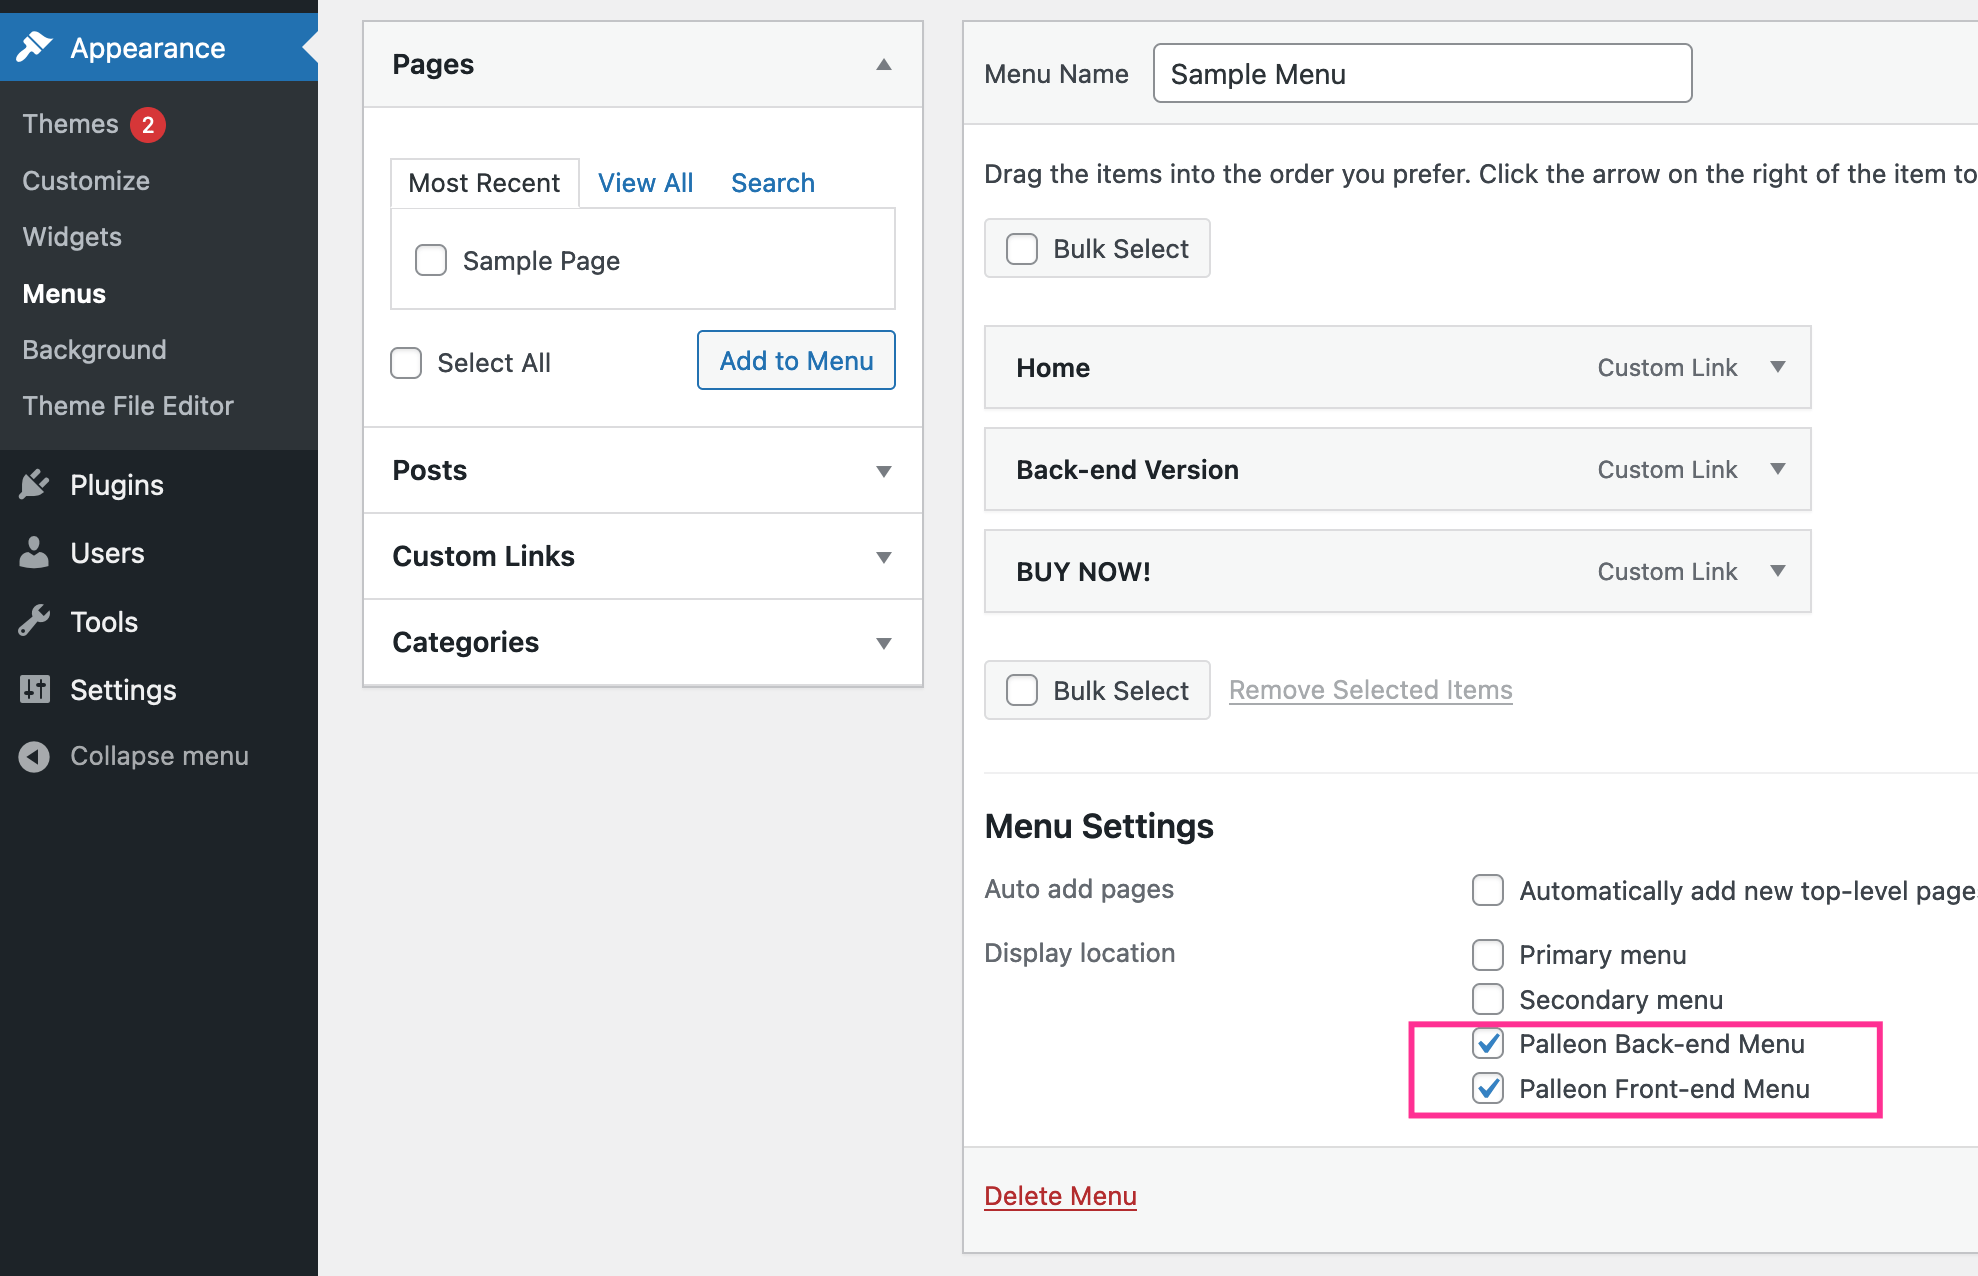
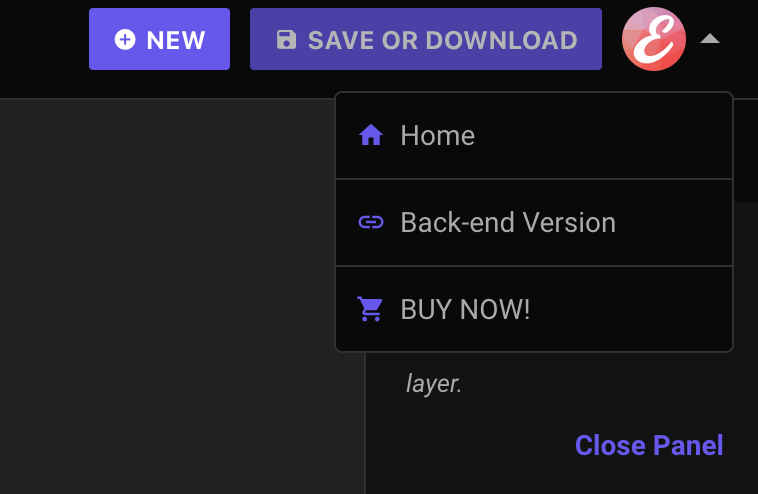
User Menus
You can create a simple dropdown menu which is displayed at the top bar. It supports only one-level menus.
How to add an icon to the menu item
You can add any material icon to the menu item. To find the icon code, go to Material Icons;
Copy the code and paste it to the "Navigation Label" field before the menu title;
Templates
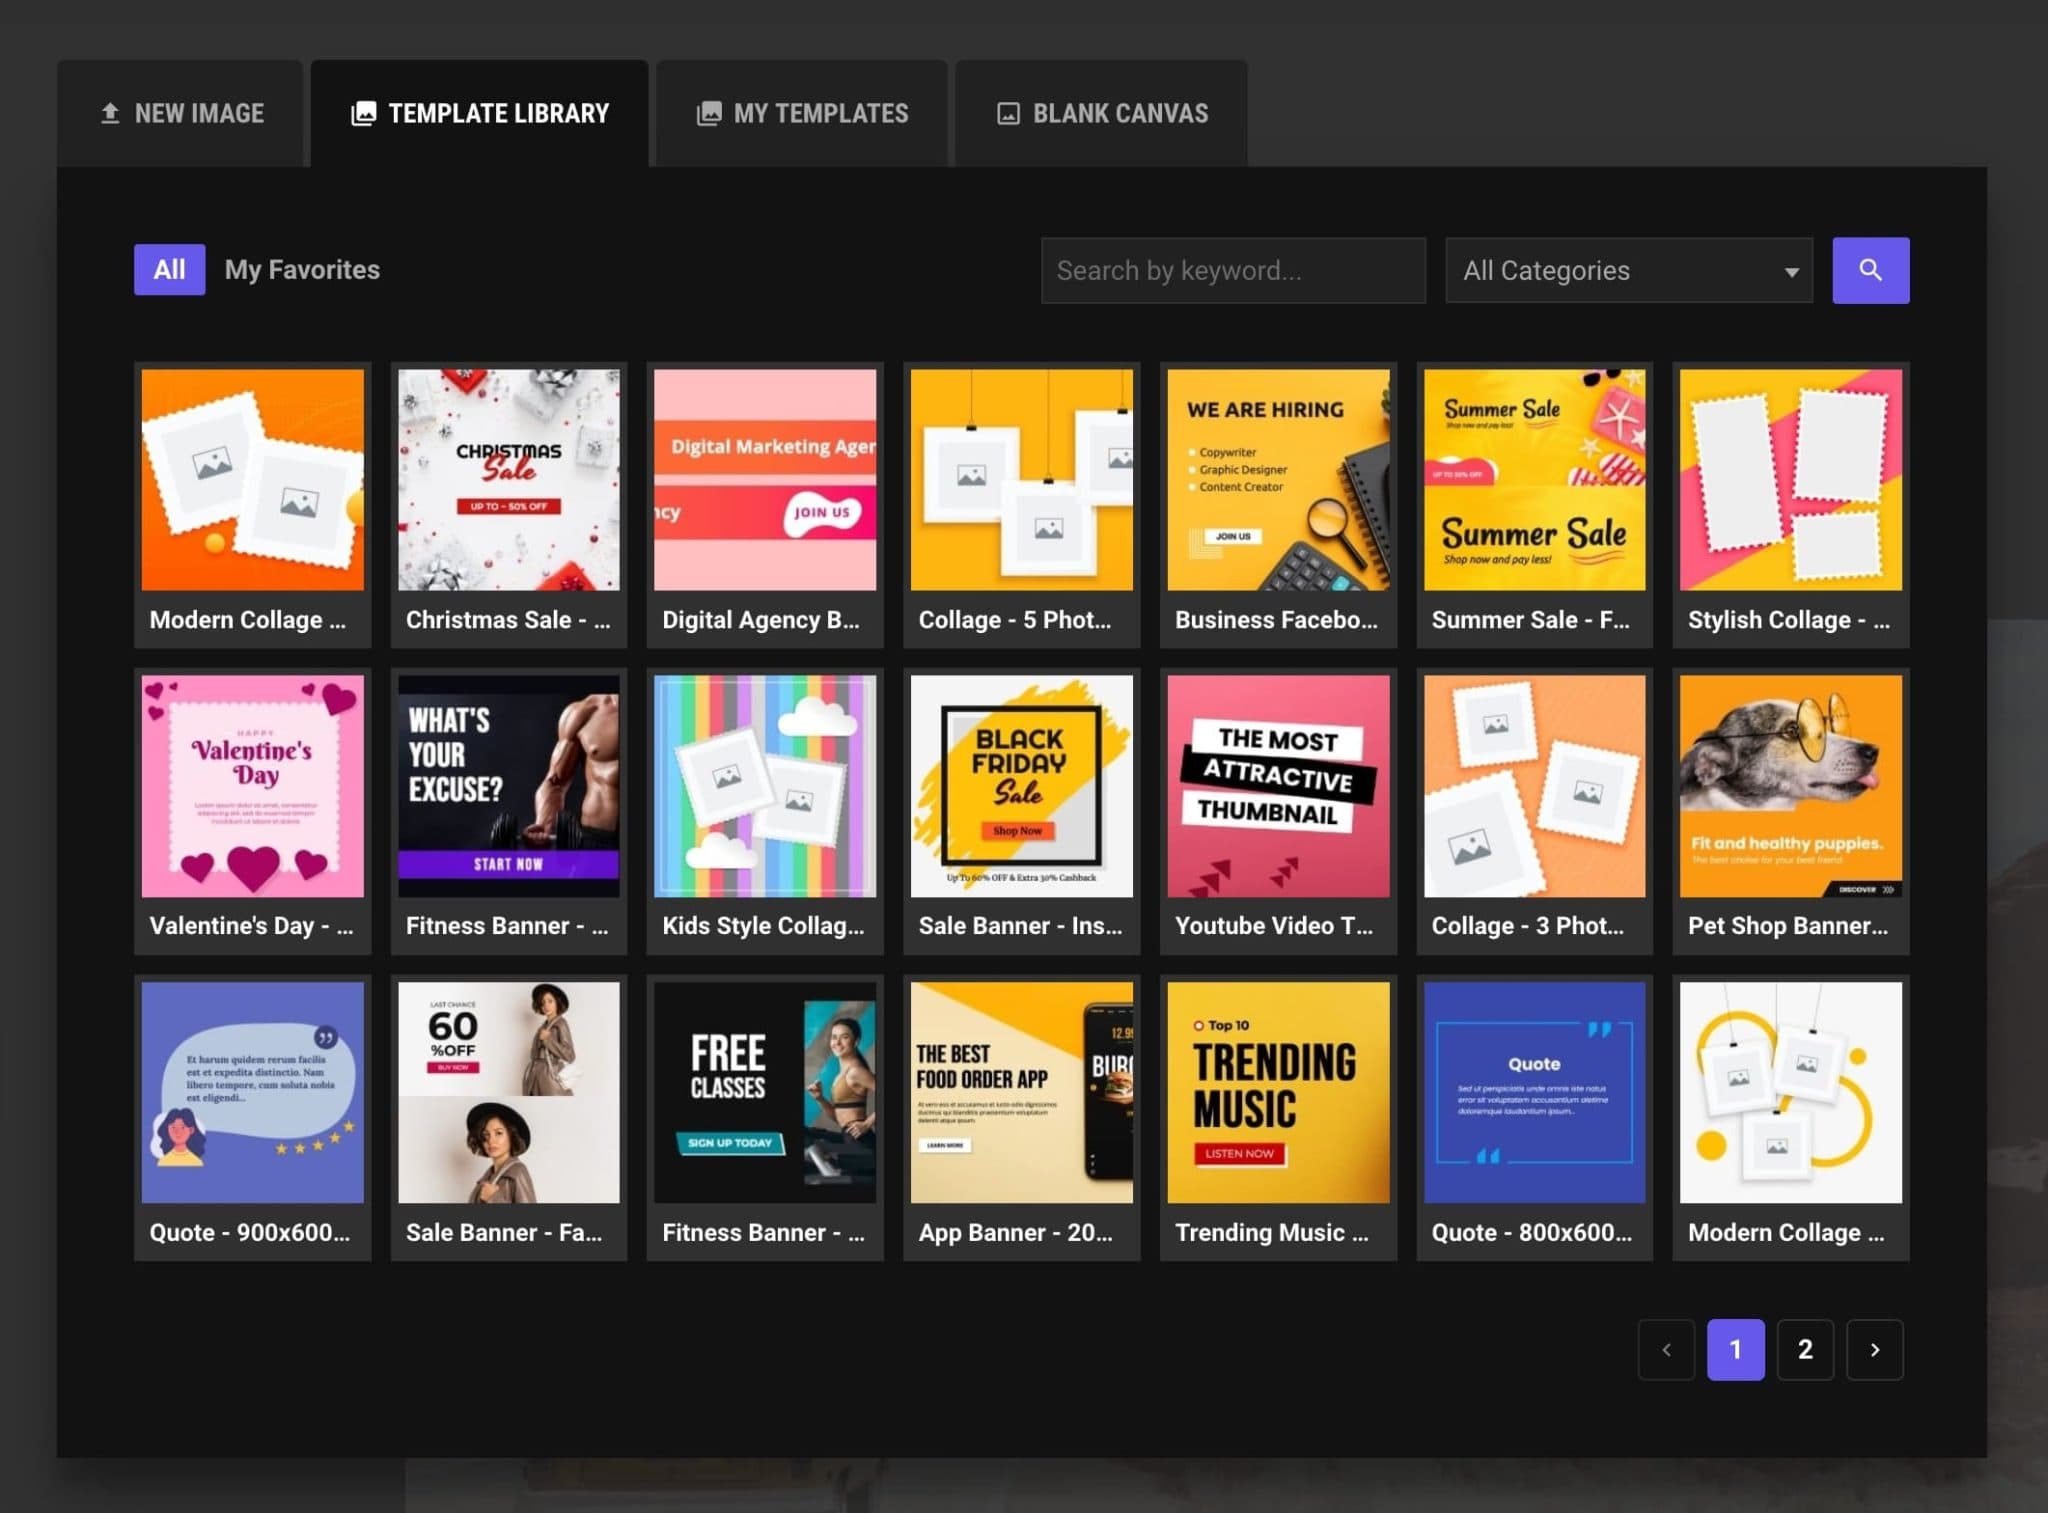
Template Library
Template library tab: You can find our template collection on this tab. Just click on the template to add it to the canvas. Click the star icon on any template, to add it to your favorites.
My templates: You can find the templates which you’ve saved using “save or download” button here.
How To Add Custom Templates to The Library
Site admins and editors can add new templates to the library.
- Create something with the image editor
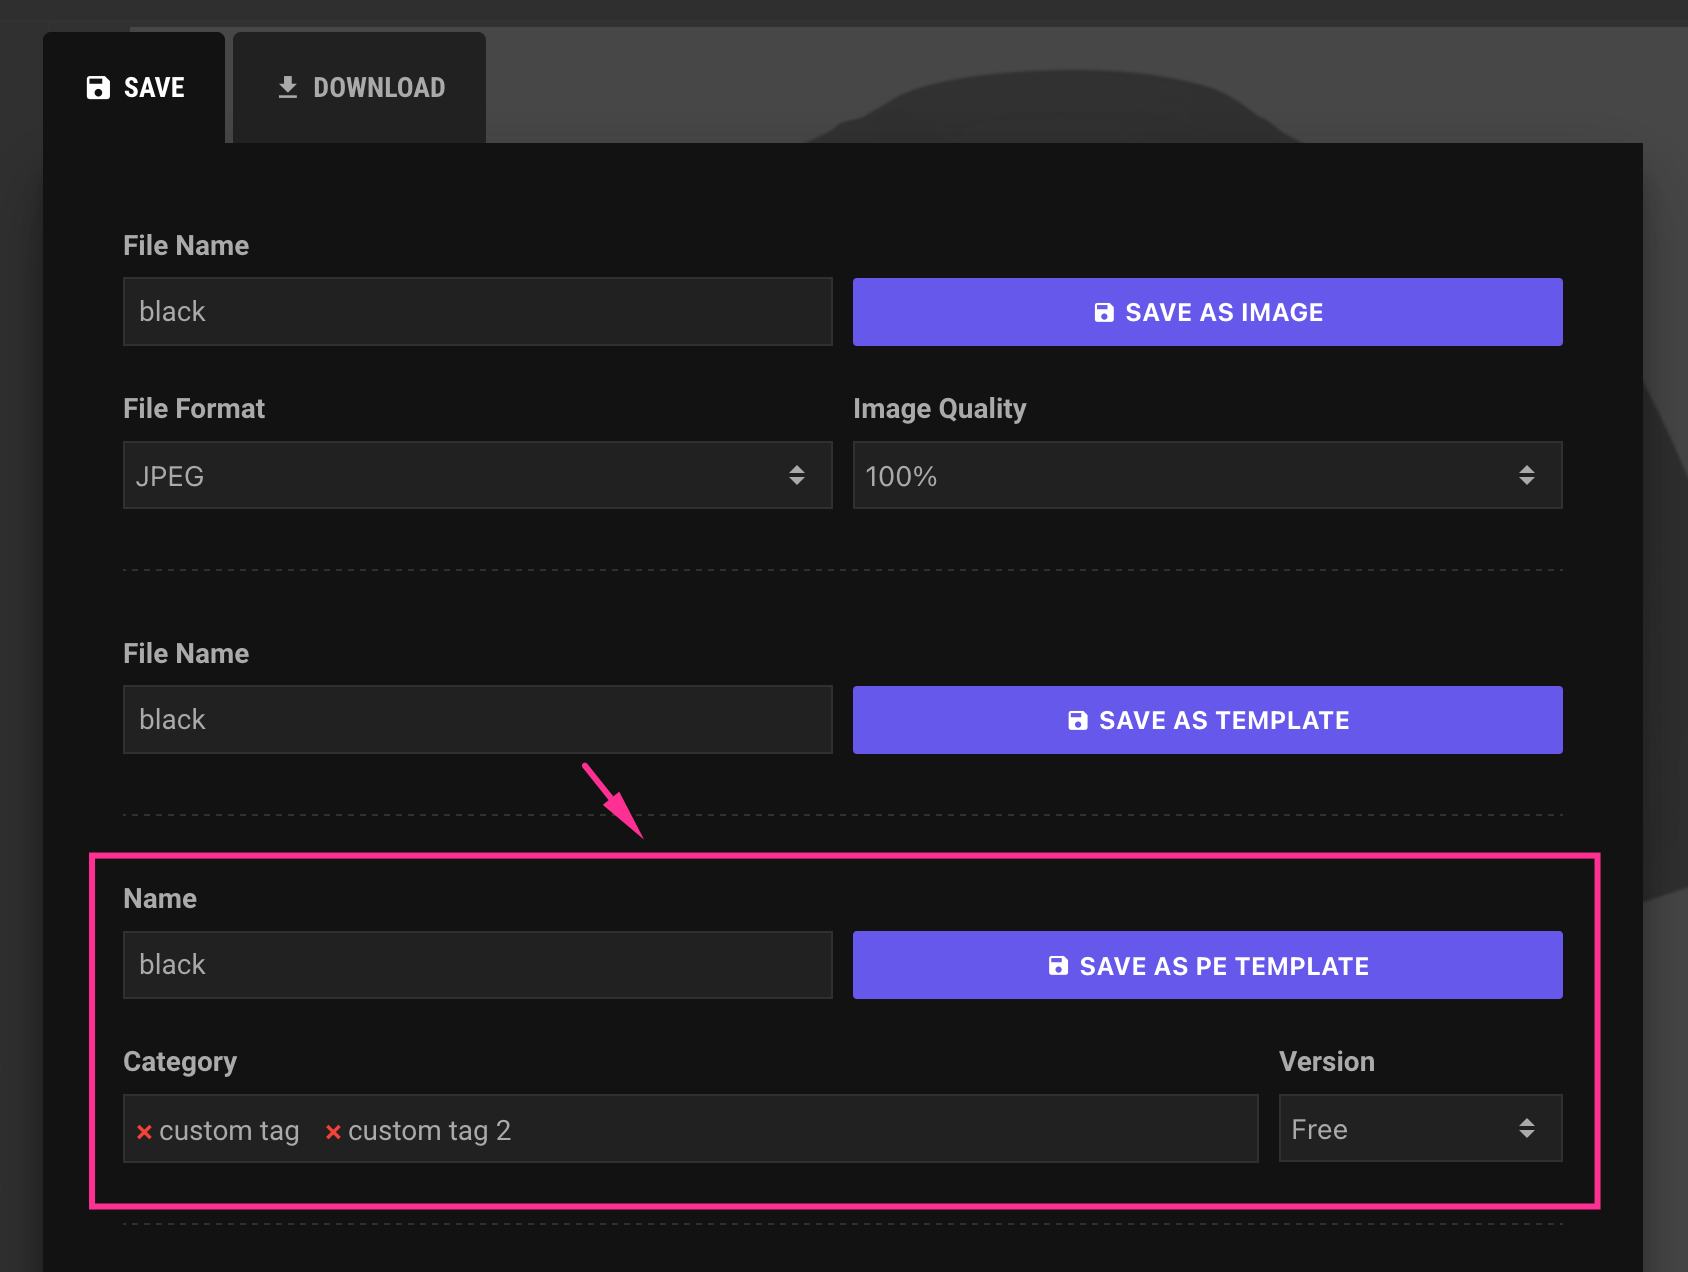
- Click "Save or Download"
- Click "Save as PE Template"
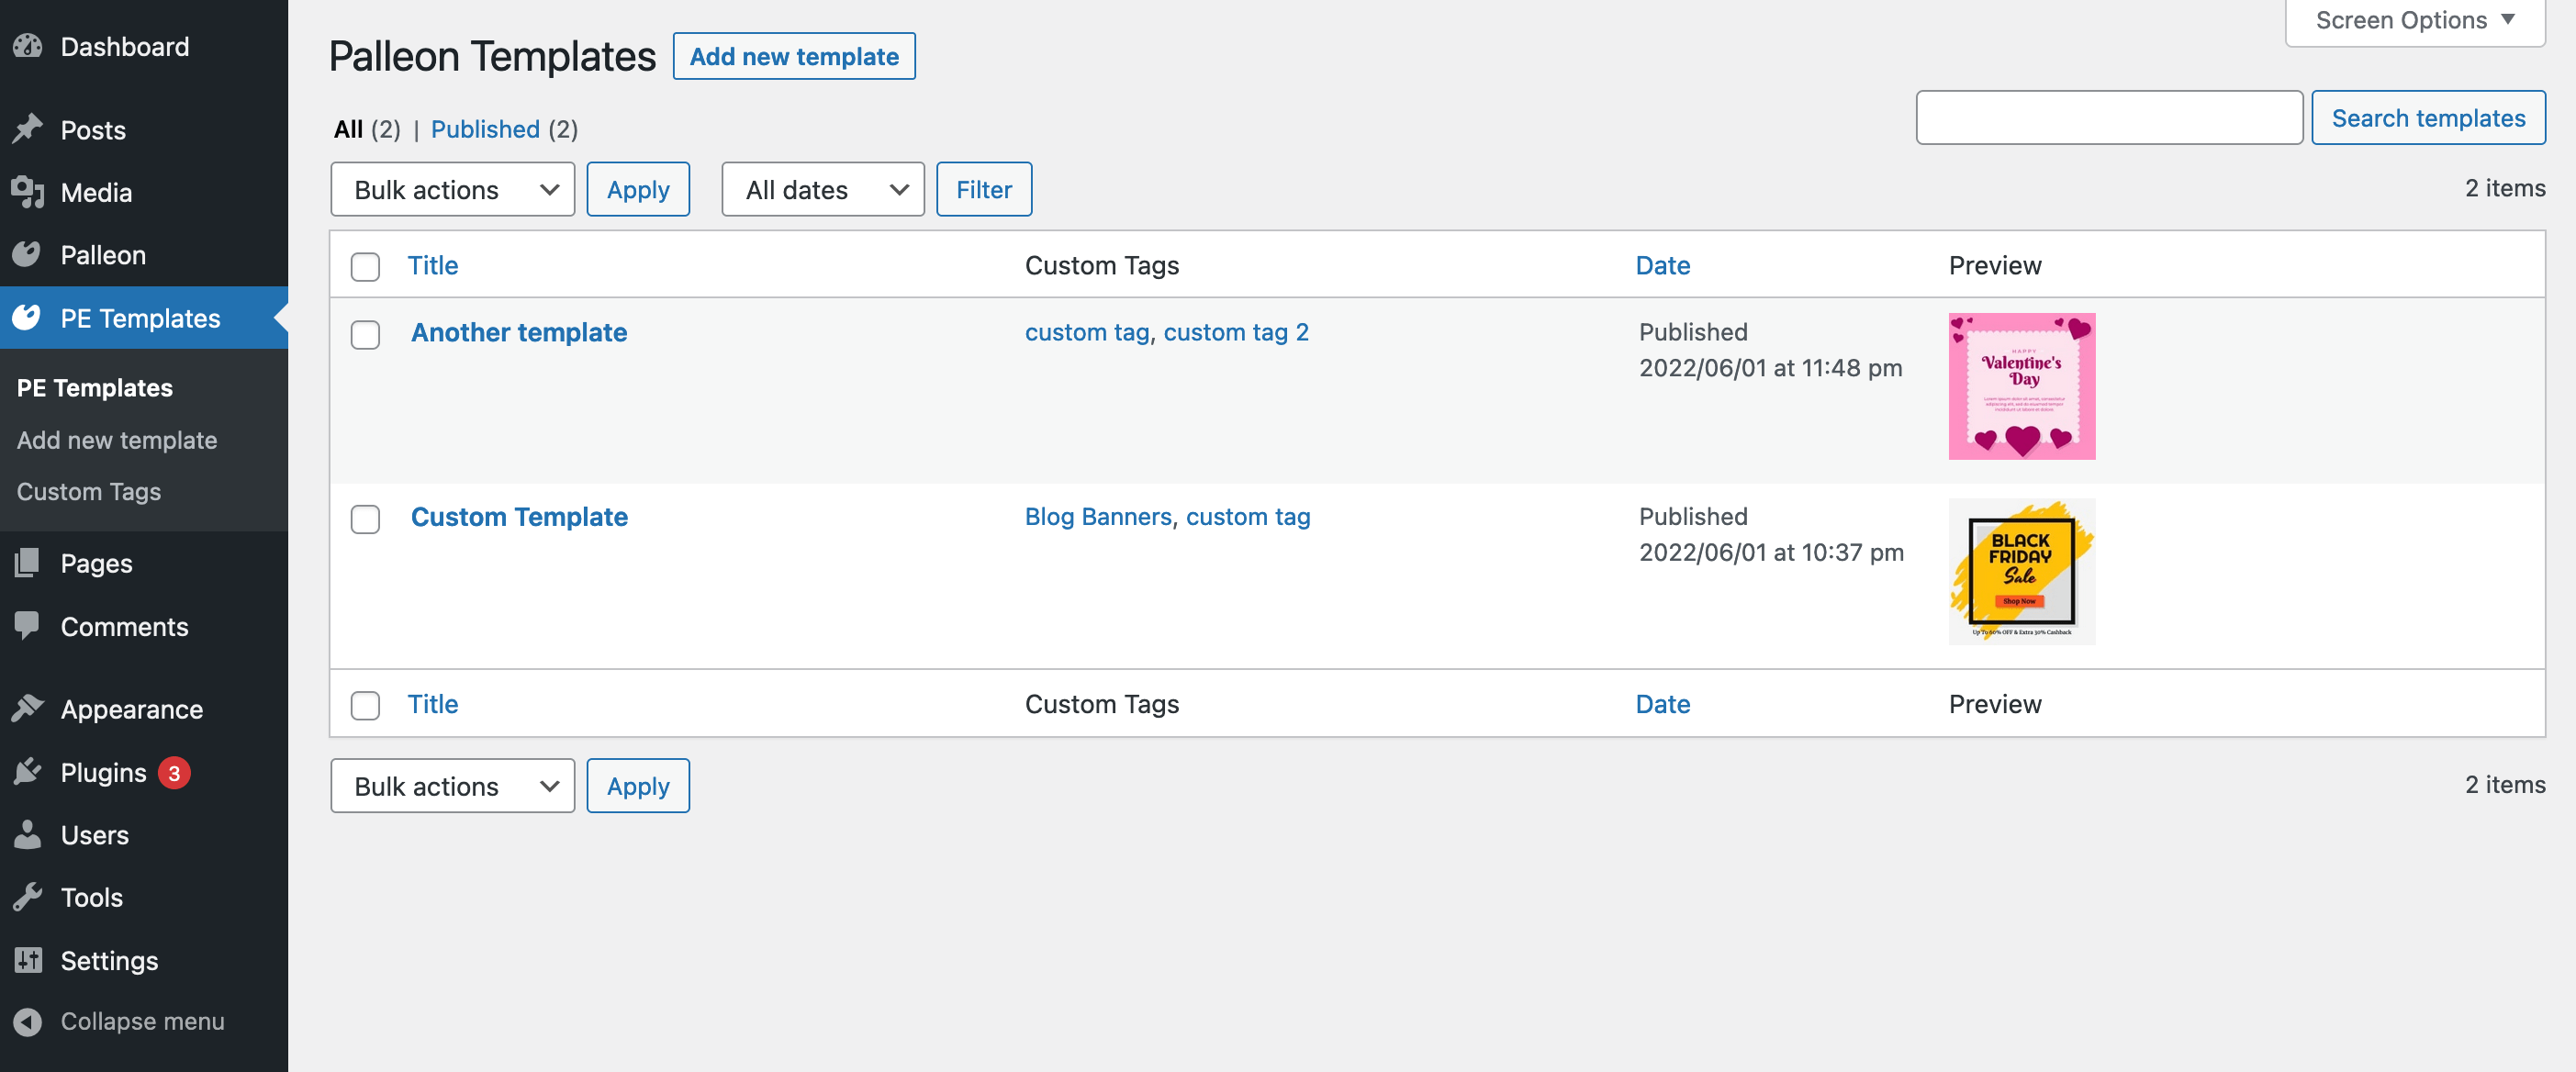
You can also add the templates you've made to the template library from WordPress dashboard.
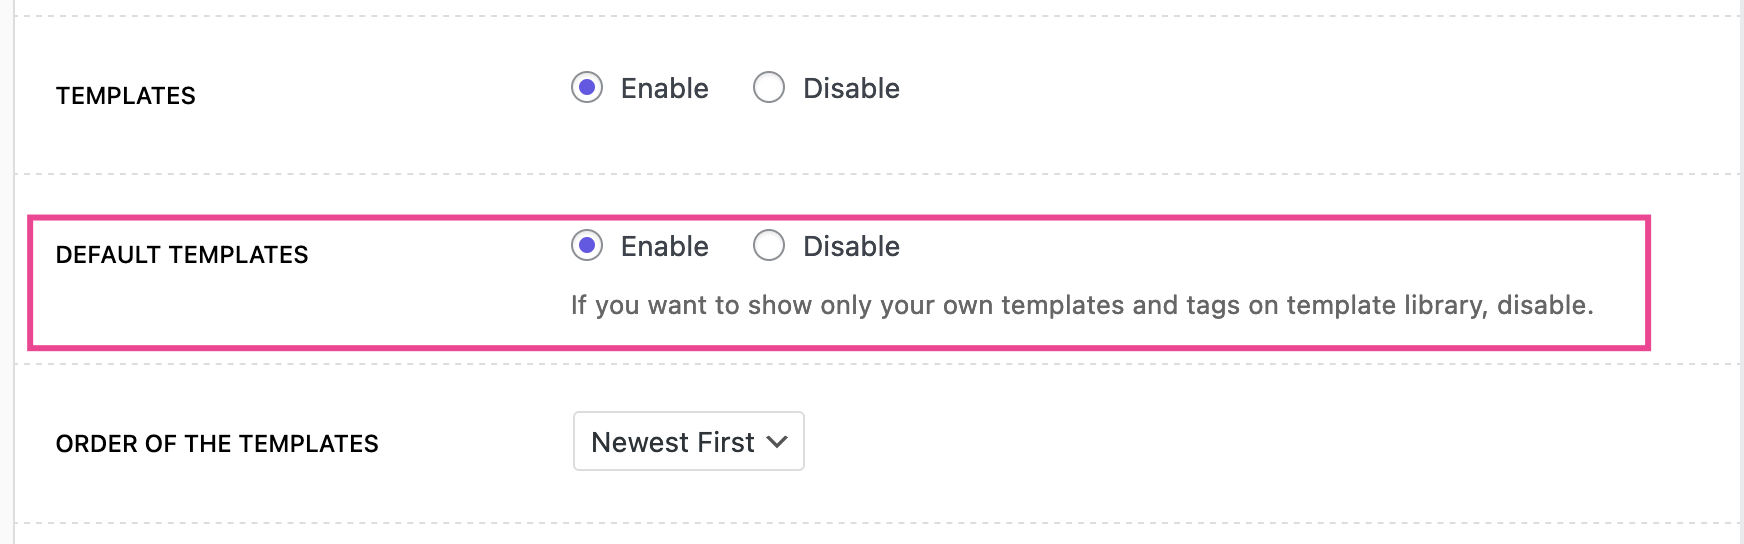
How To Remove Default Templates And Tags
If you want to show only your own templates and tags on the template library, go to Palleon->Settings->Modules and disable "Default Templates".
What is Free/Pro Version?
PRO templates are not accessible on frontend version. If you are using one of the supported membership plugins (see; integration), you can choose which membership levels will be able to access your PRO templates on backend version.
Blank Canvas
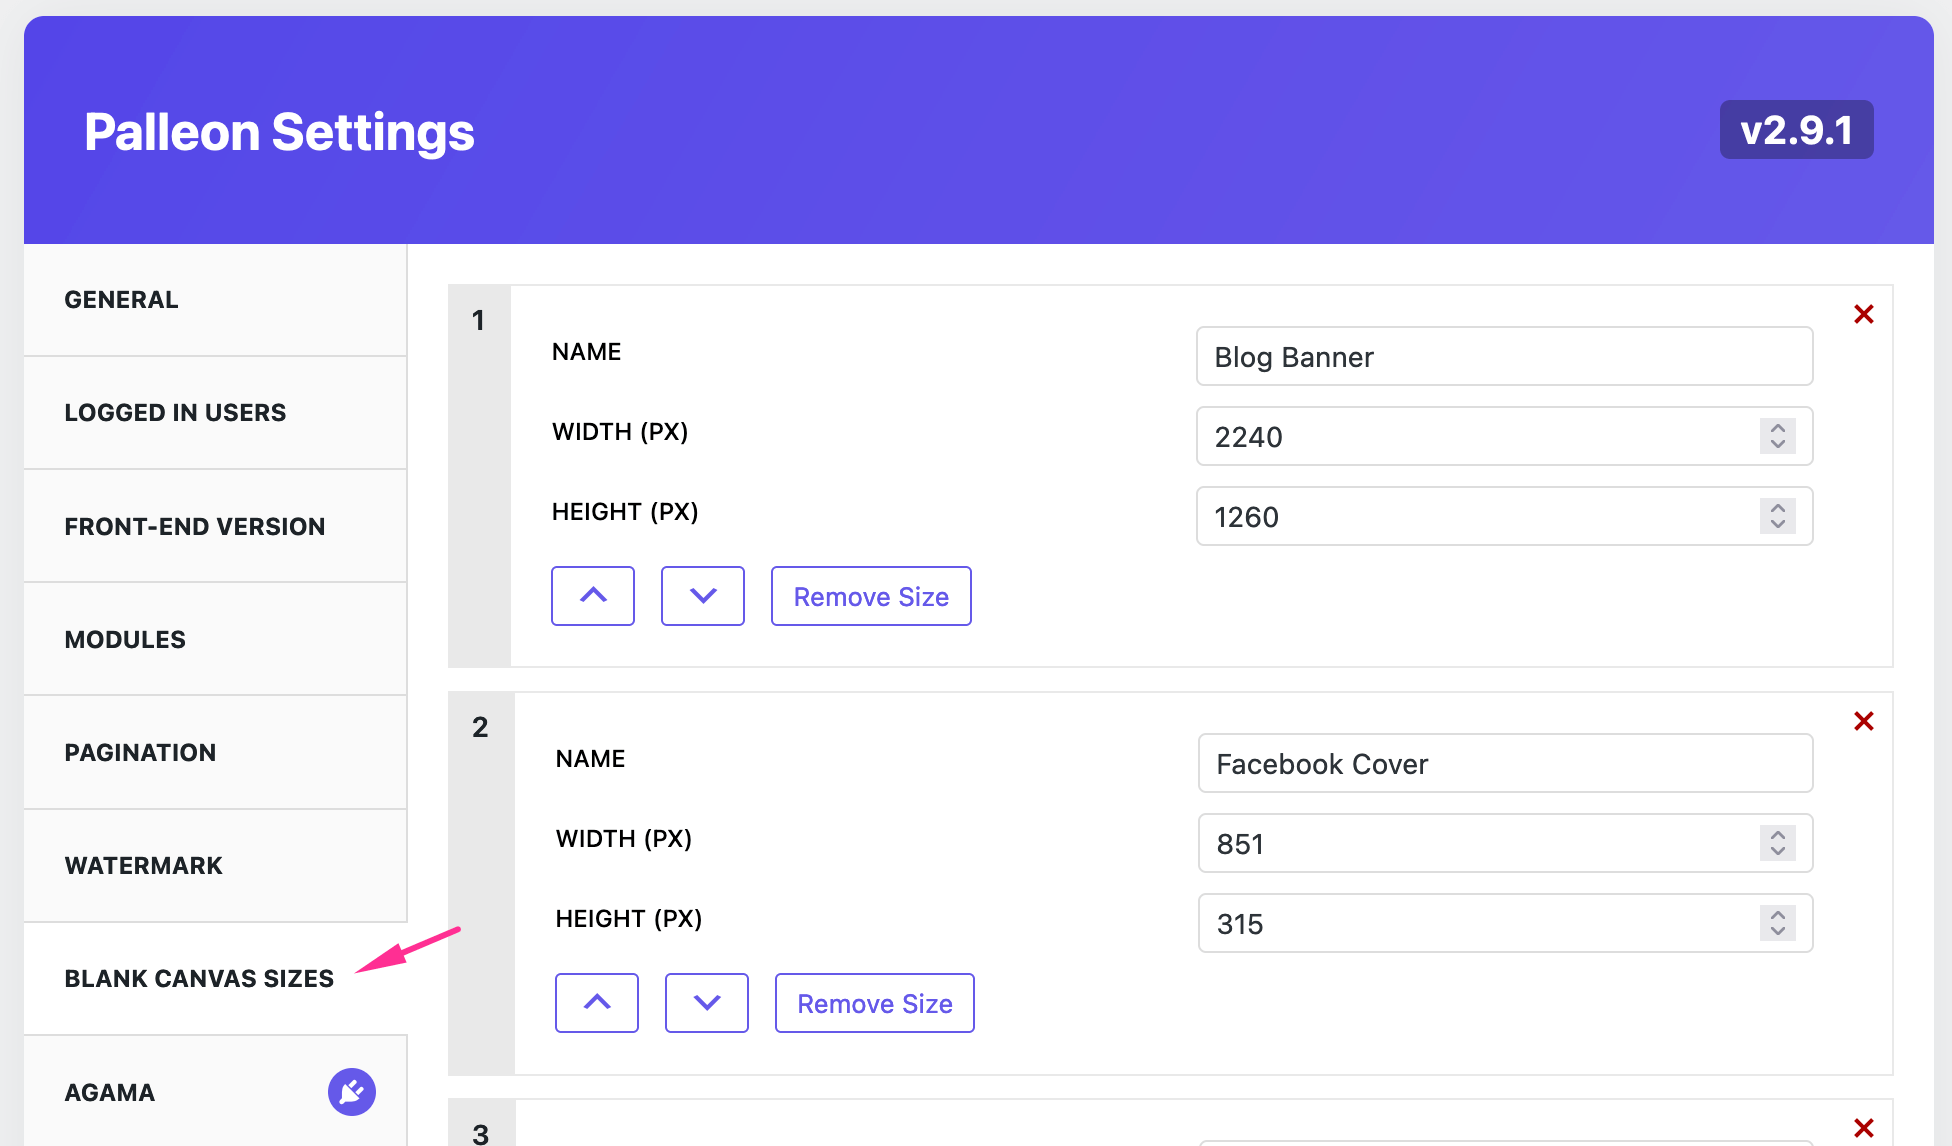
Click “Blank Canvas” tab. Set the dimention, select a background color and click create button.
You can edit pre-defined canvas sizes from settings;
Panning and Zooming
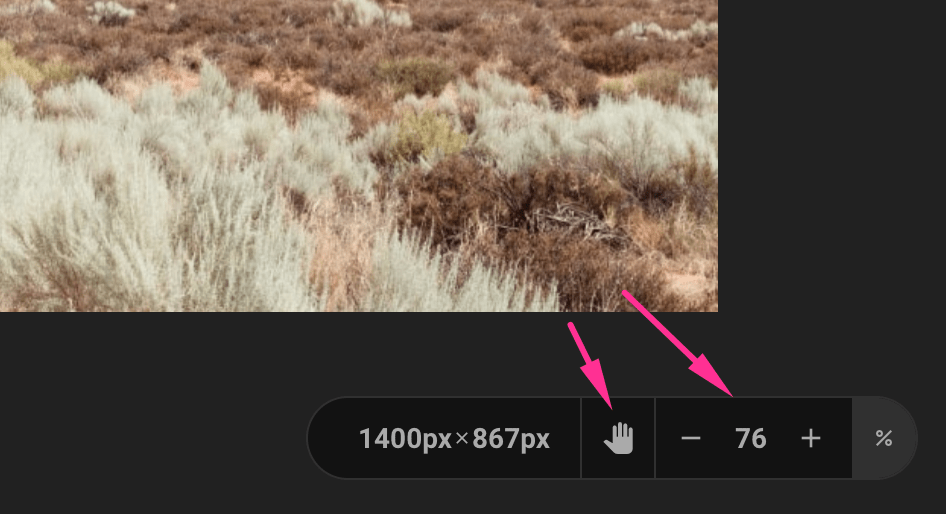
To zoom in/out use the plus/minus icons which is at the bottom right corner of the screen. Please keep in mind that maximum supported zoom in/out levels may change on different browsers and systems.
To pan the image, click “hand” icon and drag&drop the image as you want. When you are done, don’t forget to click “hand” icon again to make the layers selectable again.
Modules
Layers
All objects you’ve added to the canvas, will displayed on this panel.
To view the layer settings click gear icon;
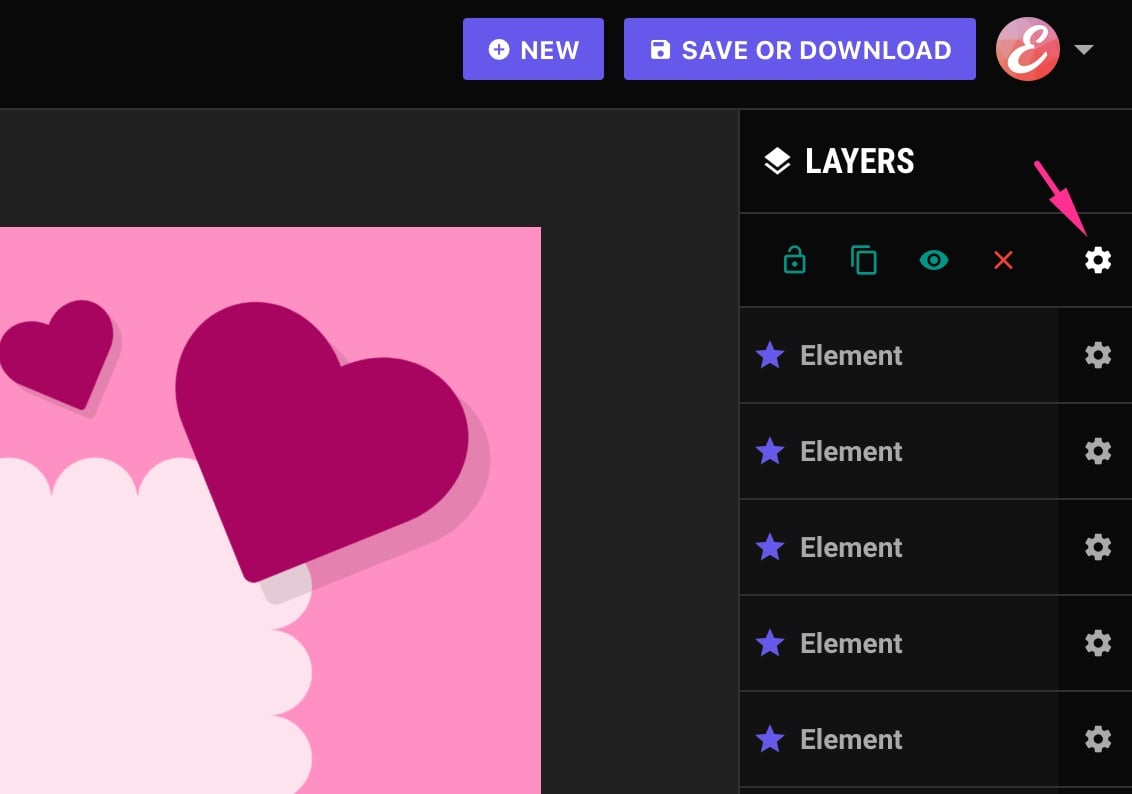
Lock/Unlock: A locked object can not moved or selected on click.
Dublicate: Click this icon to clone the object.
Show/Hide: You can use this button to toggle visibility.
Delete: Click this icon to delete the layer.
You can drag&drop to change the order of the layers;
For bulk deleting, you can use the dropdown menu at the bottom of the panel.
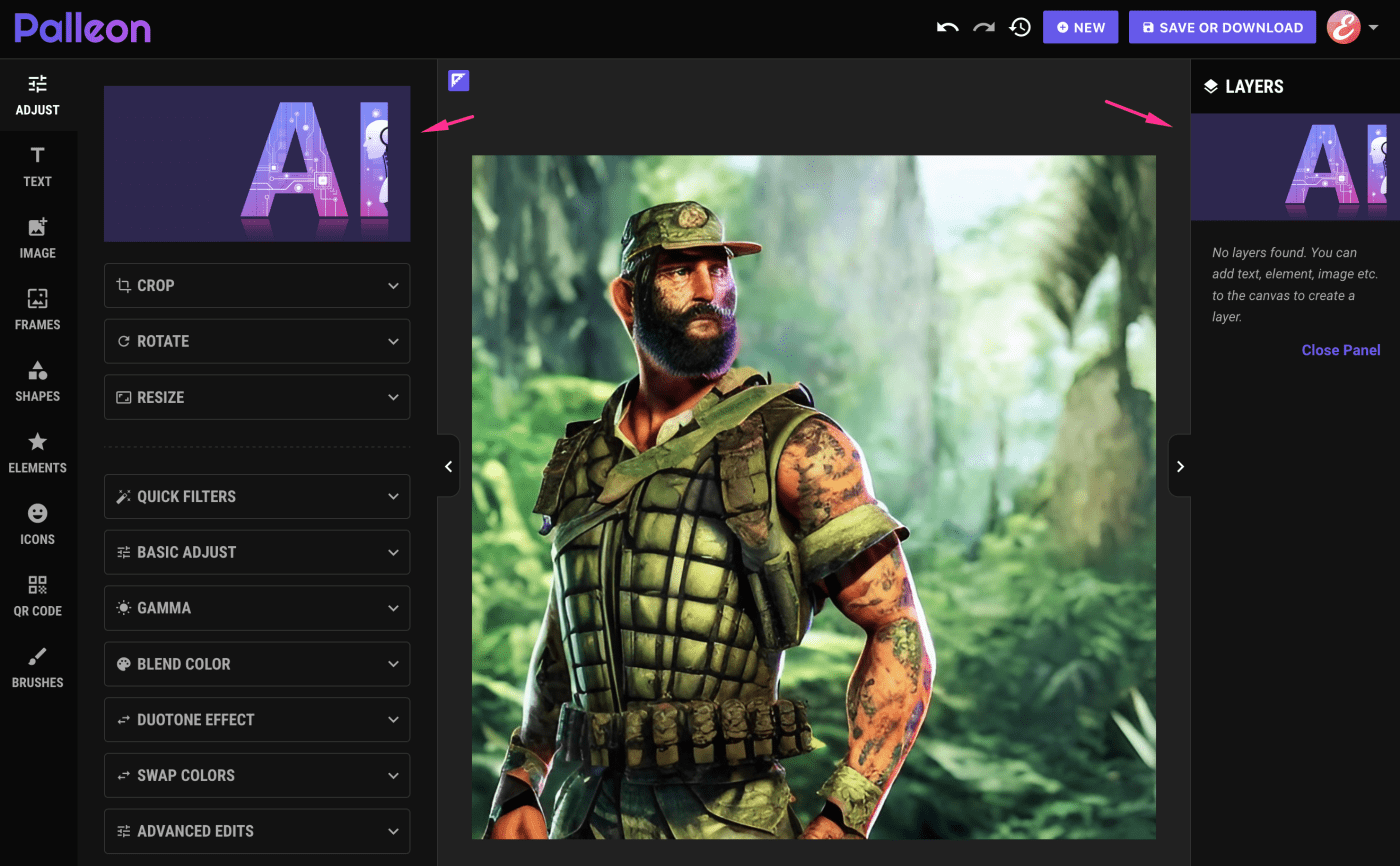
Adjust
There are 2 section on this panel;
1) You can crop, resize or rotate your images easily from this section;
2) This section contains all image manipulation settings. You can use ready to use image filters from Quick Filters tab or you can combine other filter settings such as gamma, contrast,saturation etc. to create an unique filter on your image;
Note: This section is available only if you are editing an image. If you are working on a blank canvas, the section will not be available since there is no background image.
Photo Frames
You can find beautiful photo frames for your images on our frames gallery. Just click on a frame to add it to the canvas.
All: All frames are on this tab.
My favorites: Click the star icon on any frame, and you will see it here next time you visit.
Settings: You can rotate or flip the frame to get the best result according to your image ratio. Currently, the color setting is working on only Grunge frames.
How To Add Custom Frames to The Library
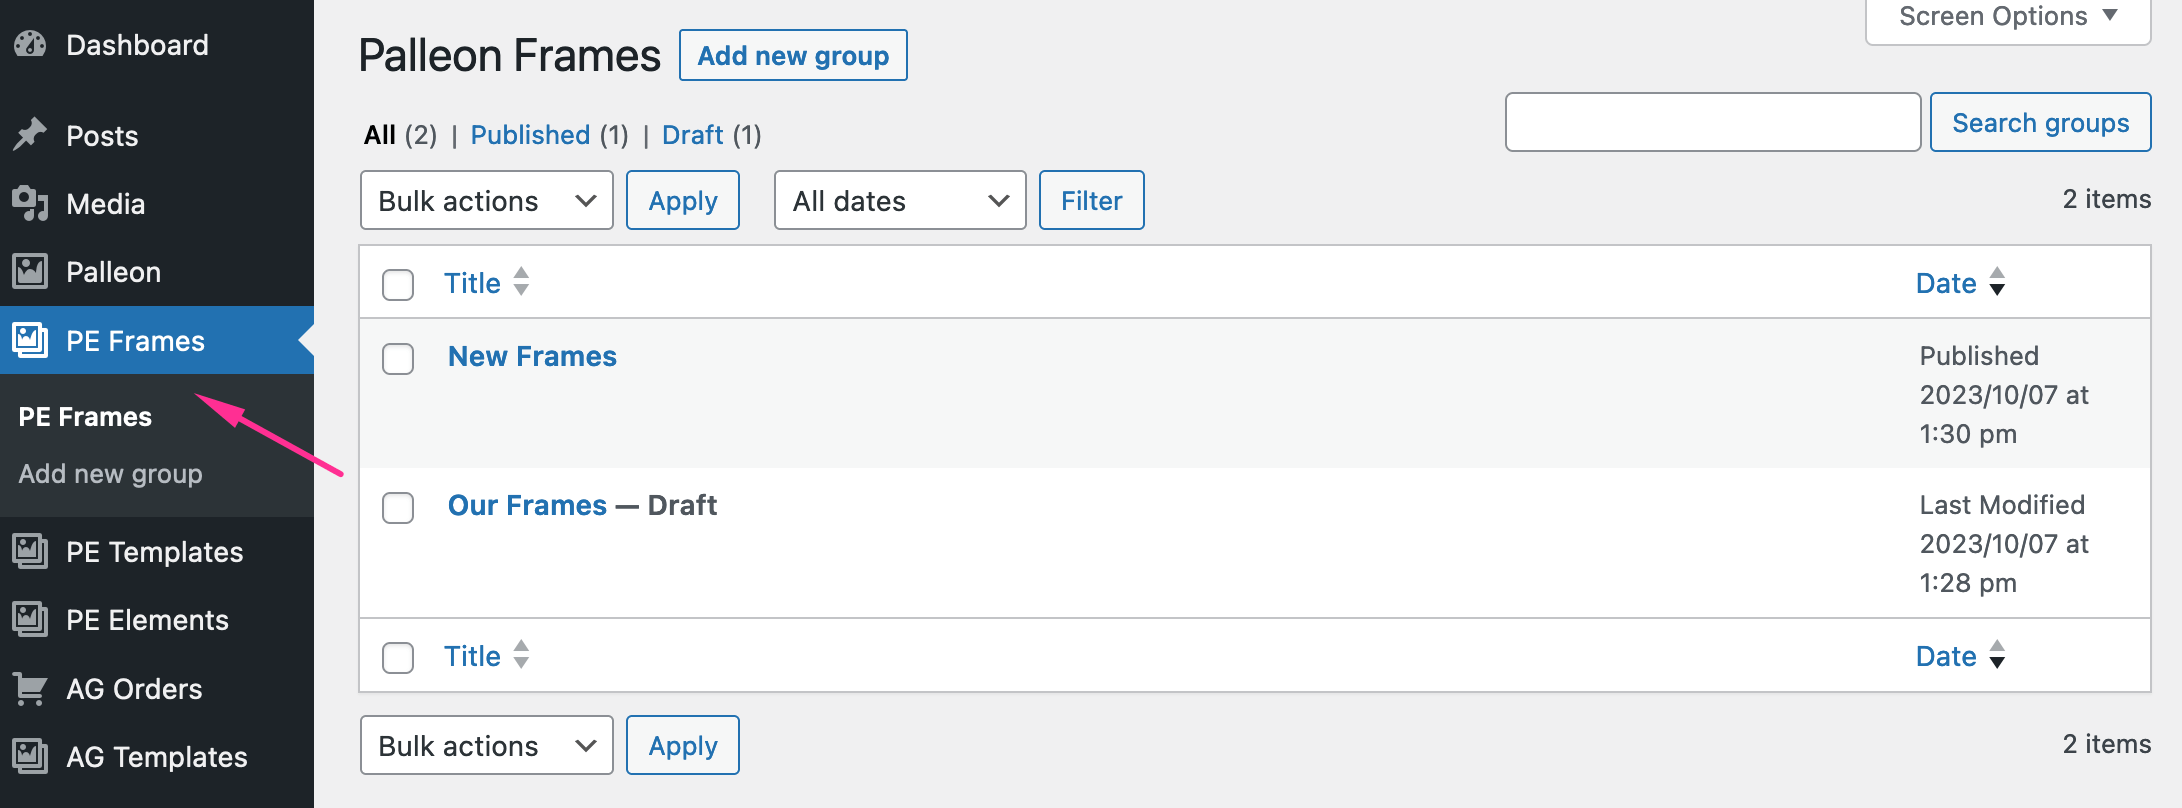
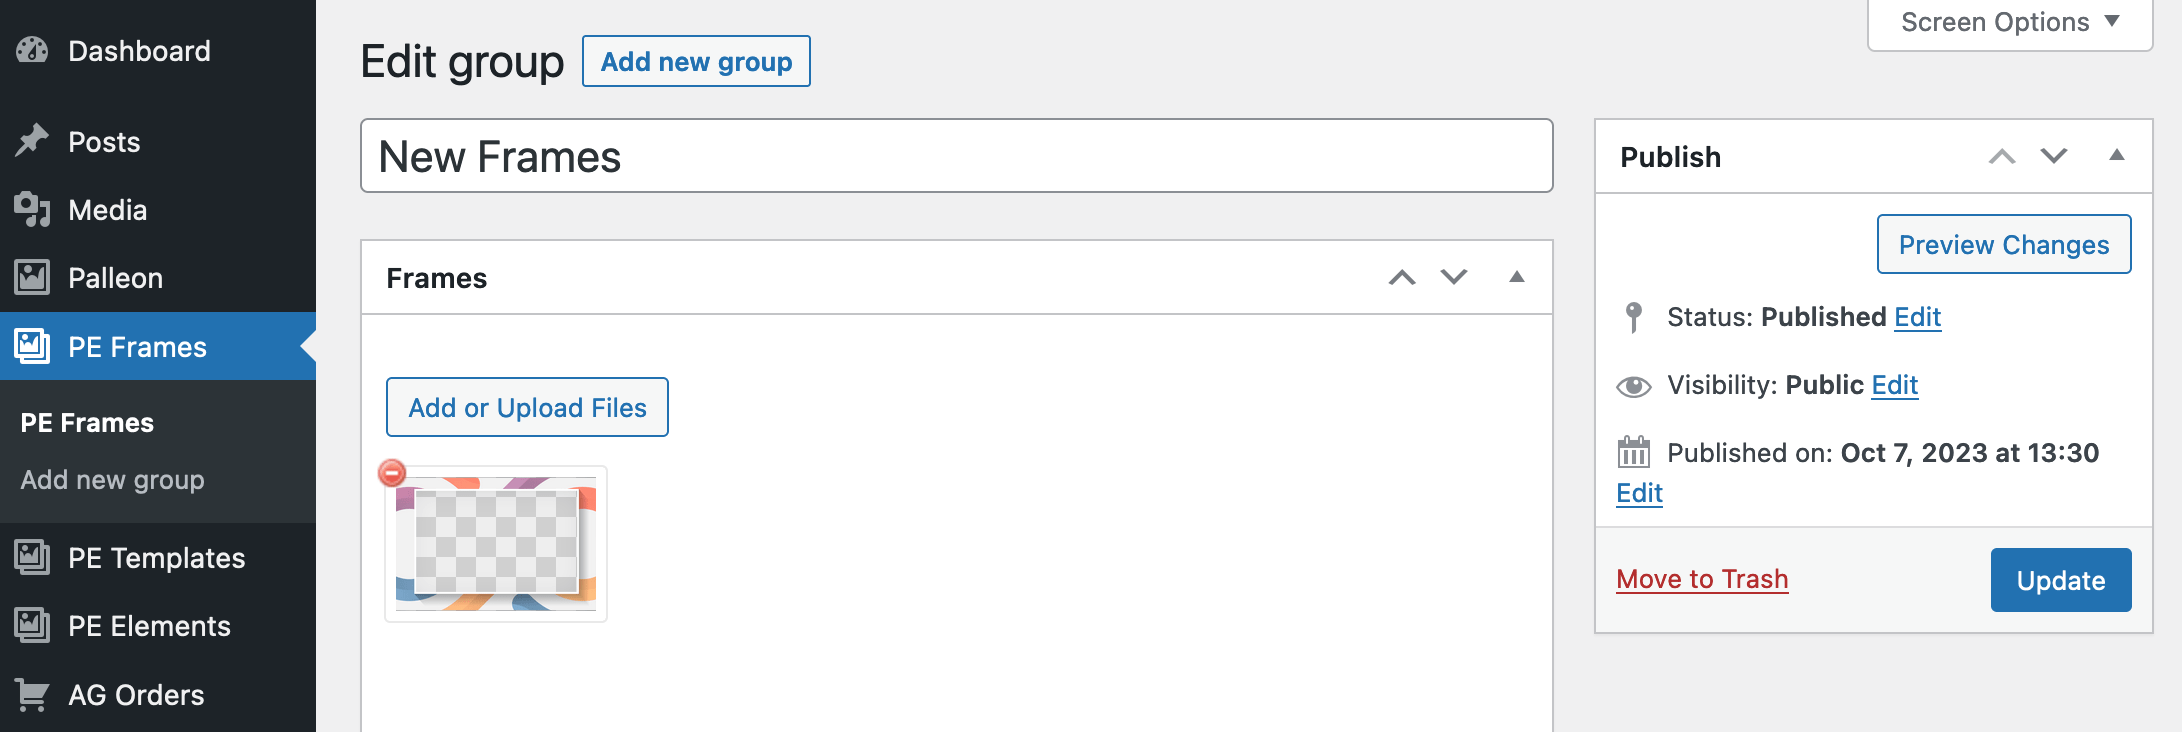
You can add your own frames from "PE Frames" menu on the dashboard. Each post is a new frame group. Frames must be SVG files with borders around a transparent area.
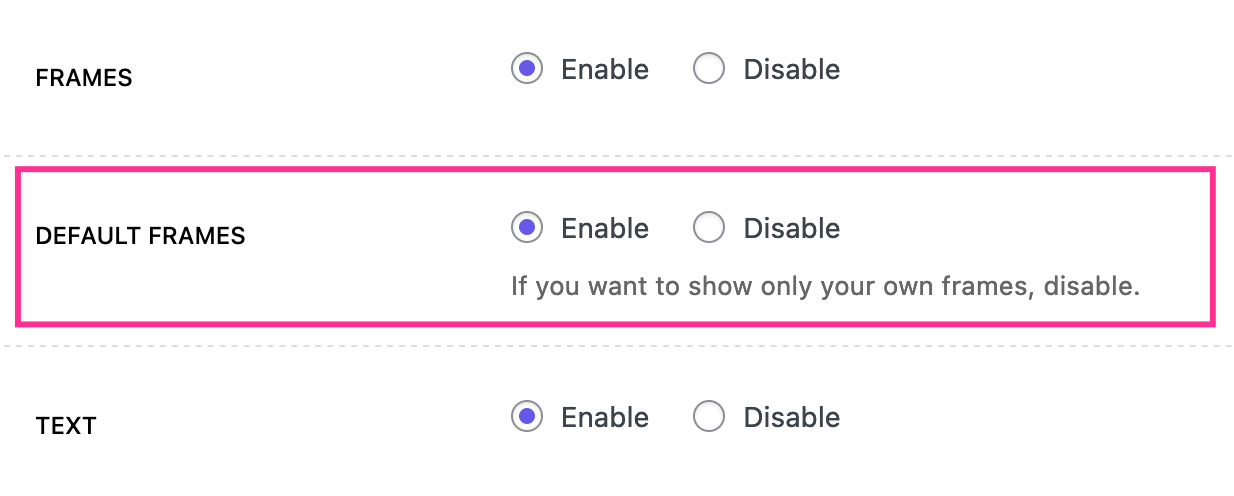
How To Remove Default Frames
If you want to show only your own frames, go to Palleon->Settings->Modules and disable "Default Frames".
Text
Palleon allows you to add as many text as you want to the canvas. You can customize the text as you wish using the rich set of customization settings such as color, font size, font family etc.
Image
You can add as many image as you want to the canvas. You can upload the image from your computer or select one of the images on the WordPress media library. When you add the image, the customization settings will appear.
Shapes
Shapes are useful elements that may help you to create contrast background for your texts or to create decorative patterns. The customization settings will appear when you add or select a shape.
Elements
Element library comes with carefully selected single color SVG graphics which are integrated with Palleon. You can use elements to create attractive banners, social media posts, video thumbnails etc.
All: All elements you can use are on this tab.
My favorites: Click the star icon on any element, and you will see it here next time you visit.
Settings: An element must be selected to view the customization settings.
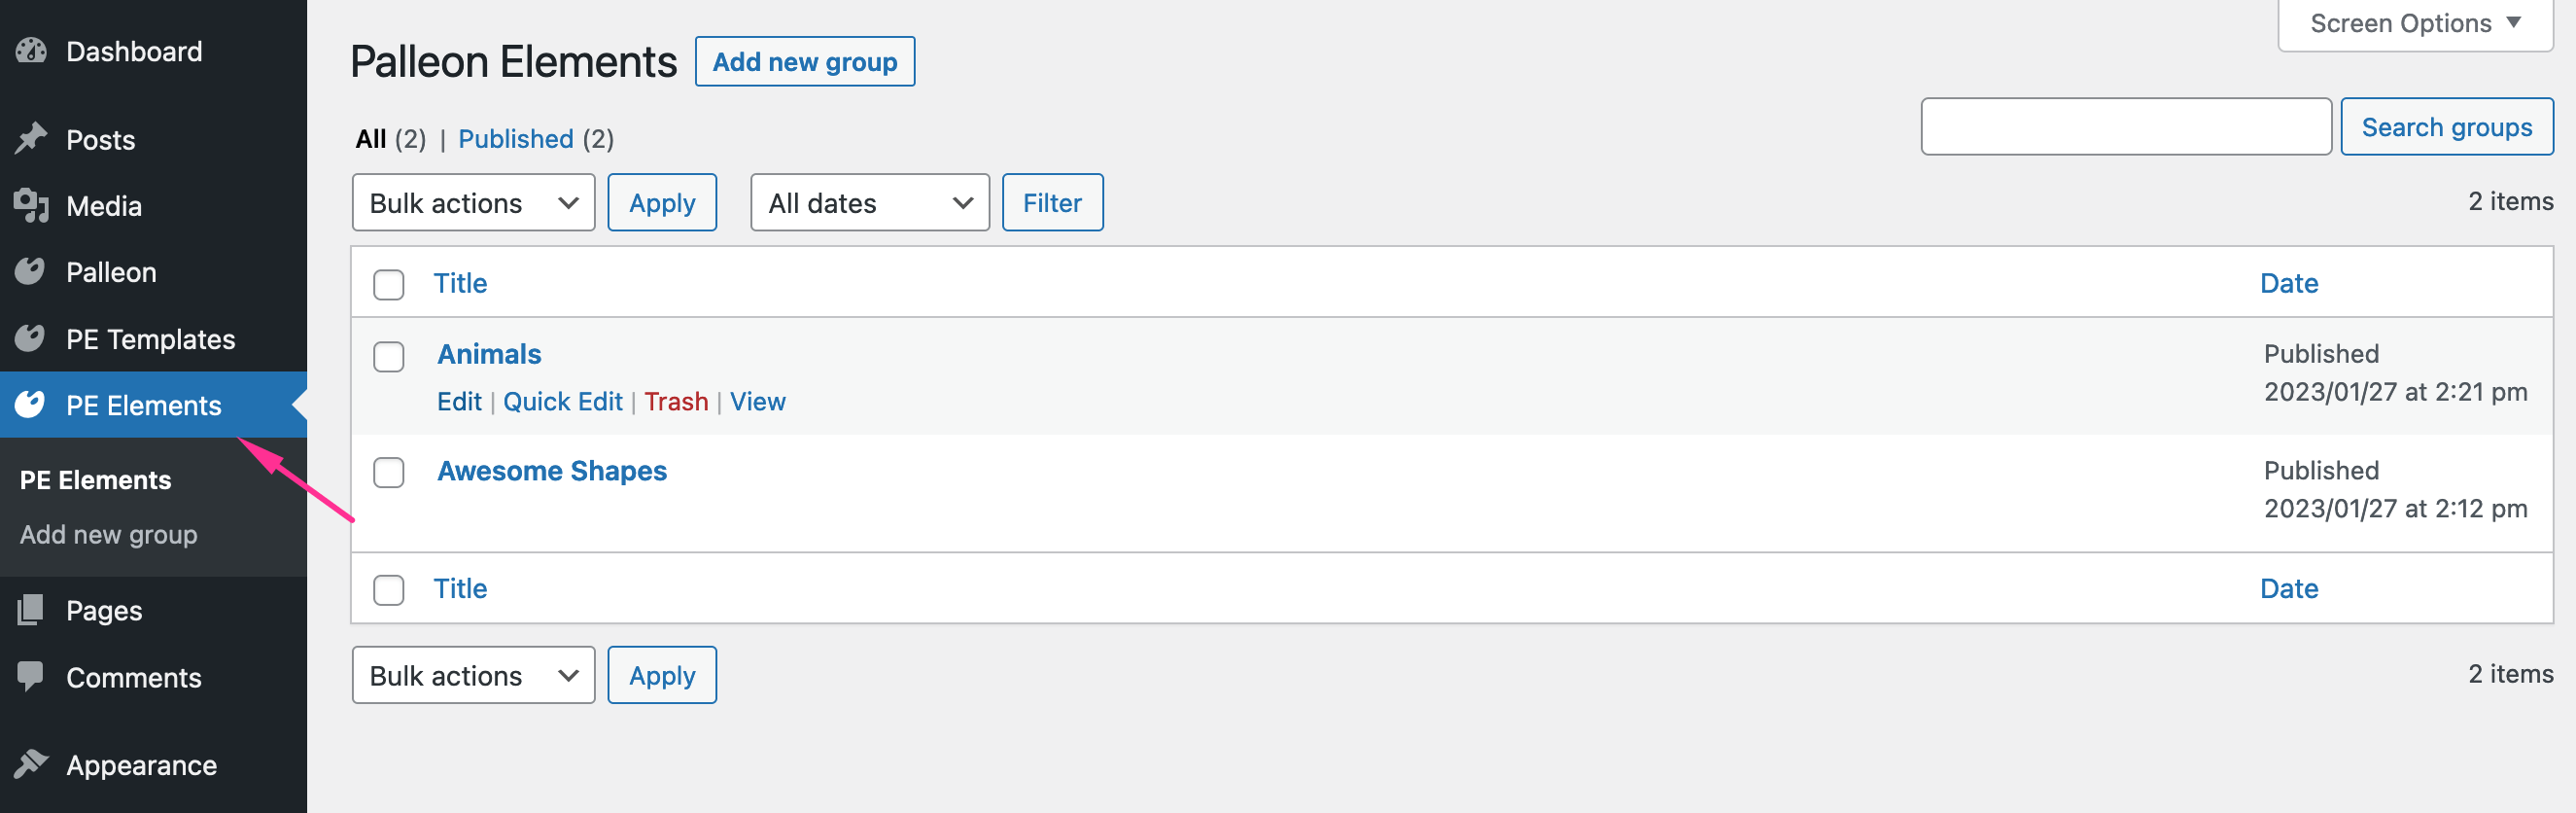
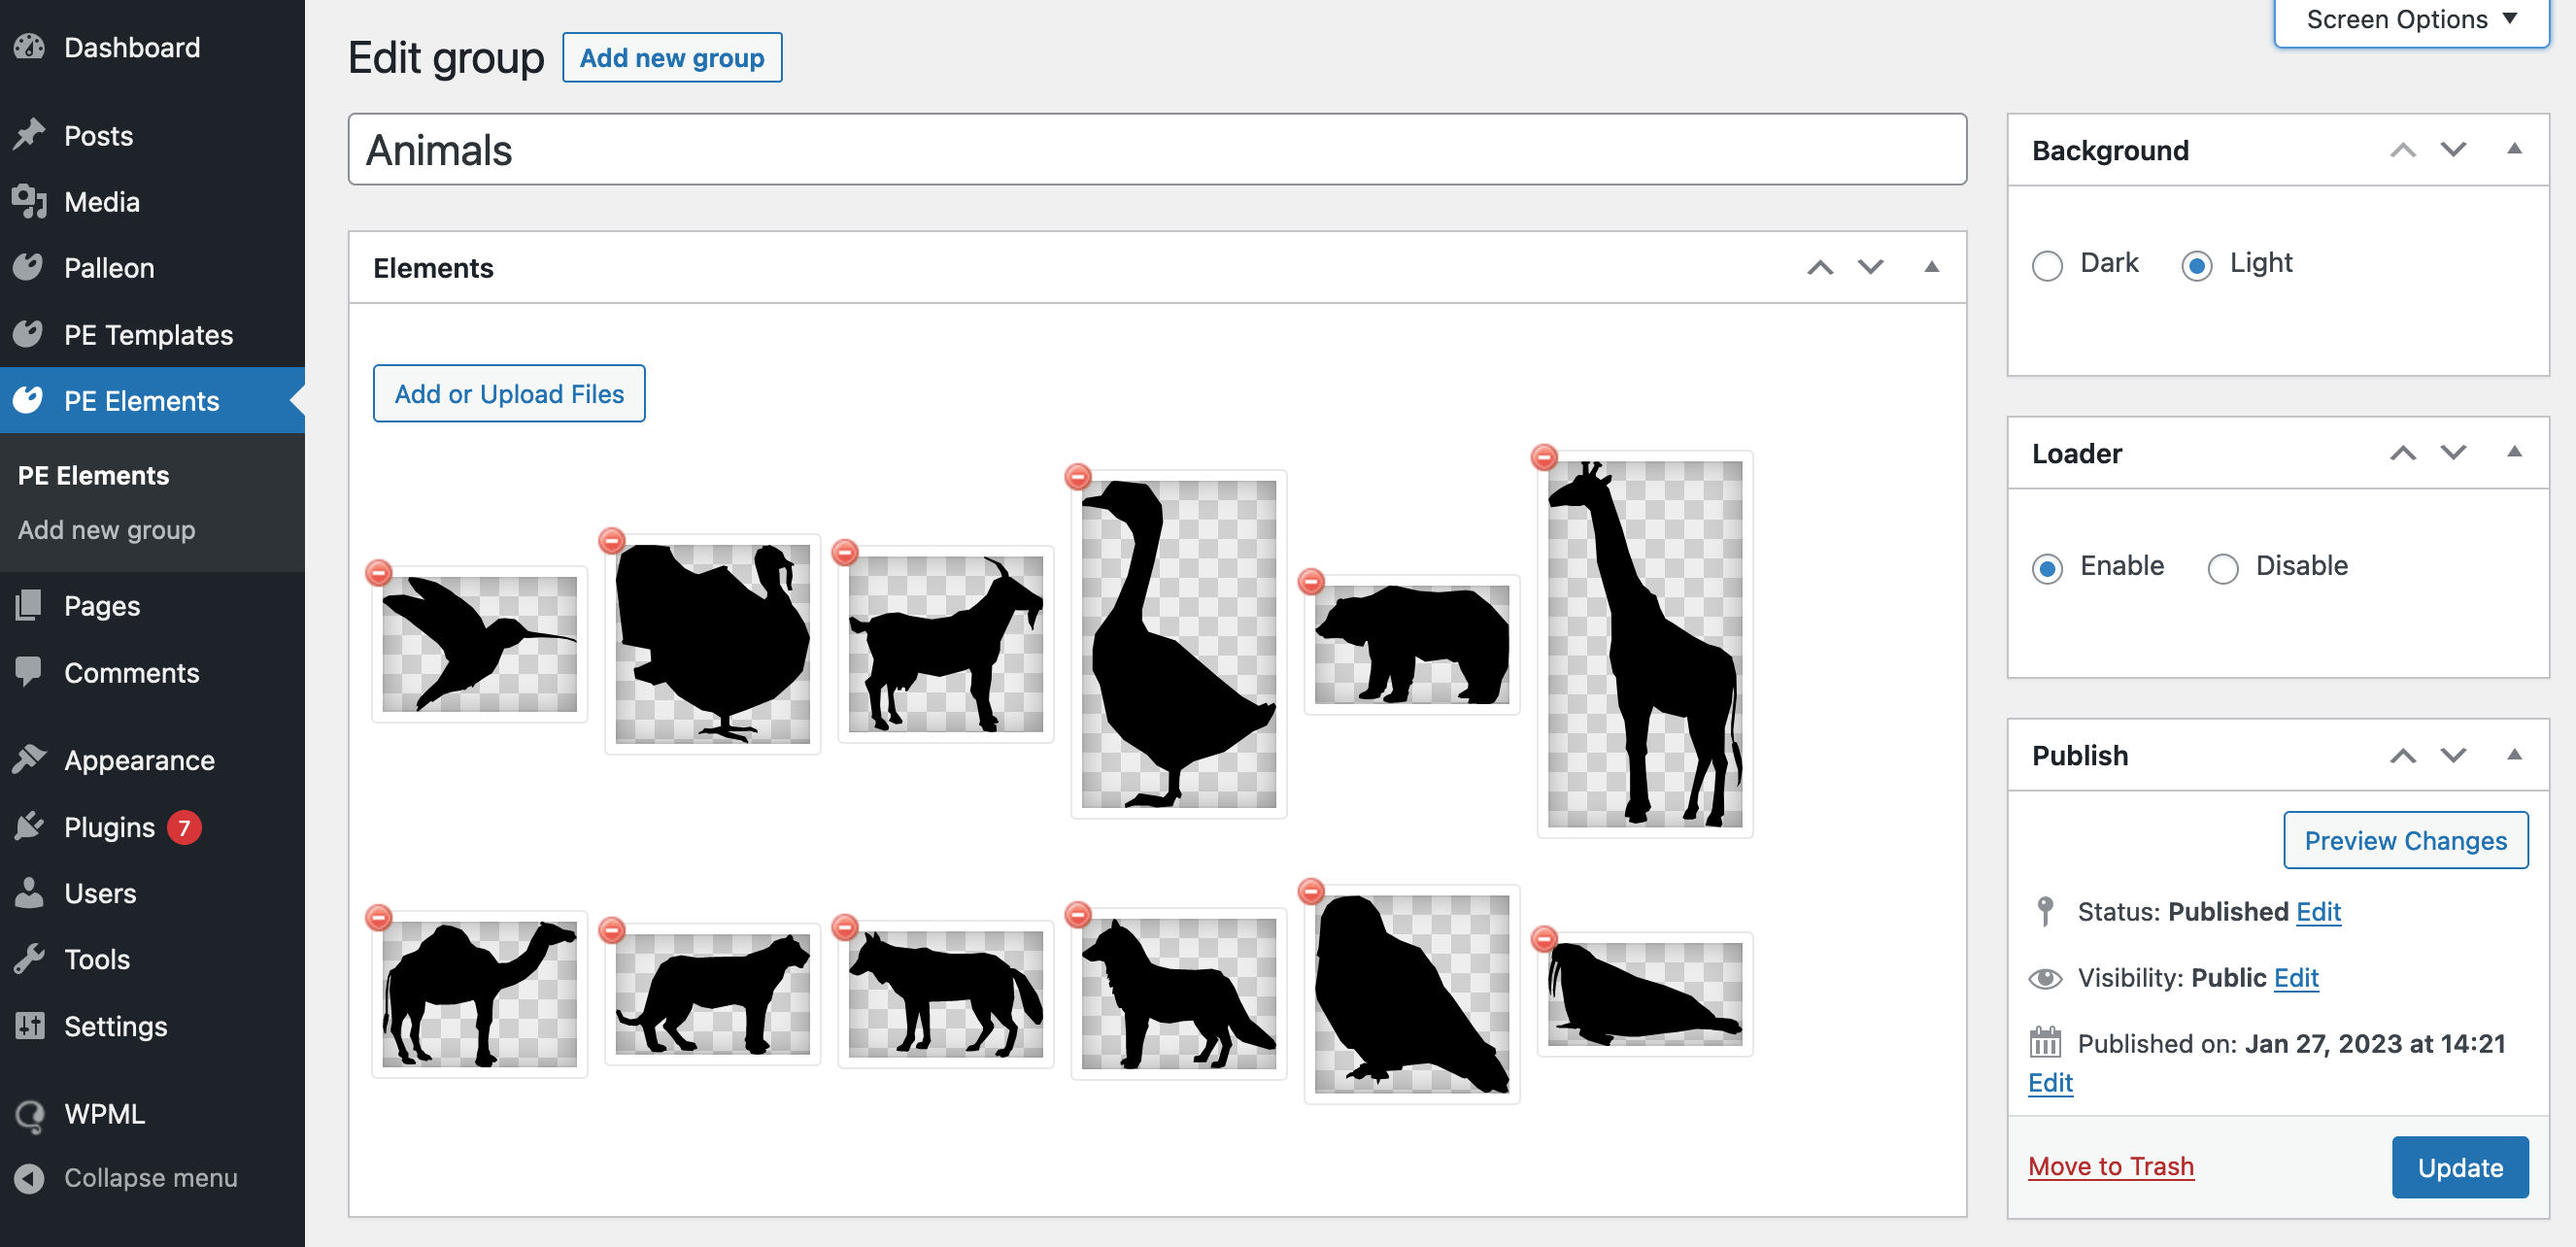
How To Add Custom Elements to The Library
You can add your own elements from "PE Elements" menu on the dashboard. Each post is a new element group.
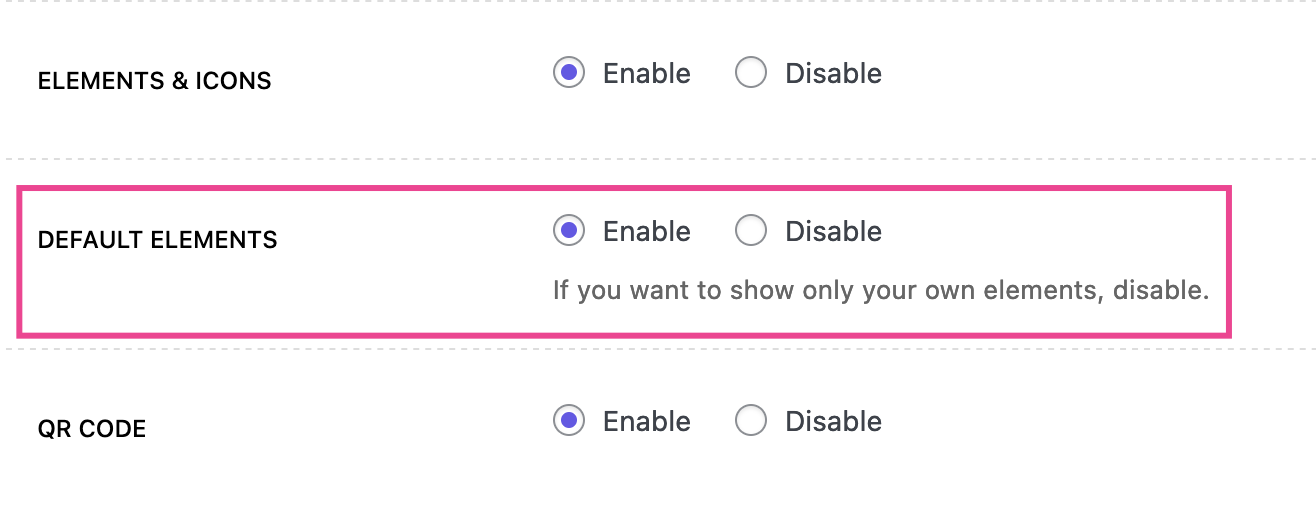
How To Remove Default Elements
If you want to show only your own elements, go to Palleon->Settings->Modules and disable "Default Elements".
Brushes
You can use all brushes except eraser, to paint the canvas freely. You can use eraser brush to delete the selected portions of the background image.
Icons
Palleon comes with hundreds of multipurpose icons ready to use. You can also upload your custom SVG files to the canvas. Please keep in mind that SVG files are made by different designers using different softwares. So, some custom SVG files may not displayed properly on the canvas.
APPS
Palleon comes with useful apps such as QR code generator, barcode generator, triangle art, multiavatar, cryptocurrency and country flags.
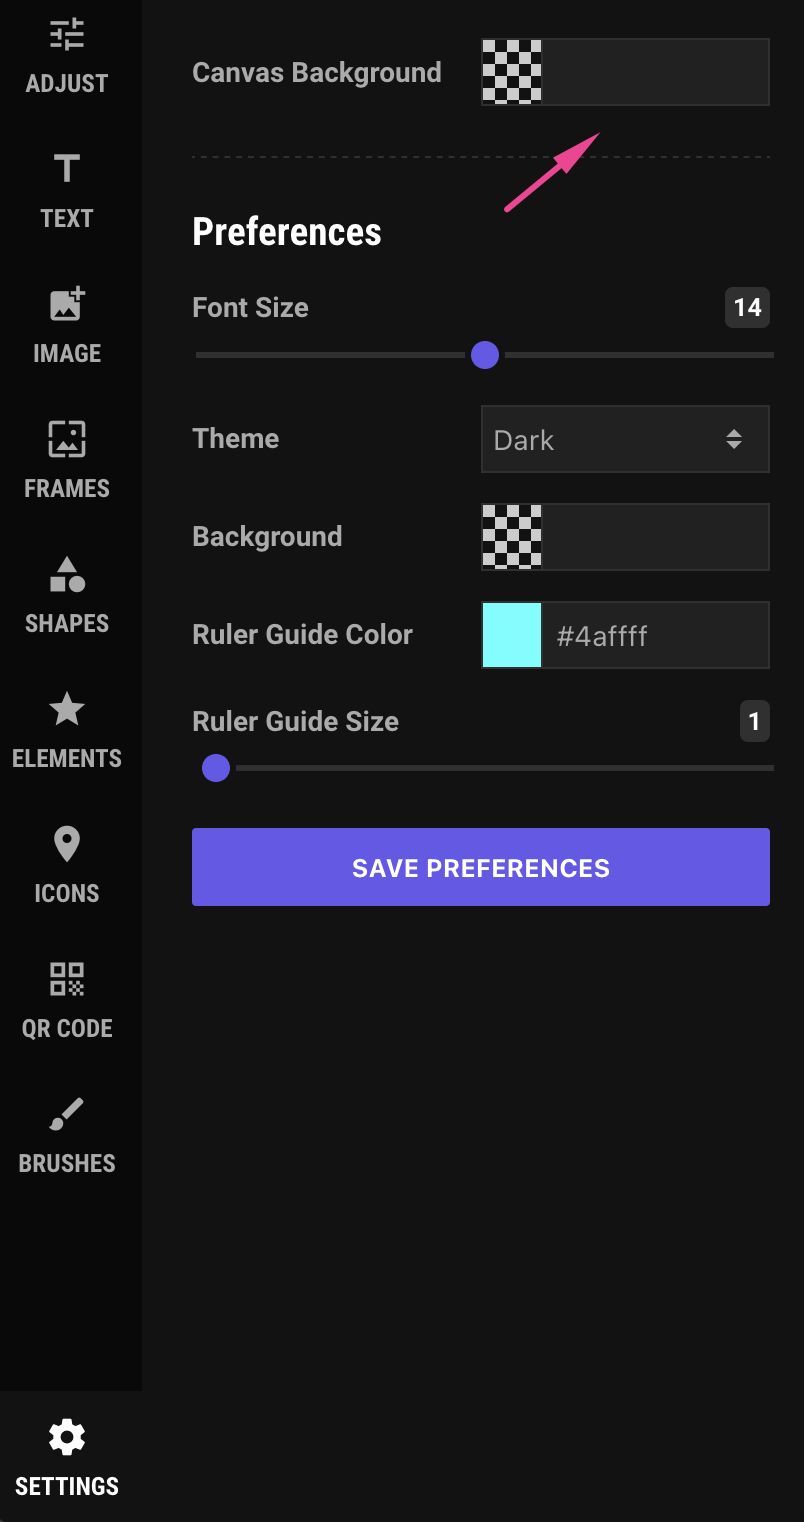
Canvas Ruler
You can use the ruler to align your elements properly and fix spacing issues.
Settings
If you are working on a blank canvas, you can change the background color from this section. This section also contains user preferences.
Integrations
Iconfinder
With Iconfinder integration, you can browse 200k+ high-quality royalty free svg icon without leaving Palleon. To activate it, you must get an API key from your Iconfinder account. Creating account and getting API key is free. Click here to get your API key.
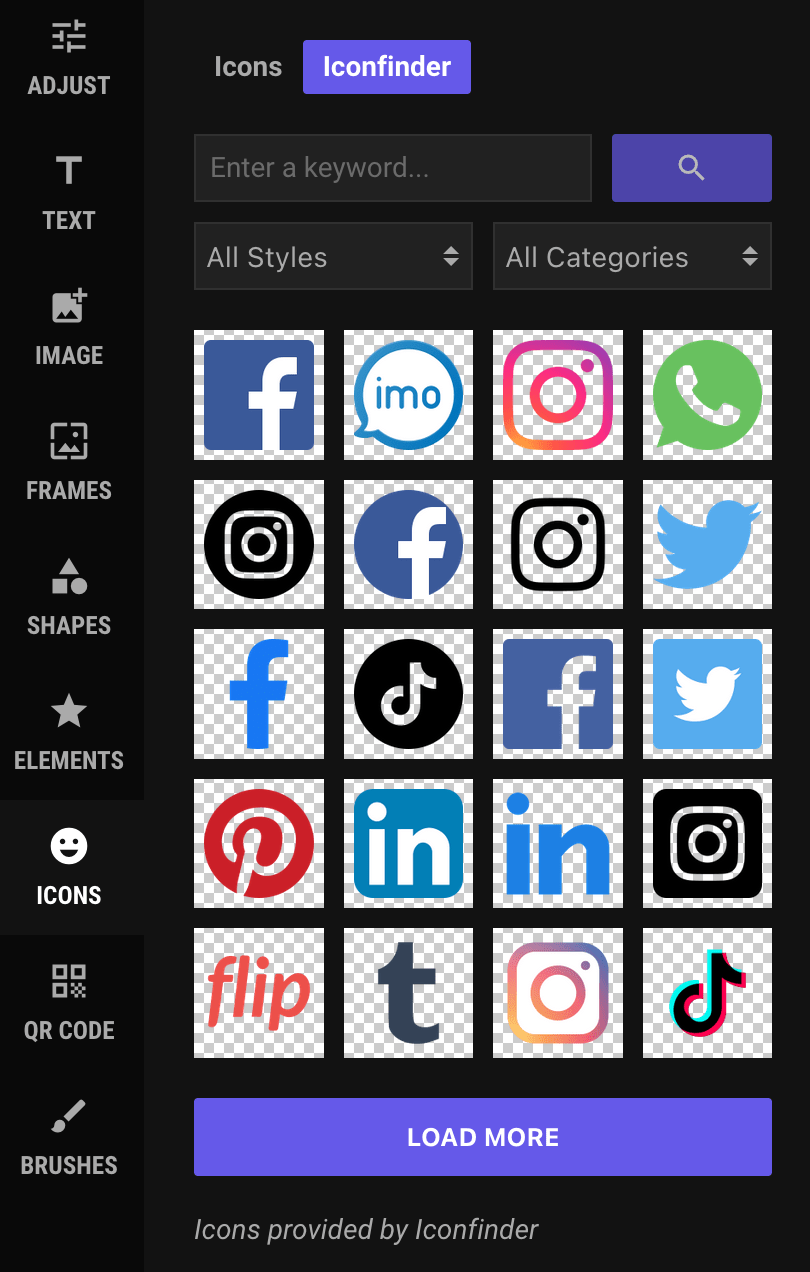
After getting the API key, copy&paste it to Palleon->Settings->Iconfinder. If your API key is valid, you will see a new tab on icon library where you can browse the icons.
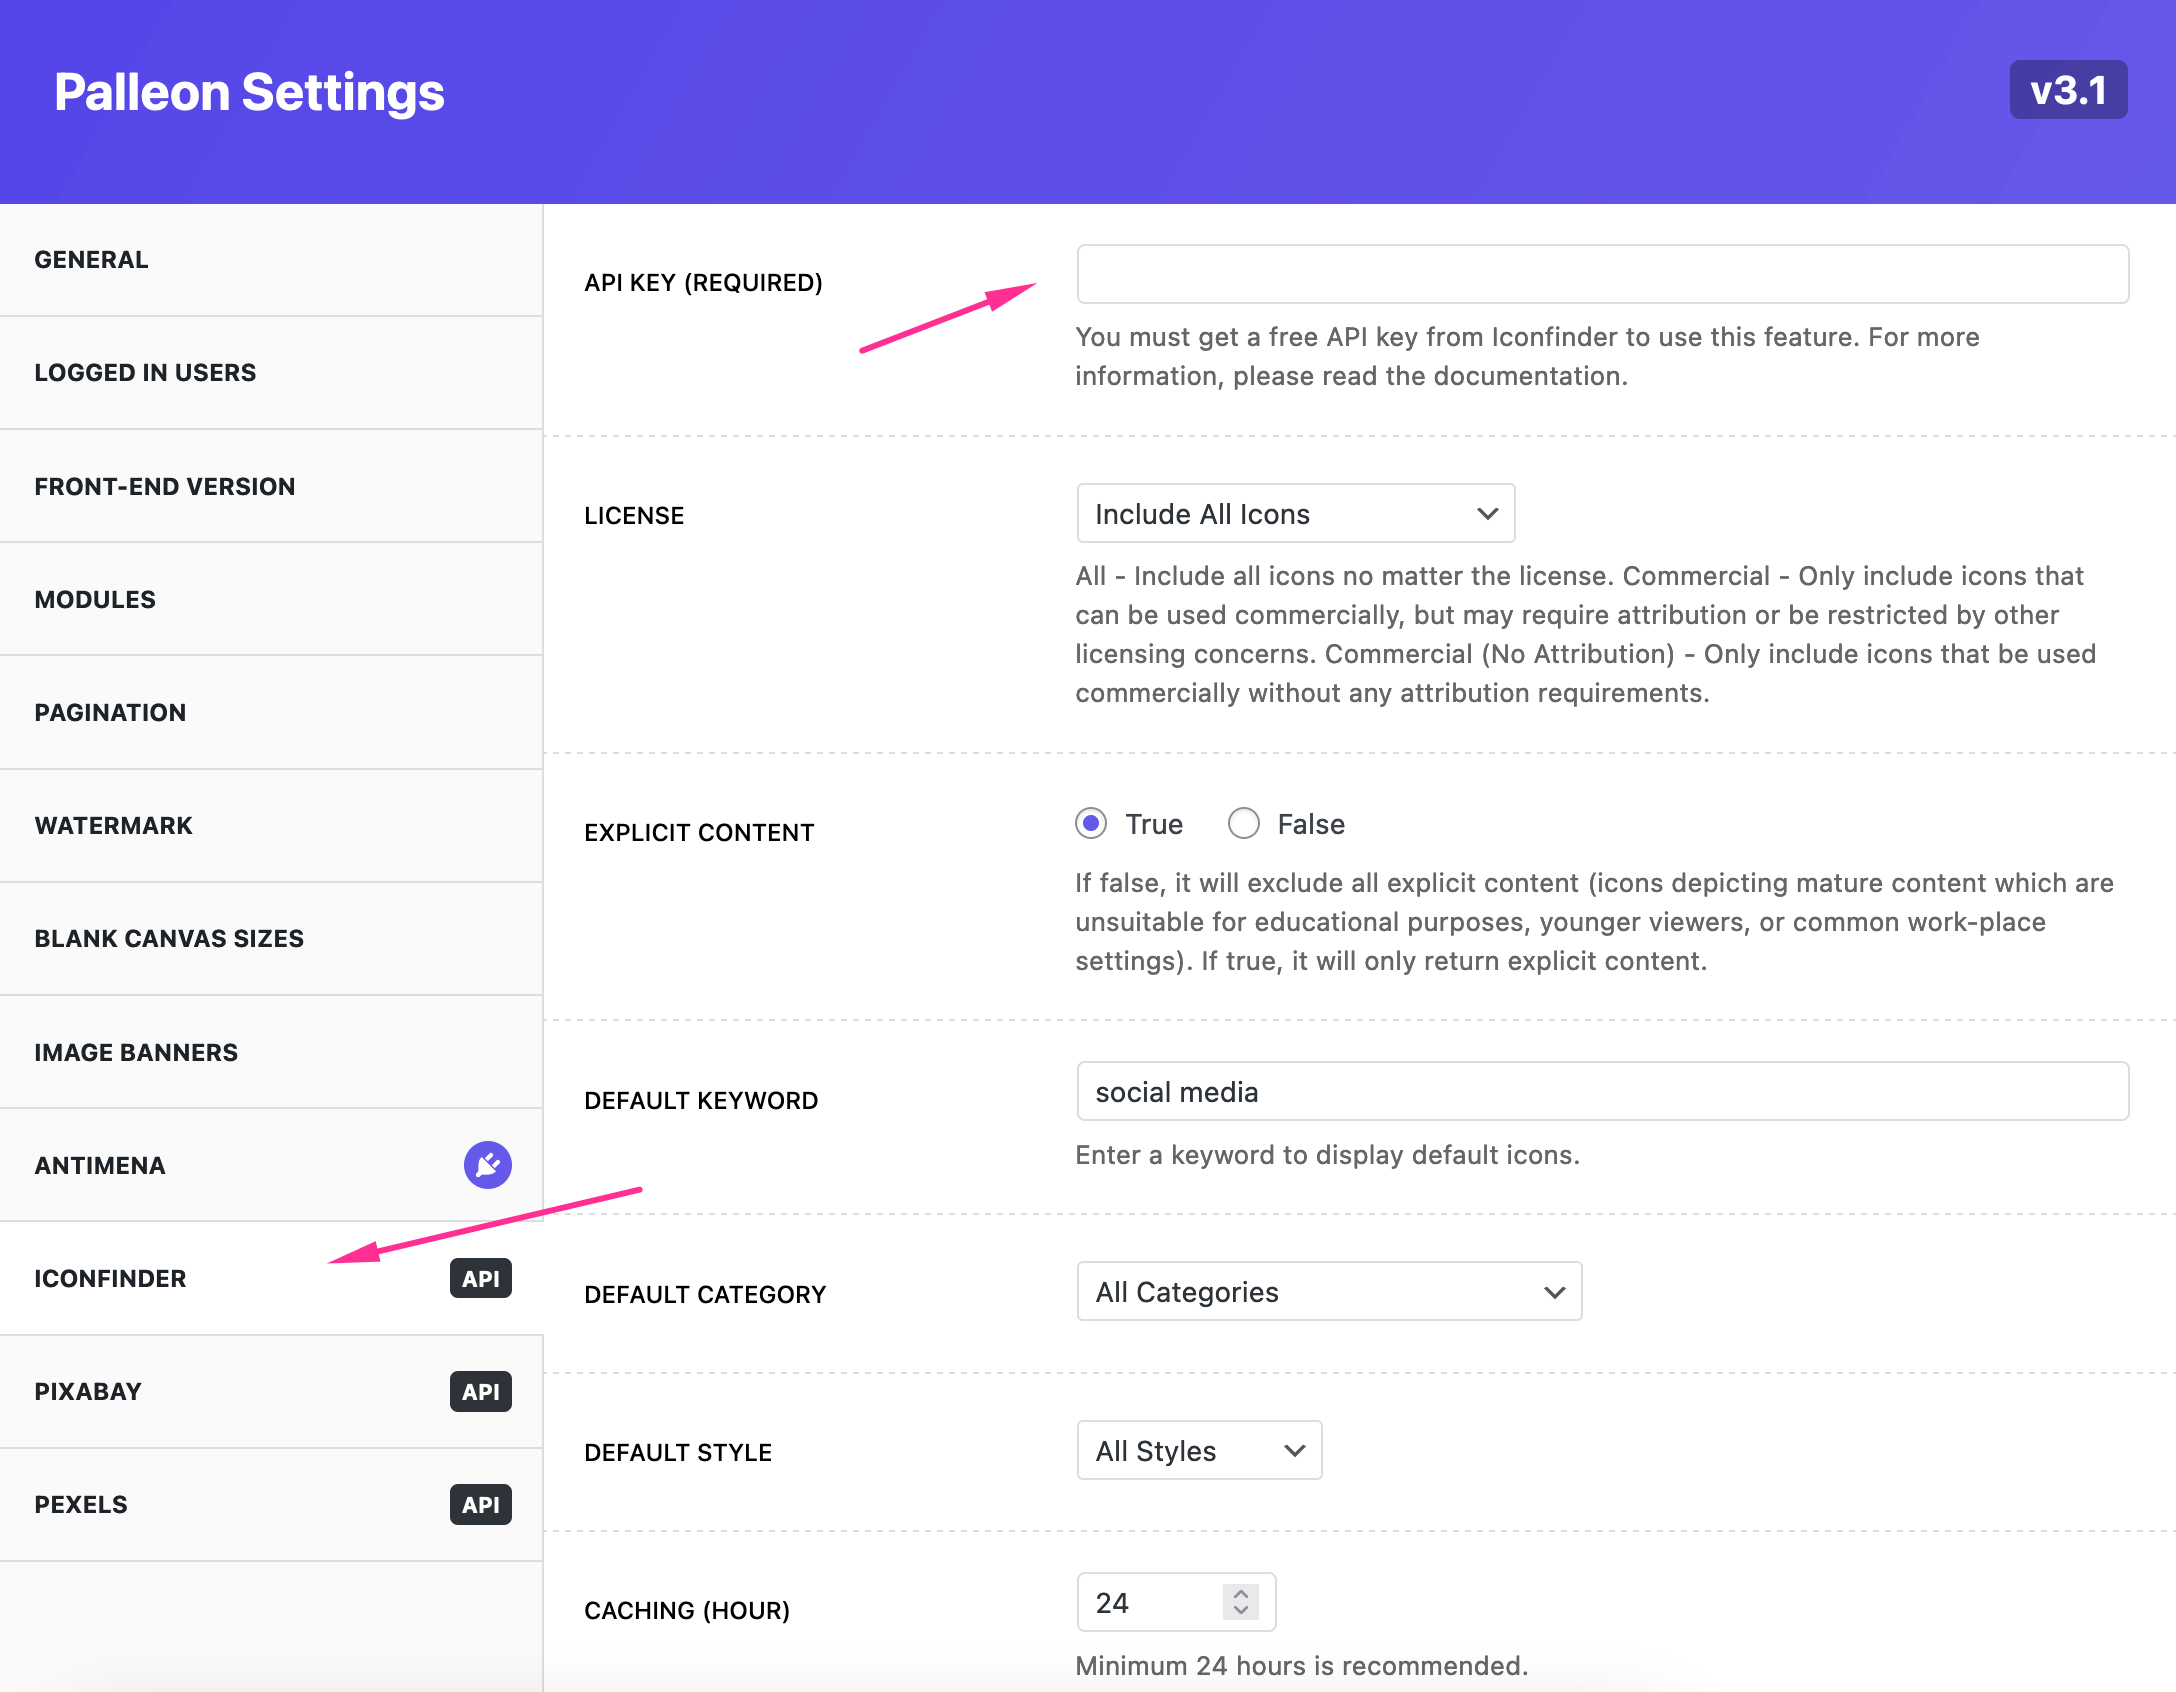
If you define a default keyword, default icons will be displayed on first page load.
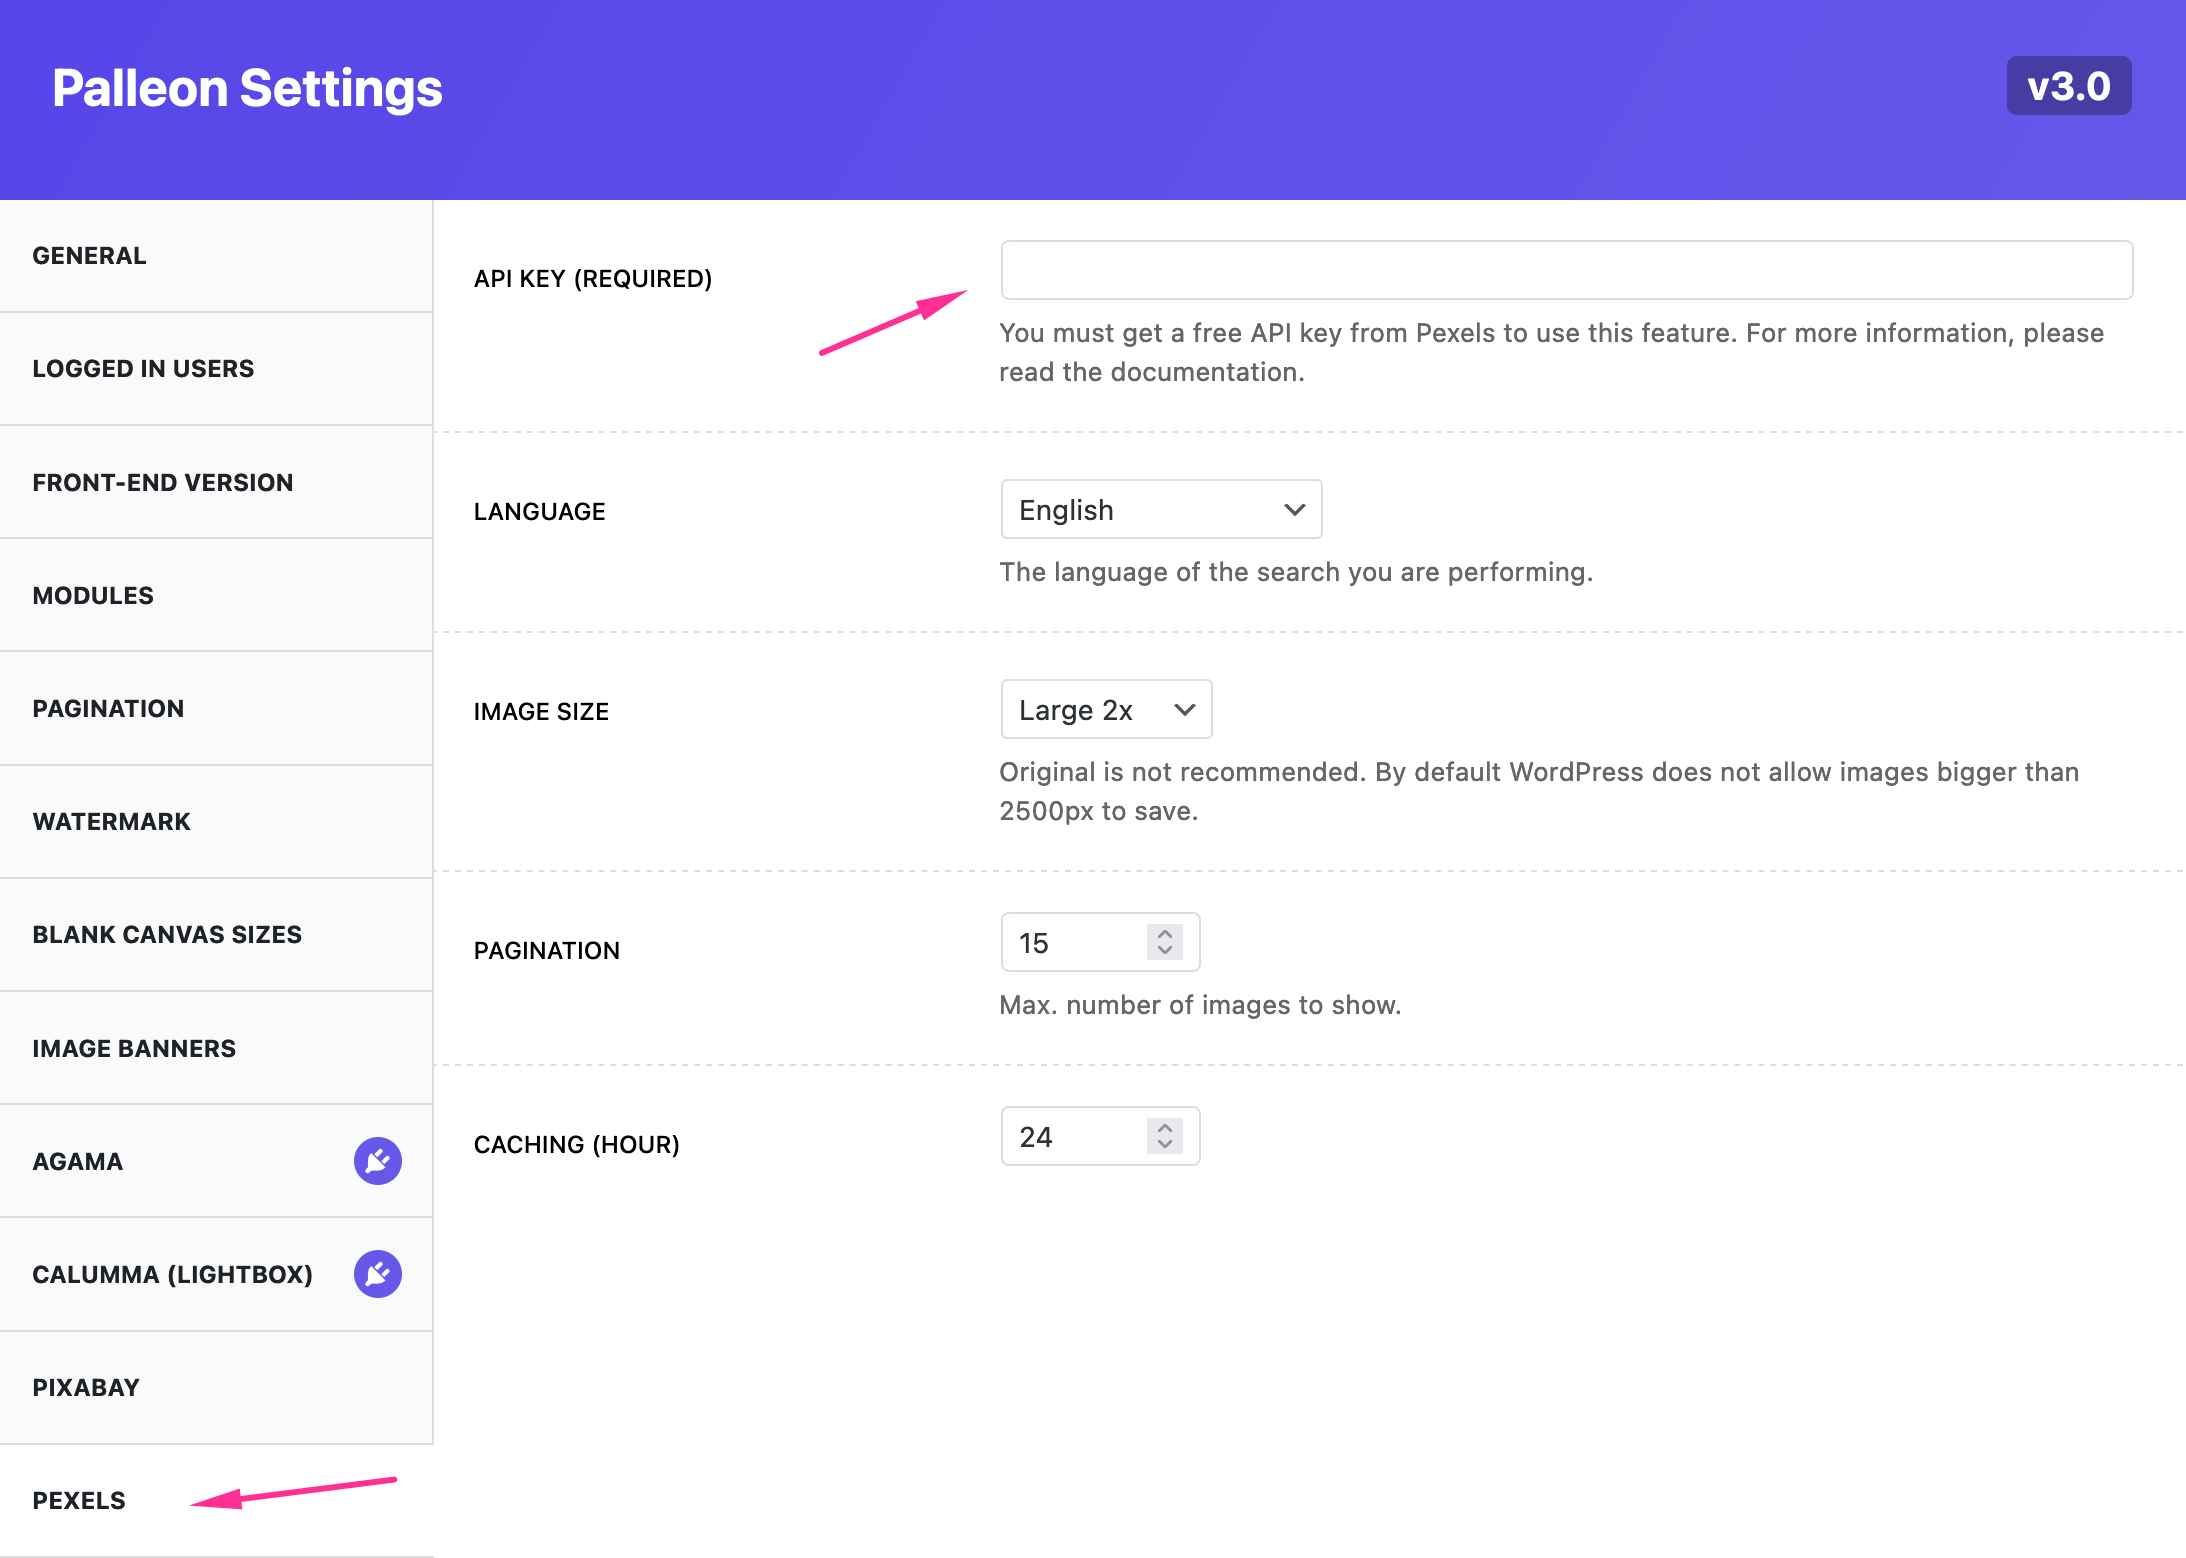
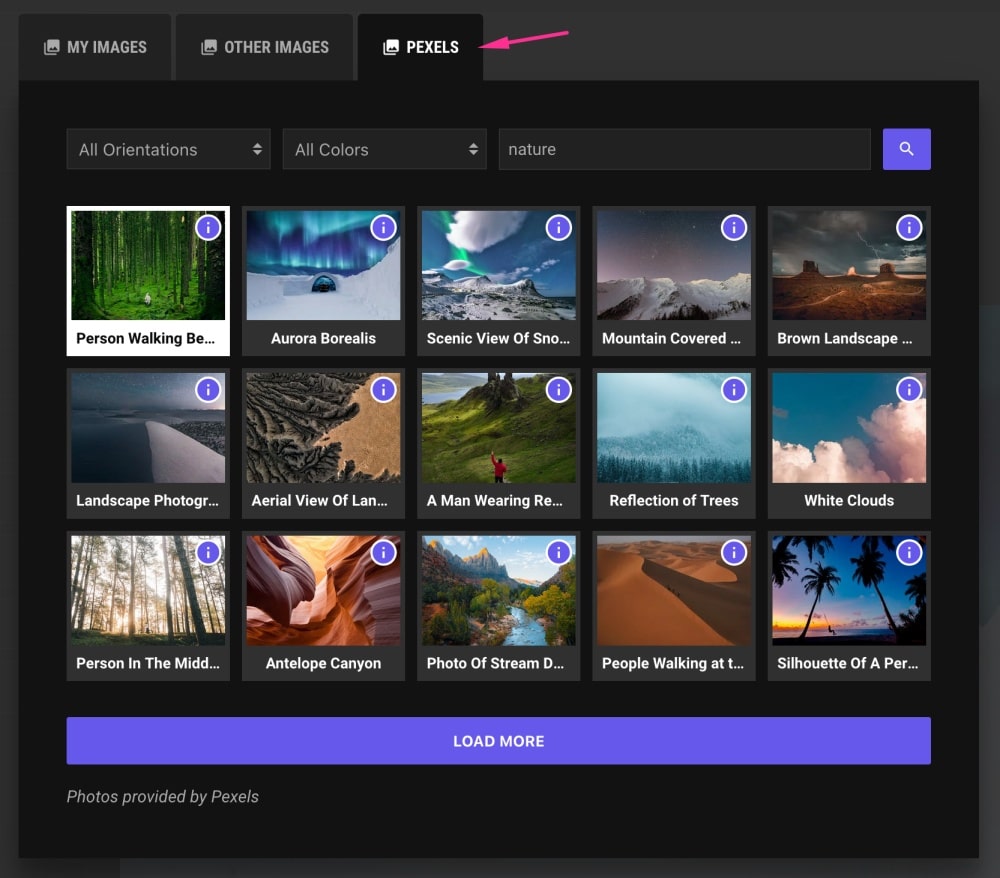
Pexels
With Pexels integration, you can browse millions of high-quality royalty free stock images without leaving Palleon. To activate it, you must get an API key from your Pexels account. Creating account and getting API key is free. Click here to get your API key.
After getting the API key, copy&paste it to Palleon->Settings->Pexels. If your API key is valid, you will see a new tab on media library where you can browse the images.
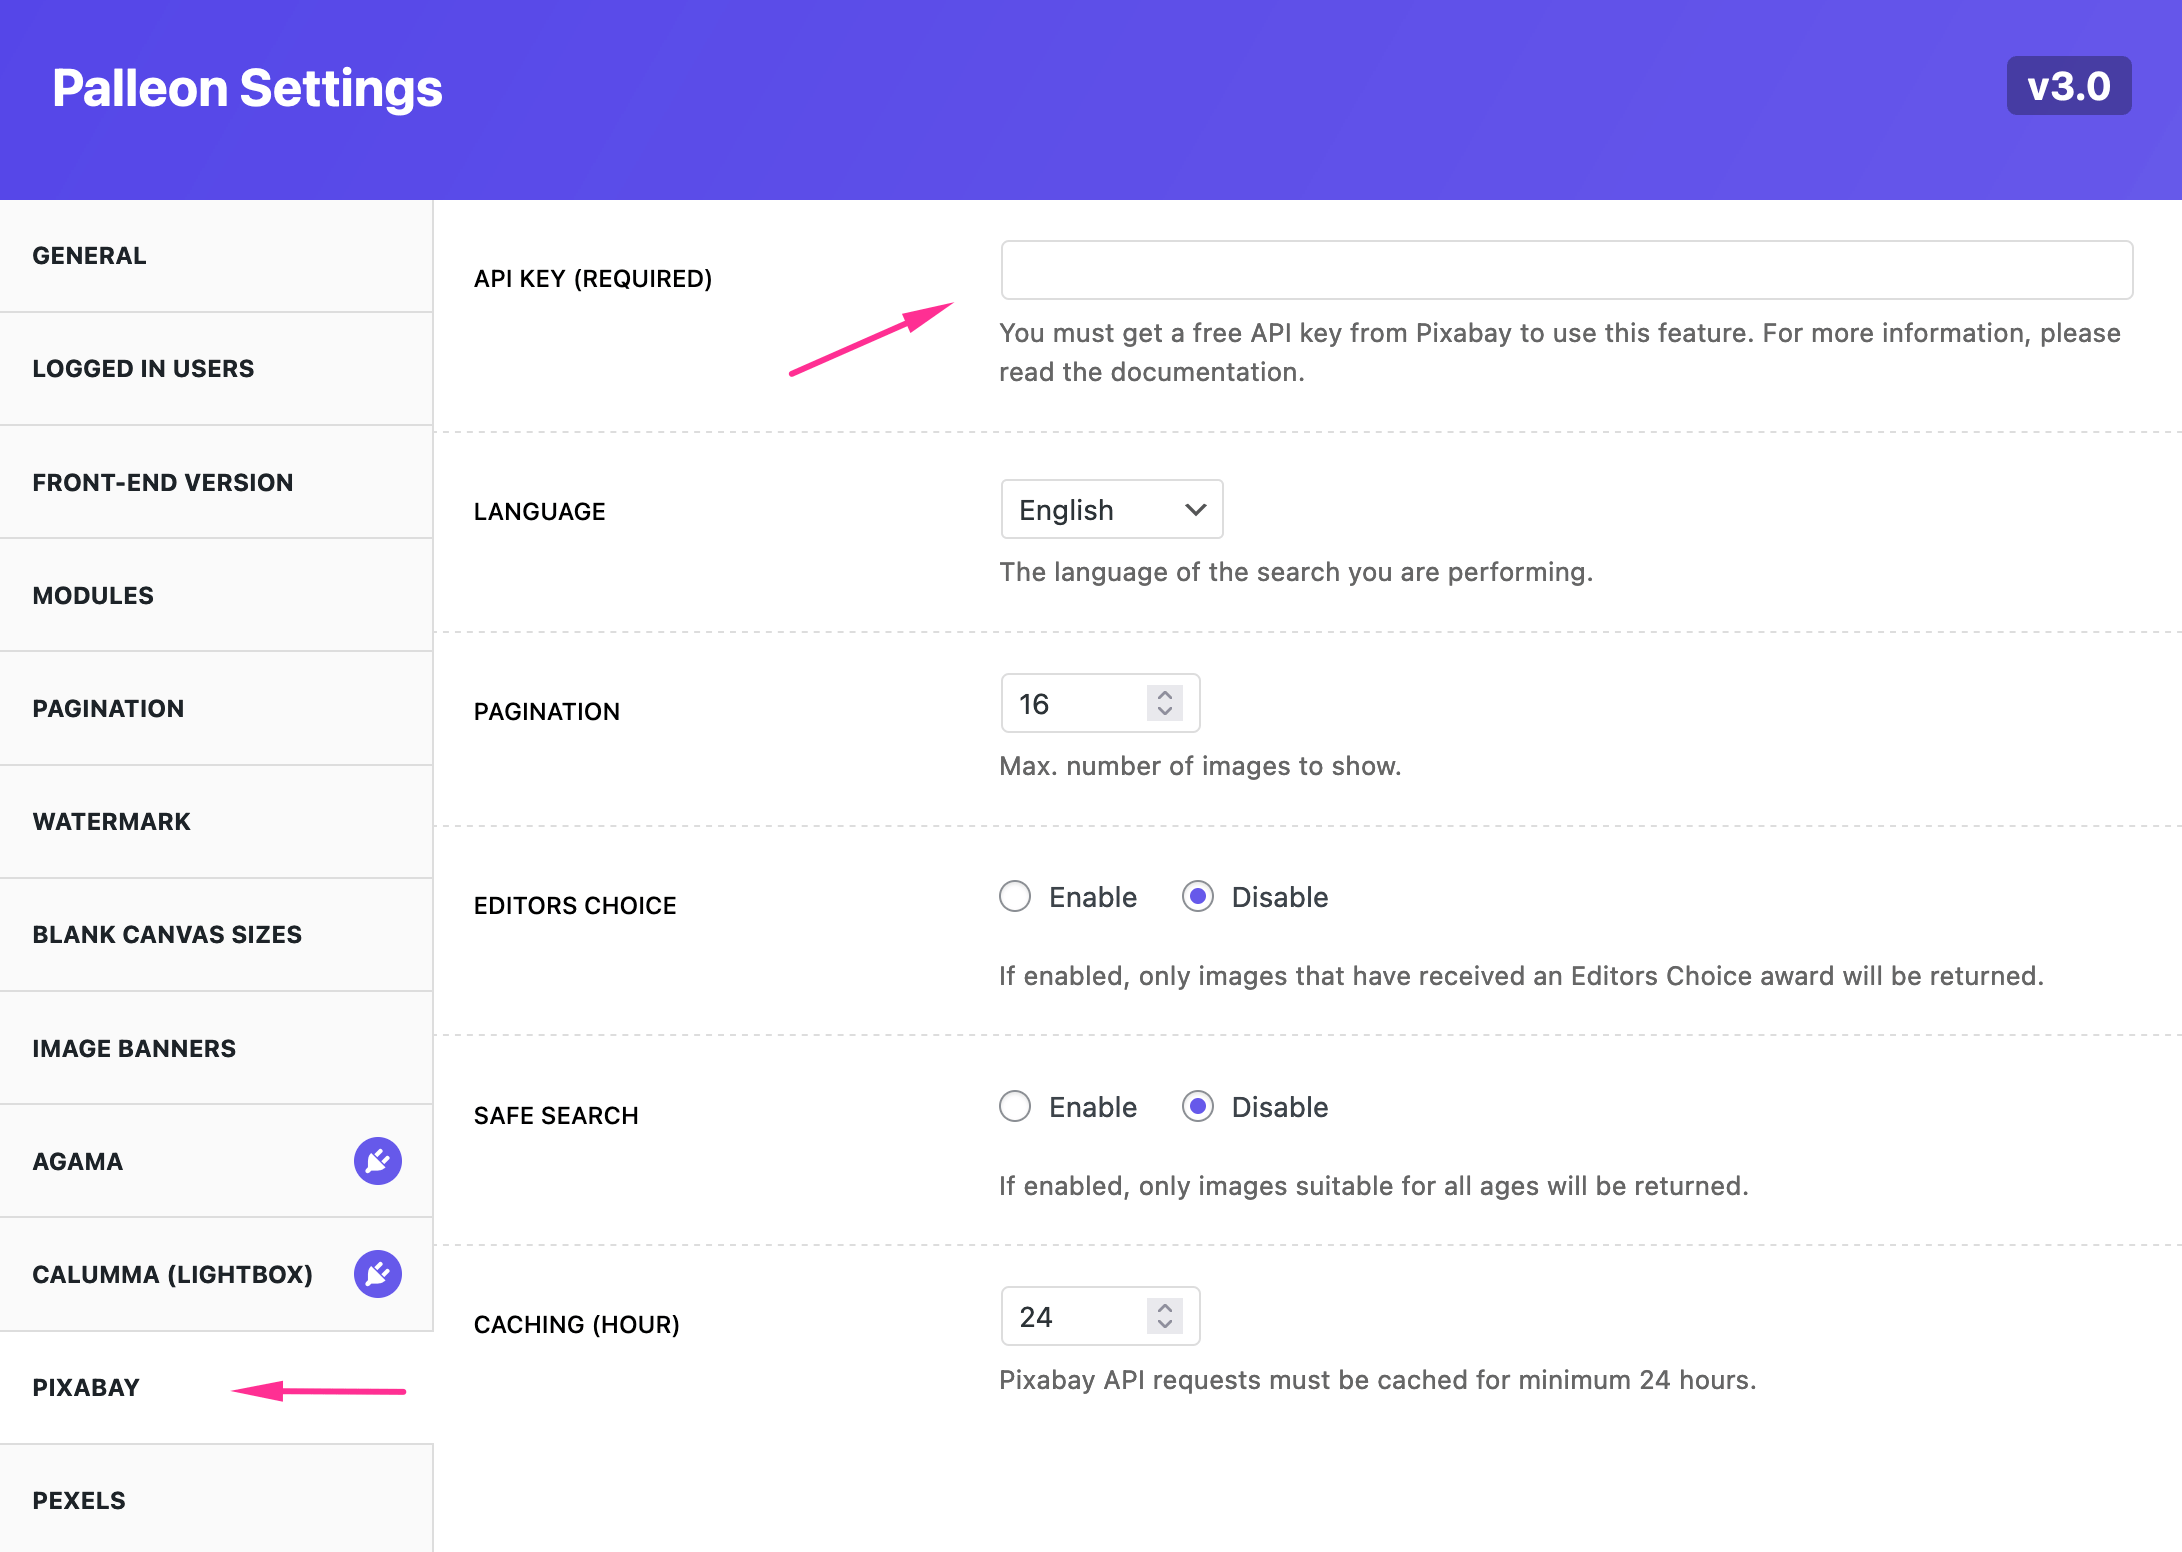
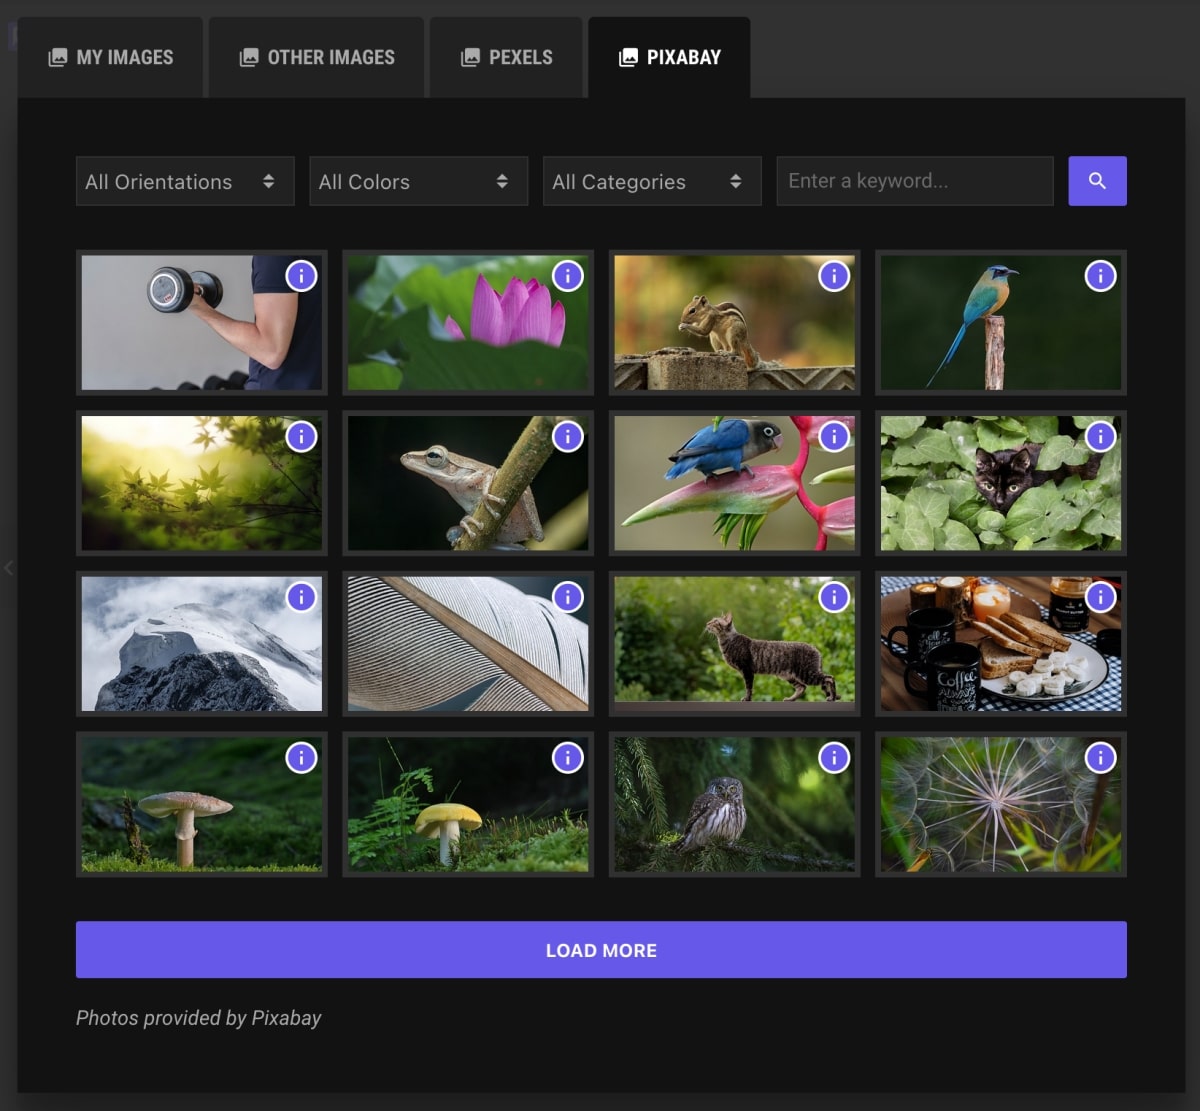
Pixabay
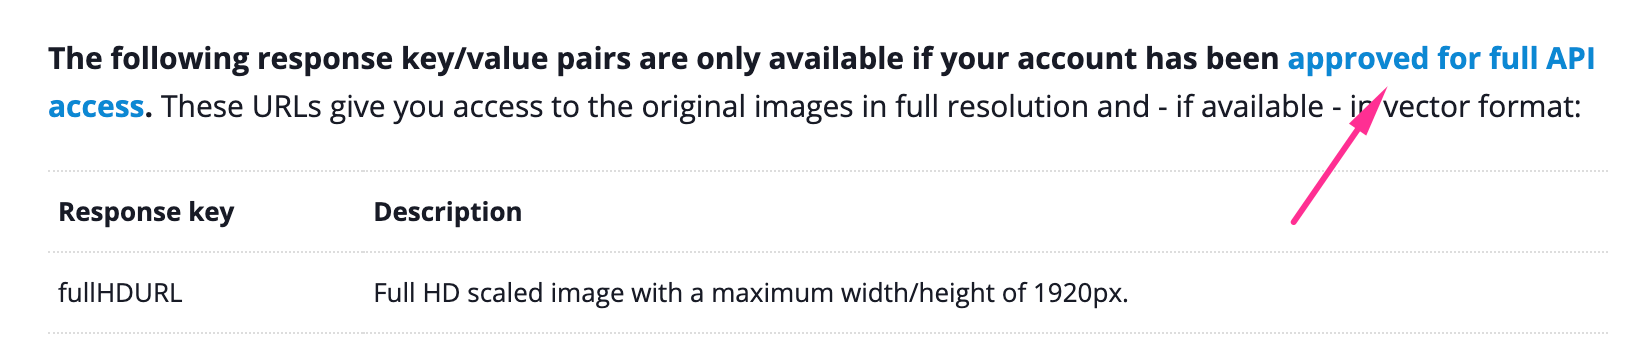
With Pixabay integration, you can browse millions of high-quality royalty free stock images without leaving Palleon. To activate it, you must get an API key from your Pixabay account. Creating account and getting API key is free. After signing-in you can find your API key on this page.

As default image size is a maximum width/height of 1280px. To get the full HD image (maximum width/height of 1920px) url instead, your account should be approved for full API access. You can request full API access from the API page.
After getting the API key, copy&paste it to Palleon->Settings->Pixabay. If your API key is valid, you will see a new tab on media library where you can browse the images.
Ultimate Membership Pro
Palleon is compatible with Ultimate Membership Pro. If Ultimate Membership Pro plugin is installed and activated on your site, you can choose which membership levels will be able to access the photo editor from the settings. To allow all users, deselect all membership levels. You can also choose which membership levels will be able to access your PRO templates on backend version.
Ultimate Membership Pro Knowledgebase
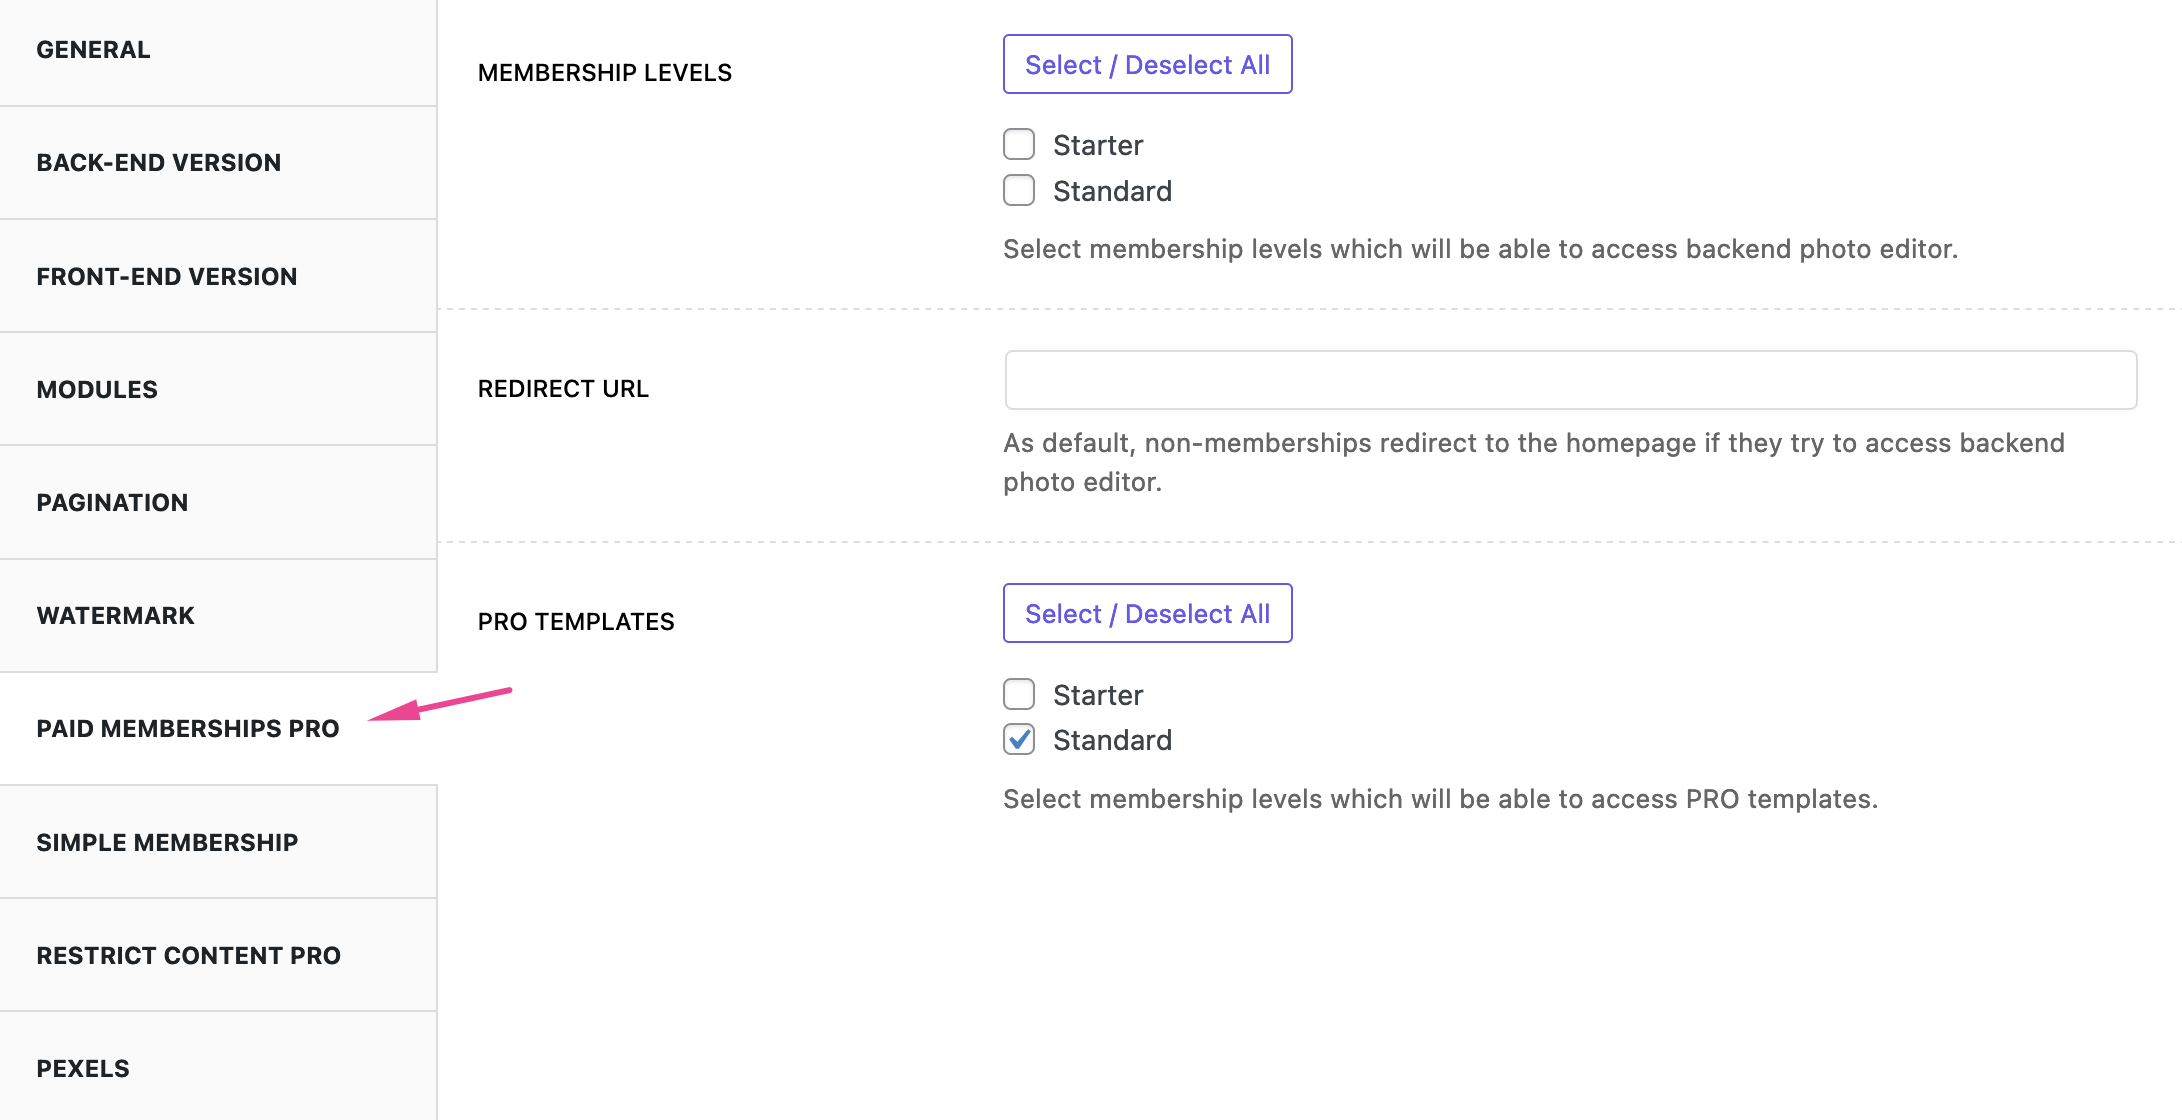
Paid Memberships Pro
Palleon is compatible with Paid Memberships Pro. If Paid Memberships Pro plugin is installed and activated on your site, you can choose which membership levels will be able to access the backend photo editor from the settings. To allow all users, deselect all membership levels. You can also choose which membership levels will be able to access your PRO templates on backend version.
Paid Memberships Pro Documentation
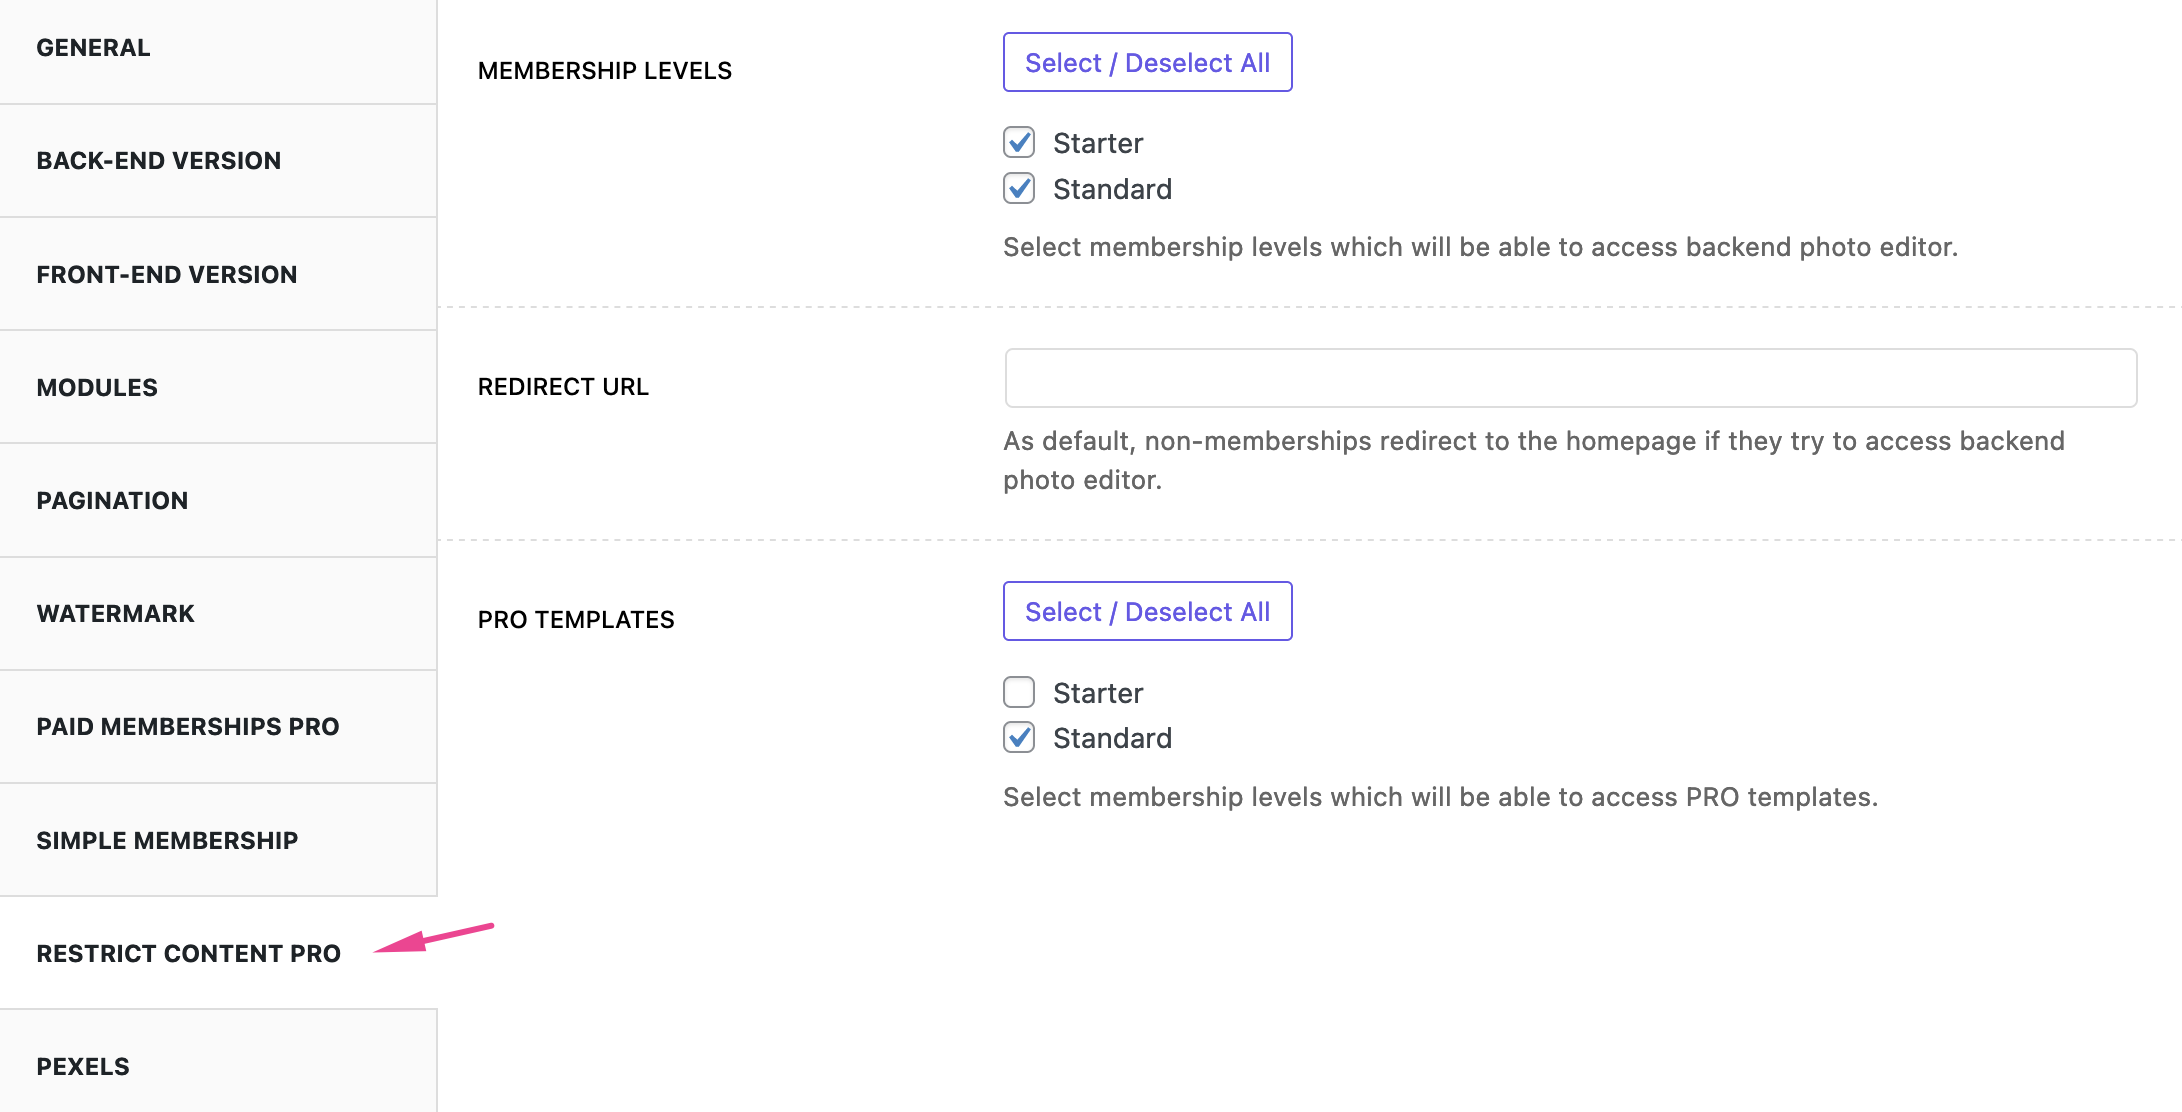
Restrict Content Pro
Palleon is compatible with Restrict Content Pro. If Restrict Content Pro is installed and activated on your site, you can choose which membership levels will be able to access the backend photo editor from the settings. To allow all users, deselect all membership levels. You can also choose which membership levels will be able to access your PRO templates on backend version.
Restrict Content Pro Knowledgebase
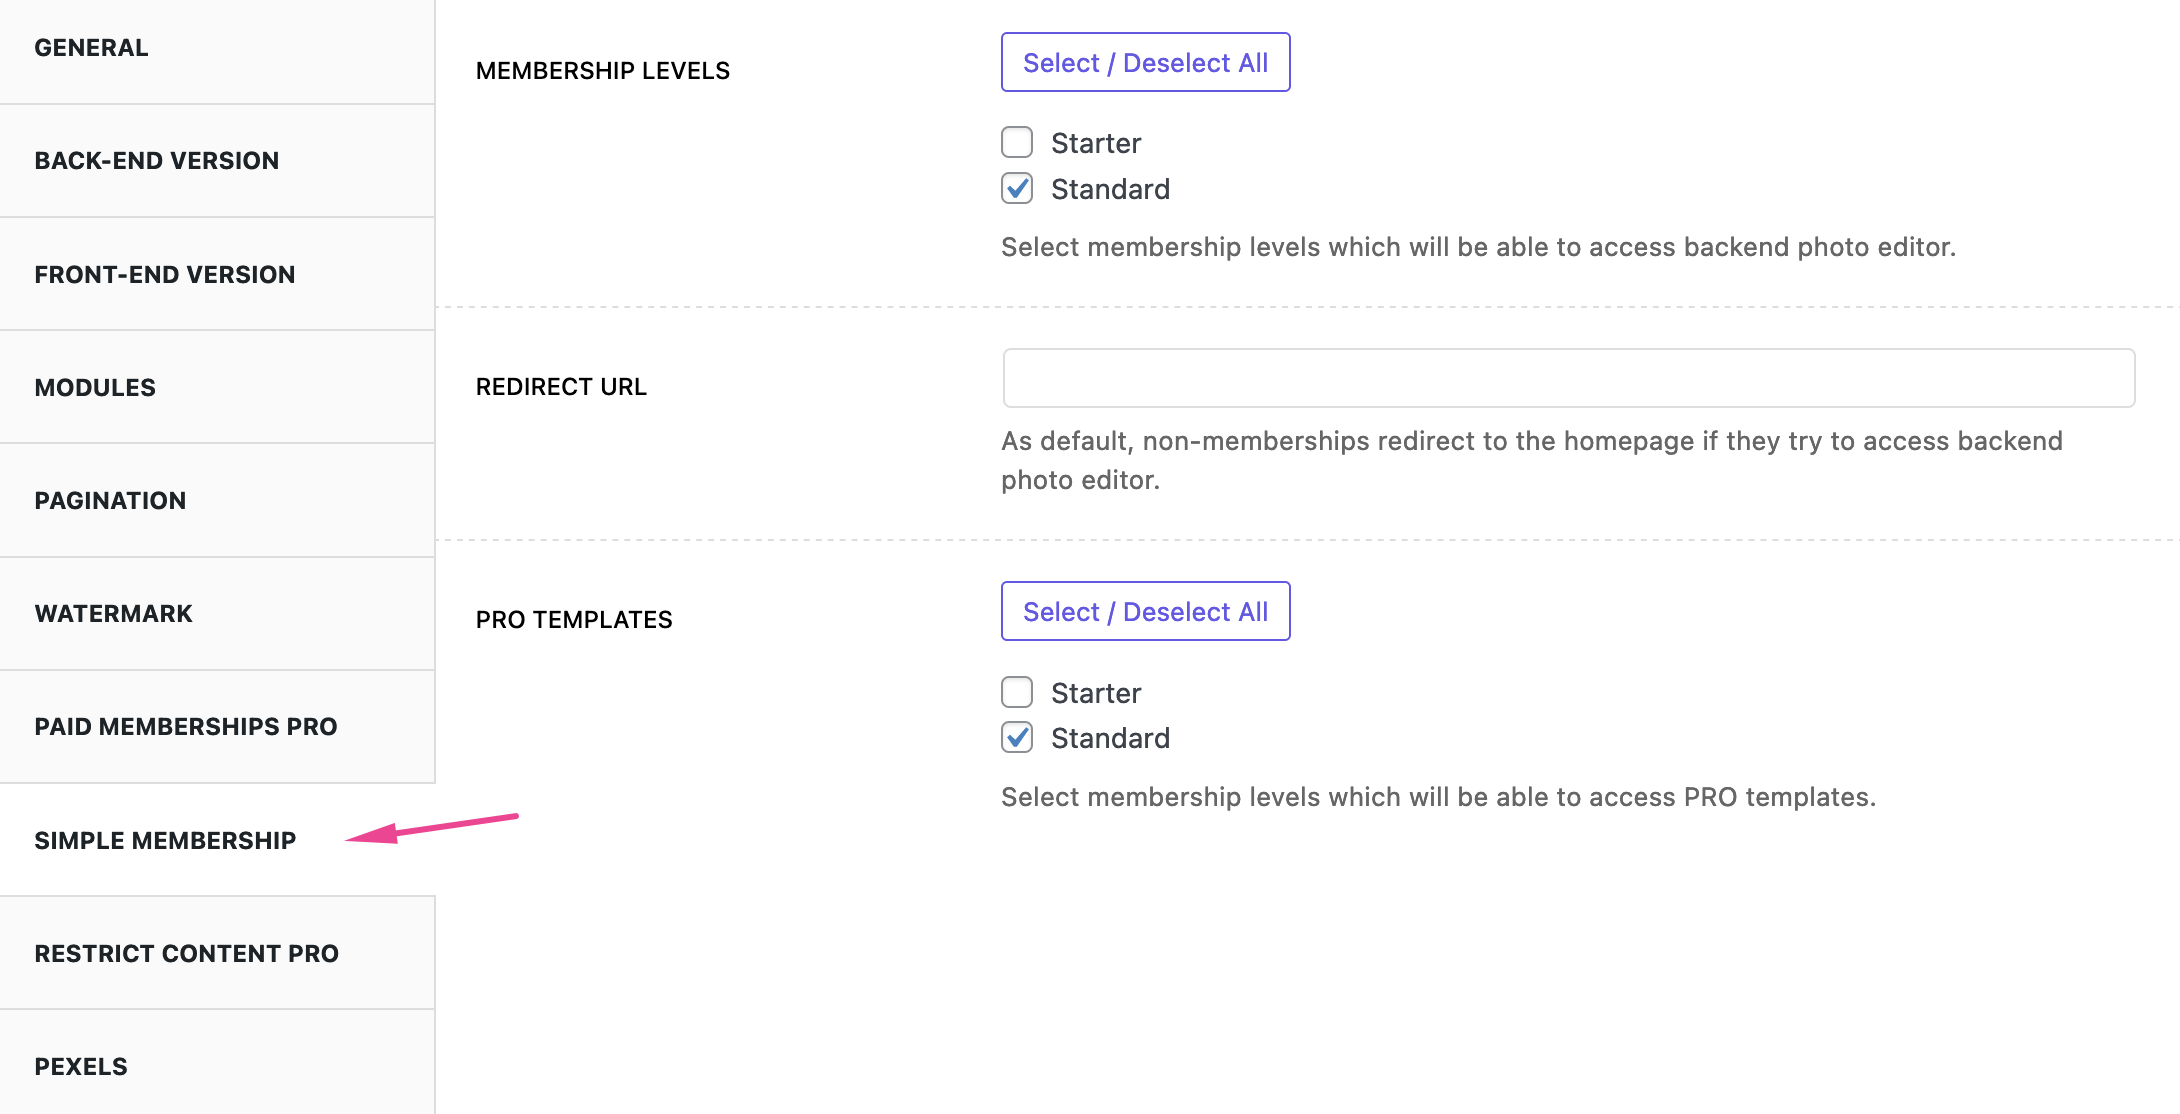
Simple Membership
Palleon is compatible with Simple Membership. If Simple Membership plugin is installed and activated on your site, you can choose which membership levels will be able to access the backend photo editor from the settings. To allow all users, deselect all membership levels. You can also choose which membership levels will be able to access your PRO templates on backend version.
Simple Membership Documentation
Faq
Where can I change the logo?
You can change the logo from plugin settings. There are 2 fields you need to edit. Mobile logo should be smaller than the desktop version.
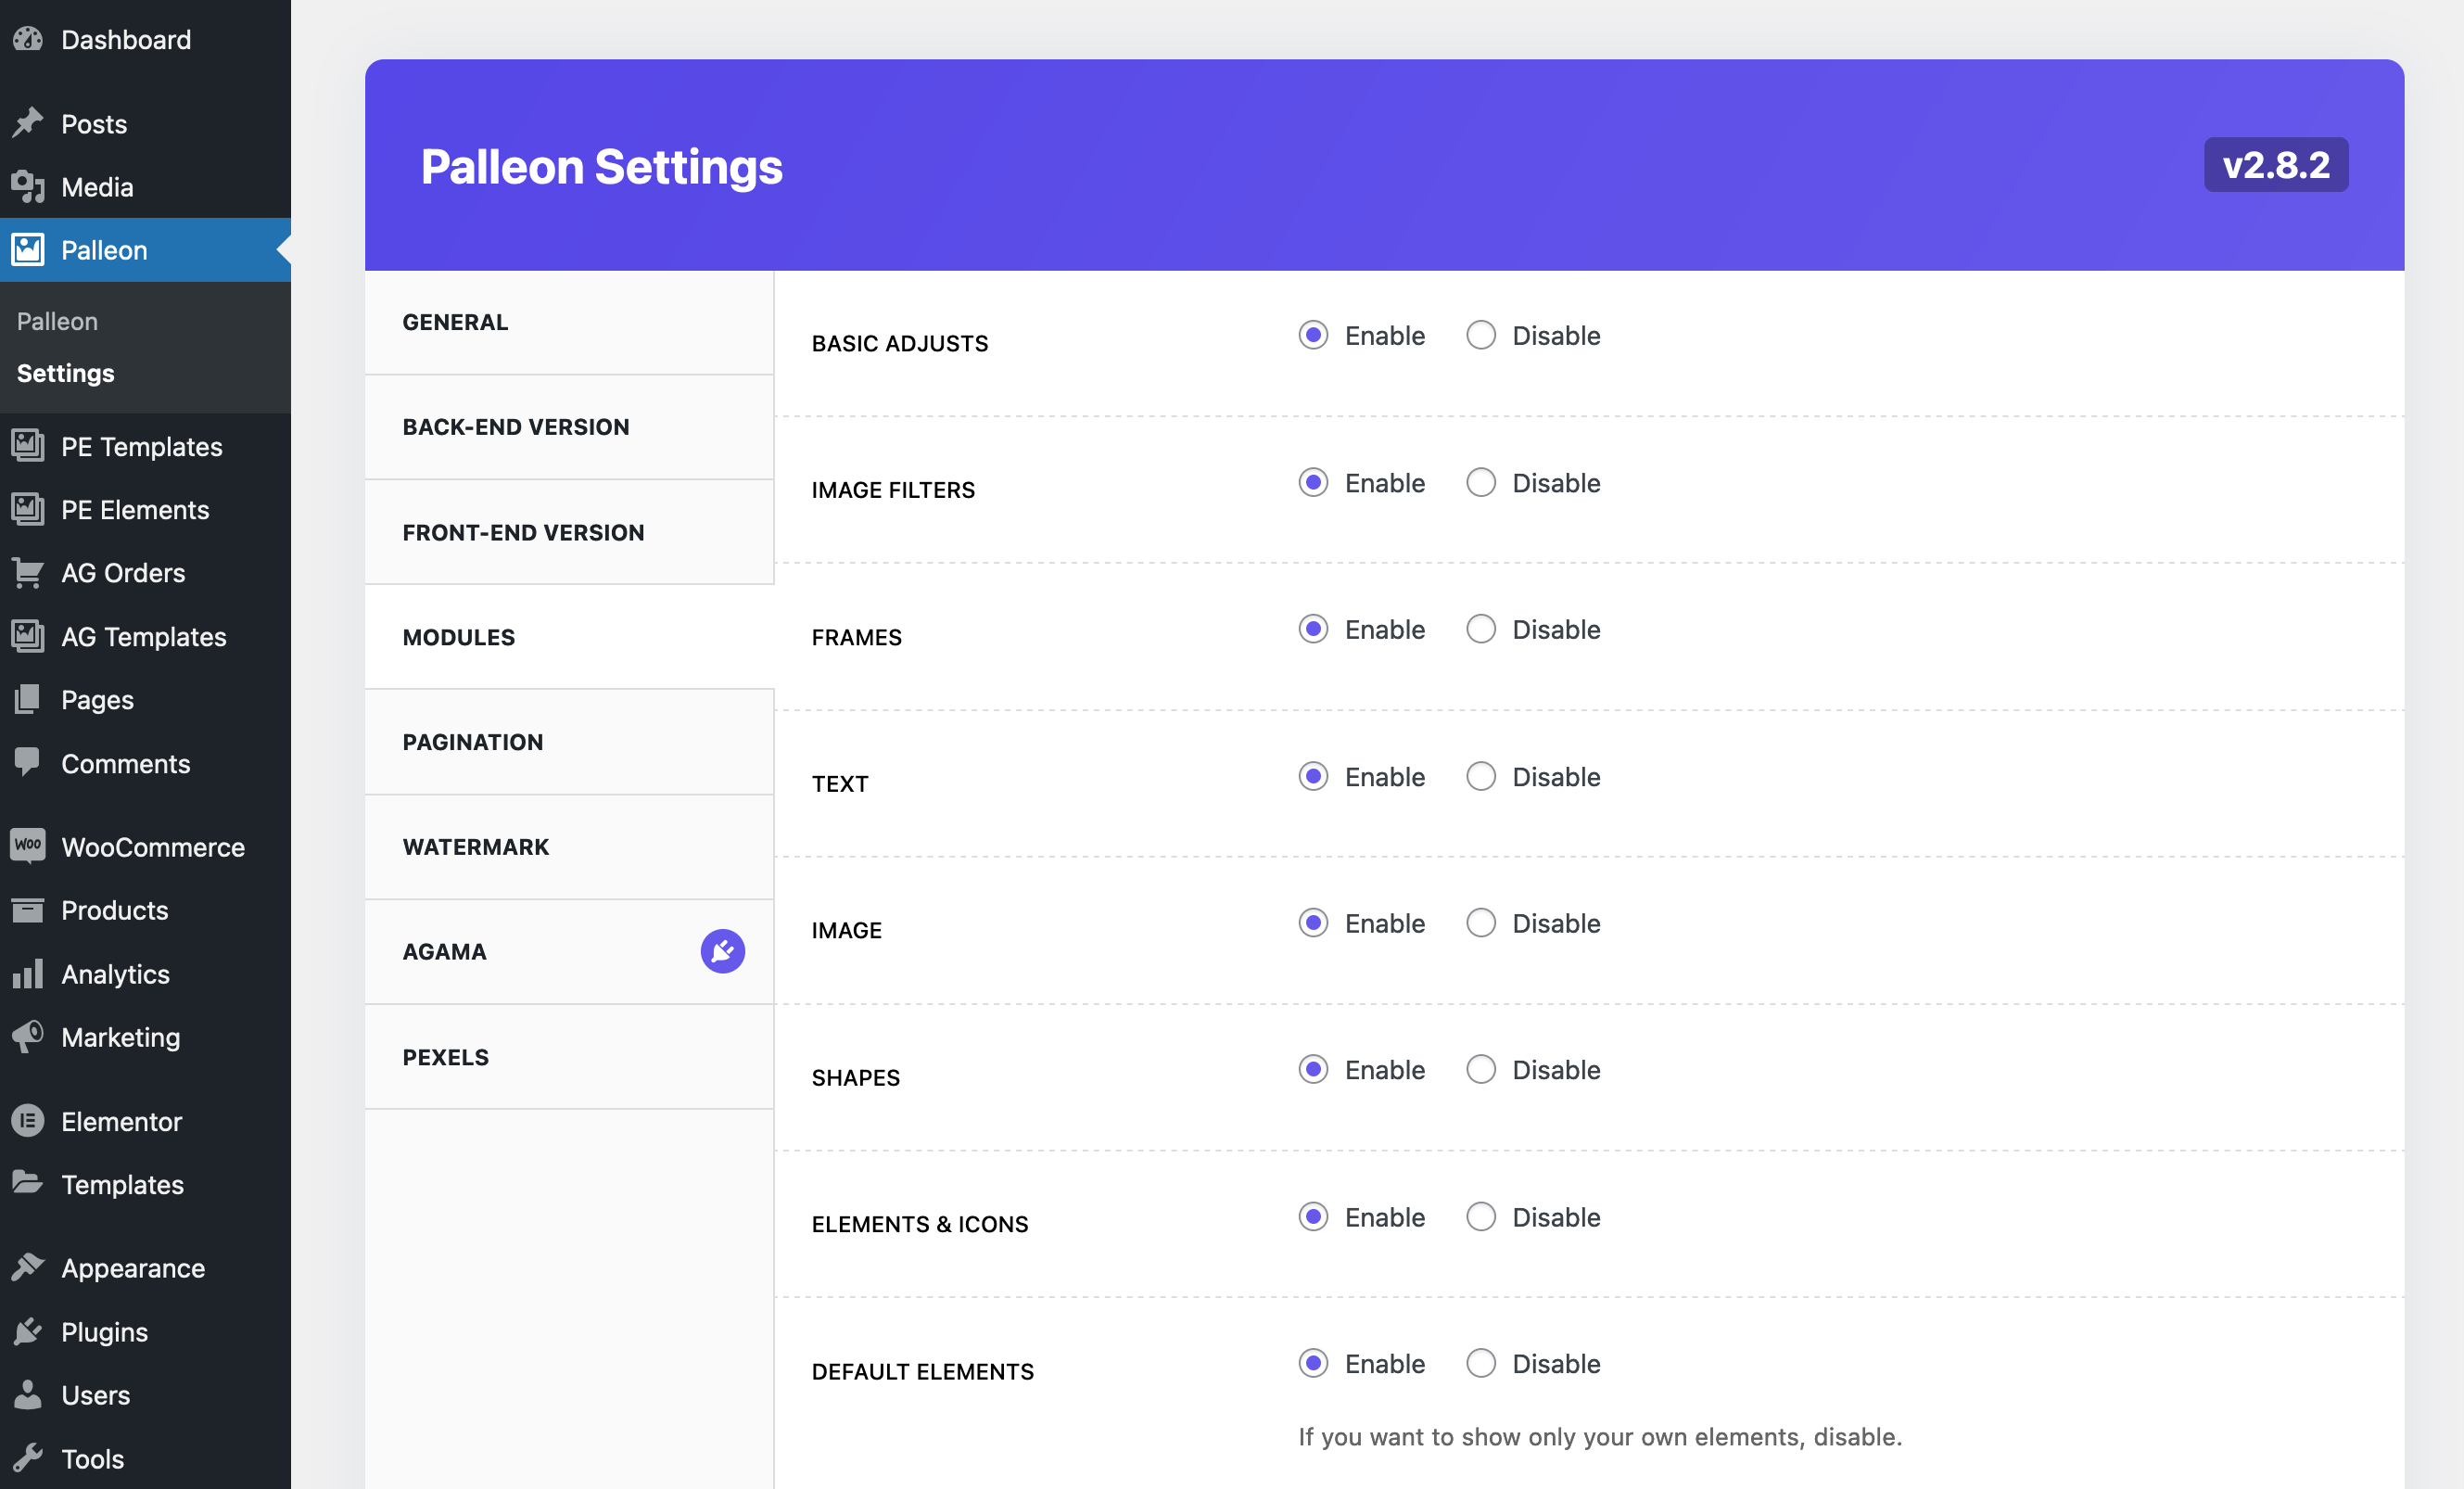
Can I enable/disable some features?
Yes. You can enable/disable built-in modules or turn on/off some specific features, from plugin settings;
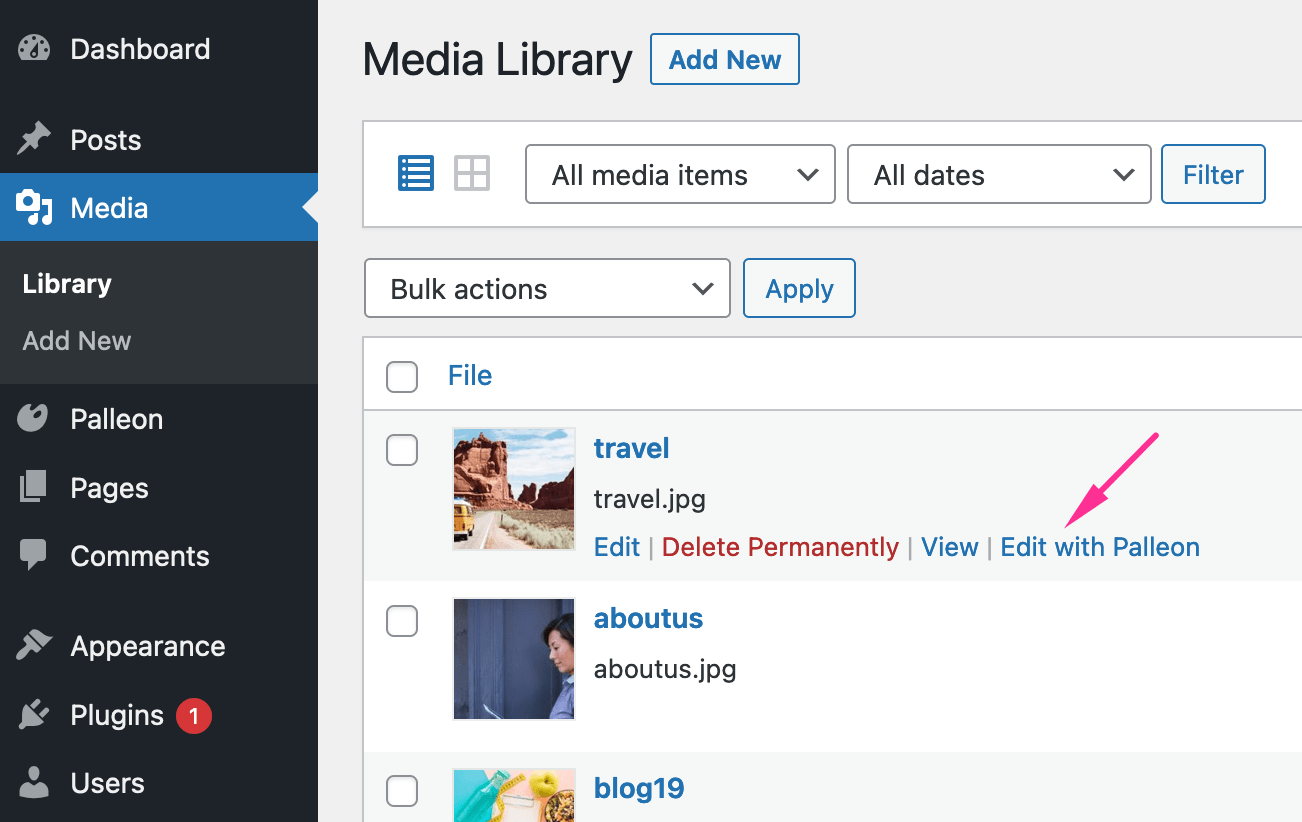
How can I edit an existing image on the media library?
Go to the media library and click "Edit with Palleon link".
Note: Admins and Editors can edit all images. Other users can edit only their own images.
Is it possible to open an image or template by url?
To open any image file (.png, .jpg or .webp) by url, you should add &url=YOUR_FILE_URL parameter to the url of Palleon image editor. For example;
http://www.yoursite.com/palleon?page=palleon&url=http://www.yoursite.com/wp-content/uploads/image.png
To open any template file (.json) by url, you should add &template_url=YOUR_FILE_URL parameter to the url of Palleon image editor. For example;
http://www.yoursite.com/palleon?page=palleon&template_url=http://www.yoursite.com/wp-content/uploads/template.json
This feature works on both frontend and backend versions.
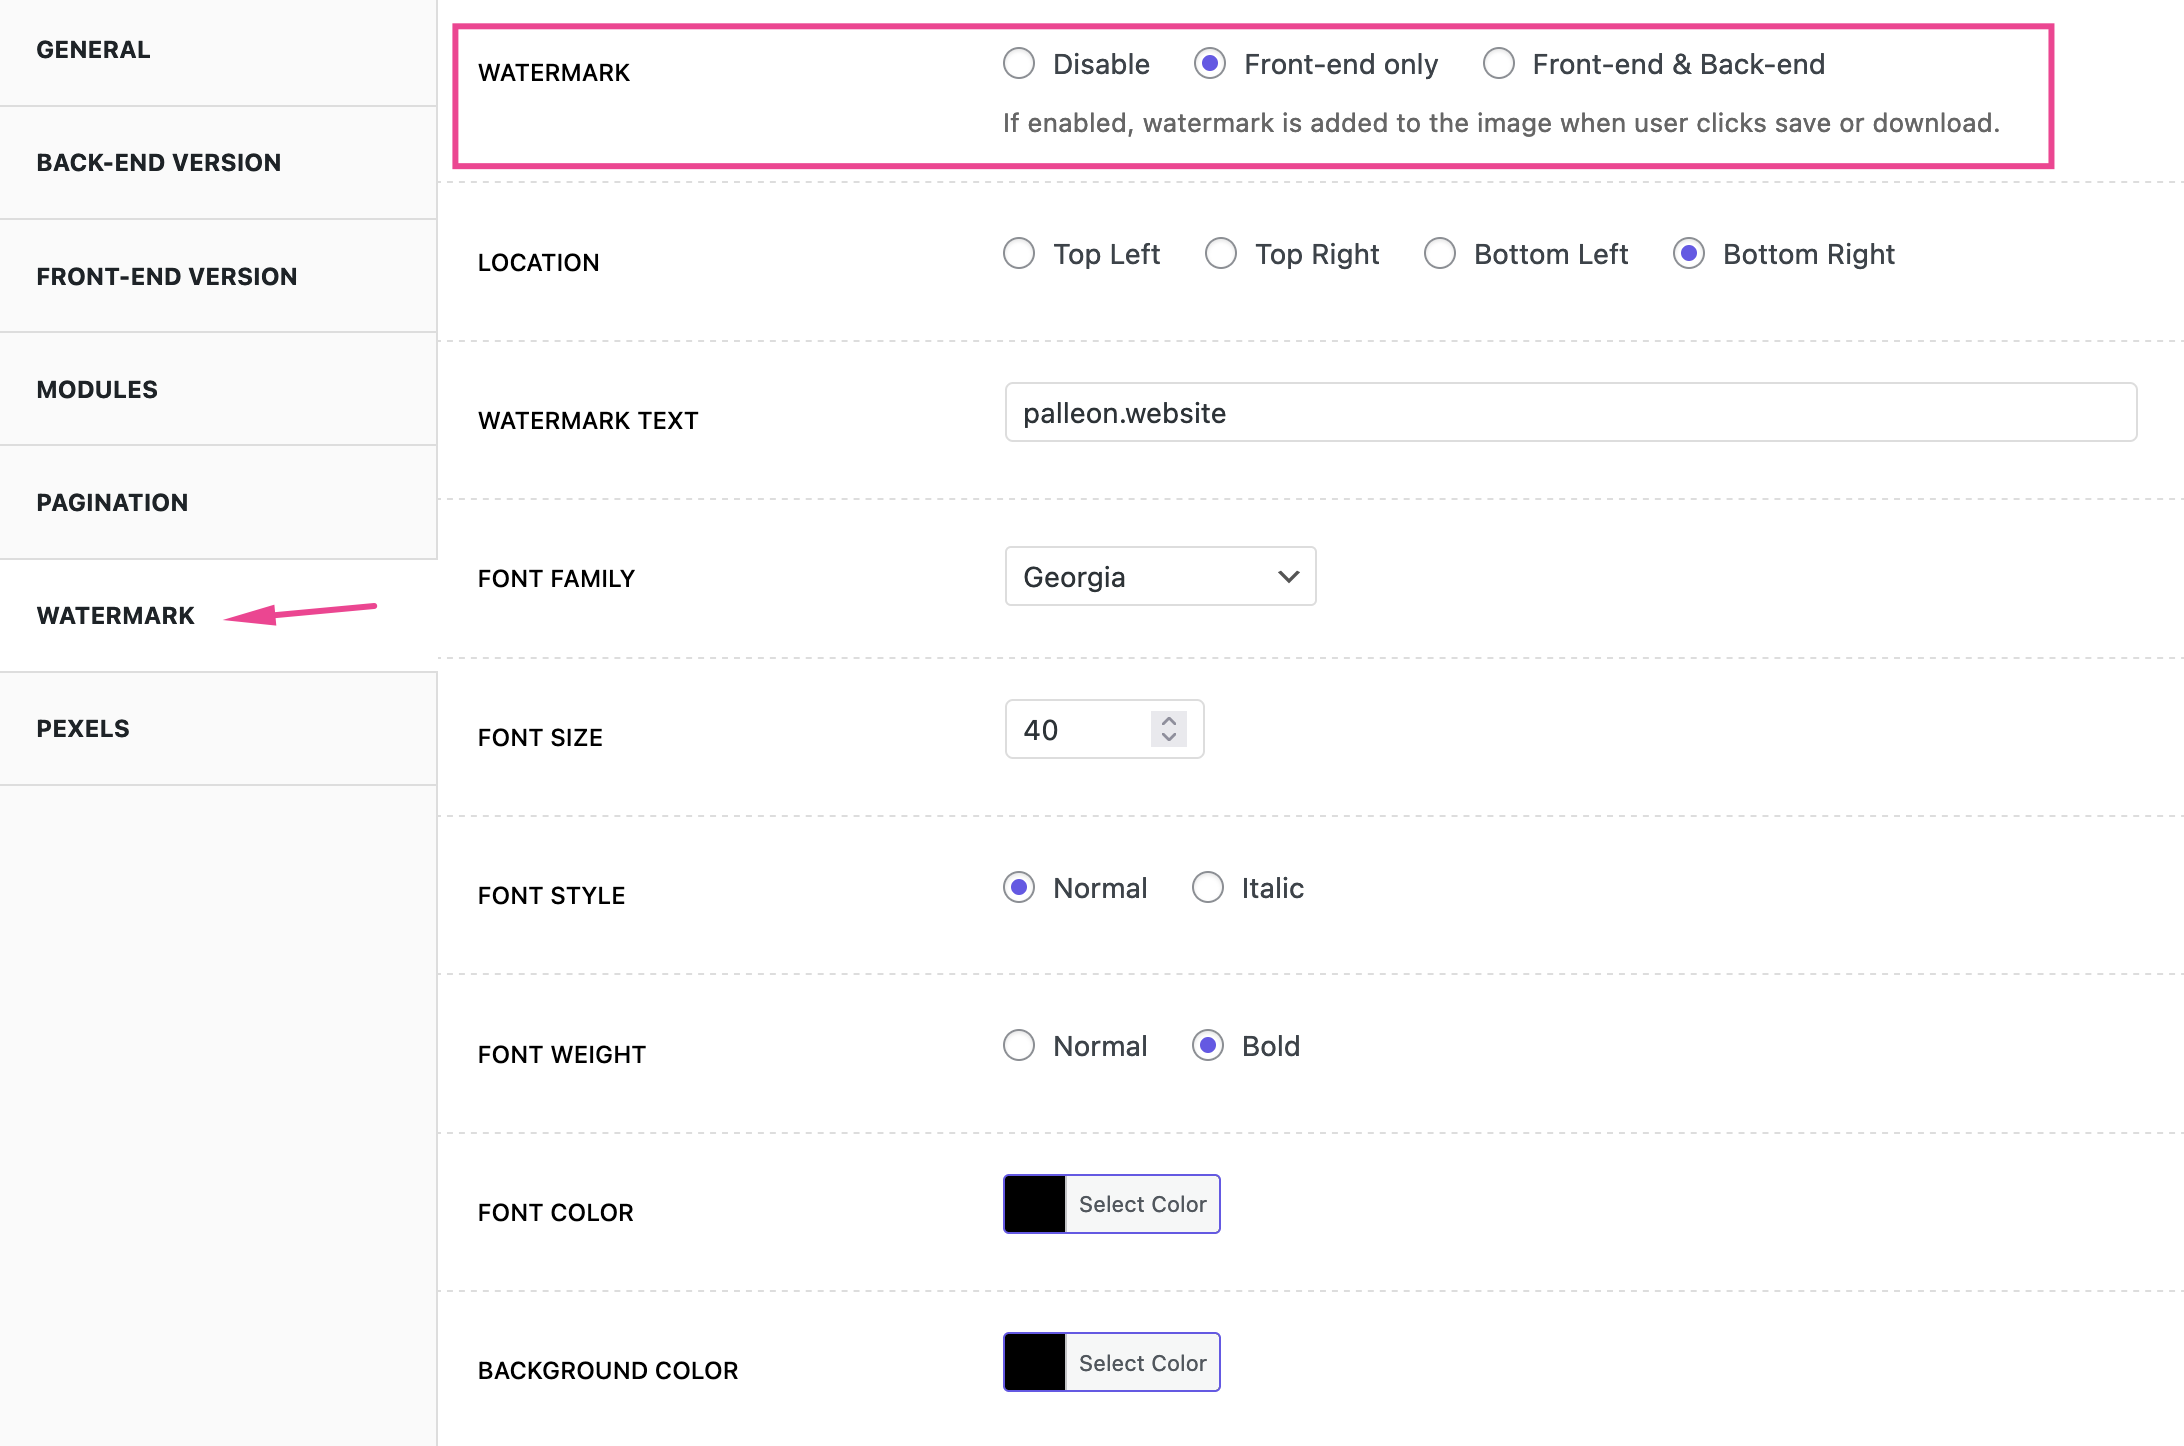
Can I watermark images?
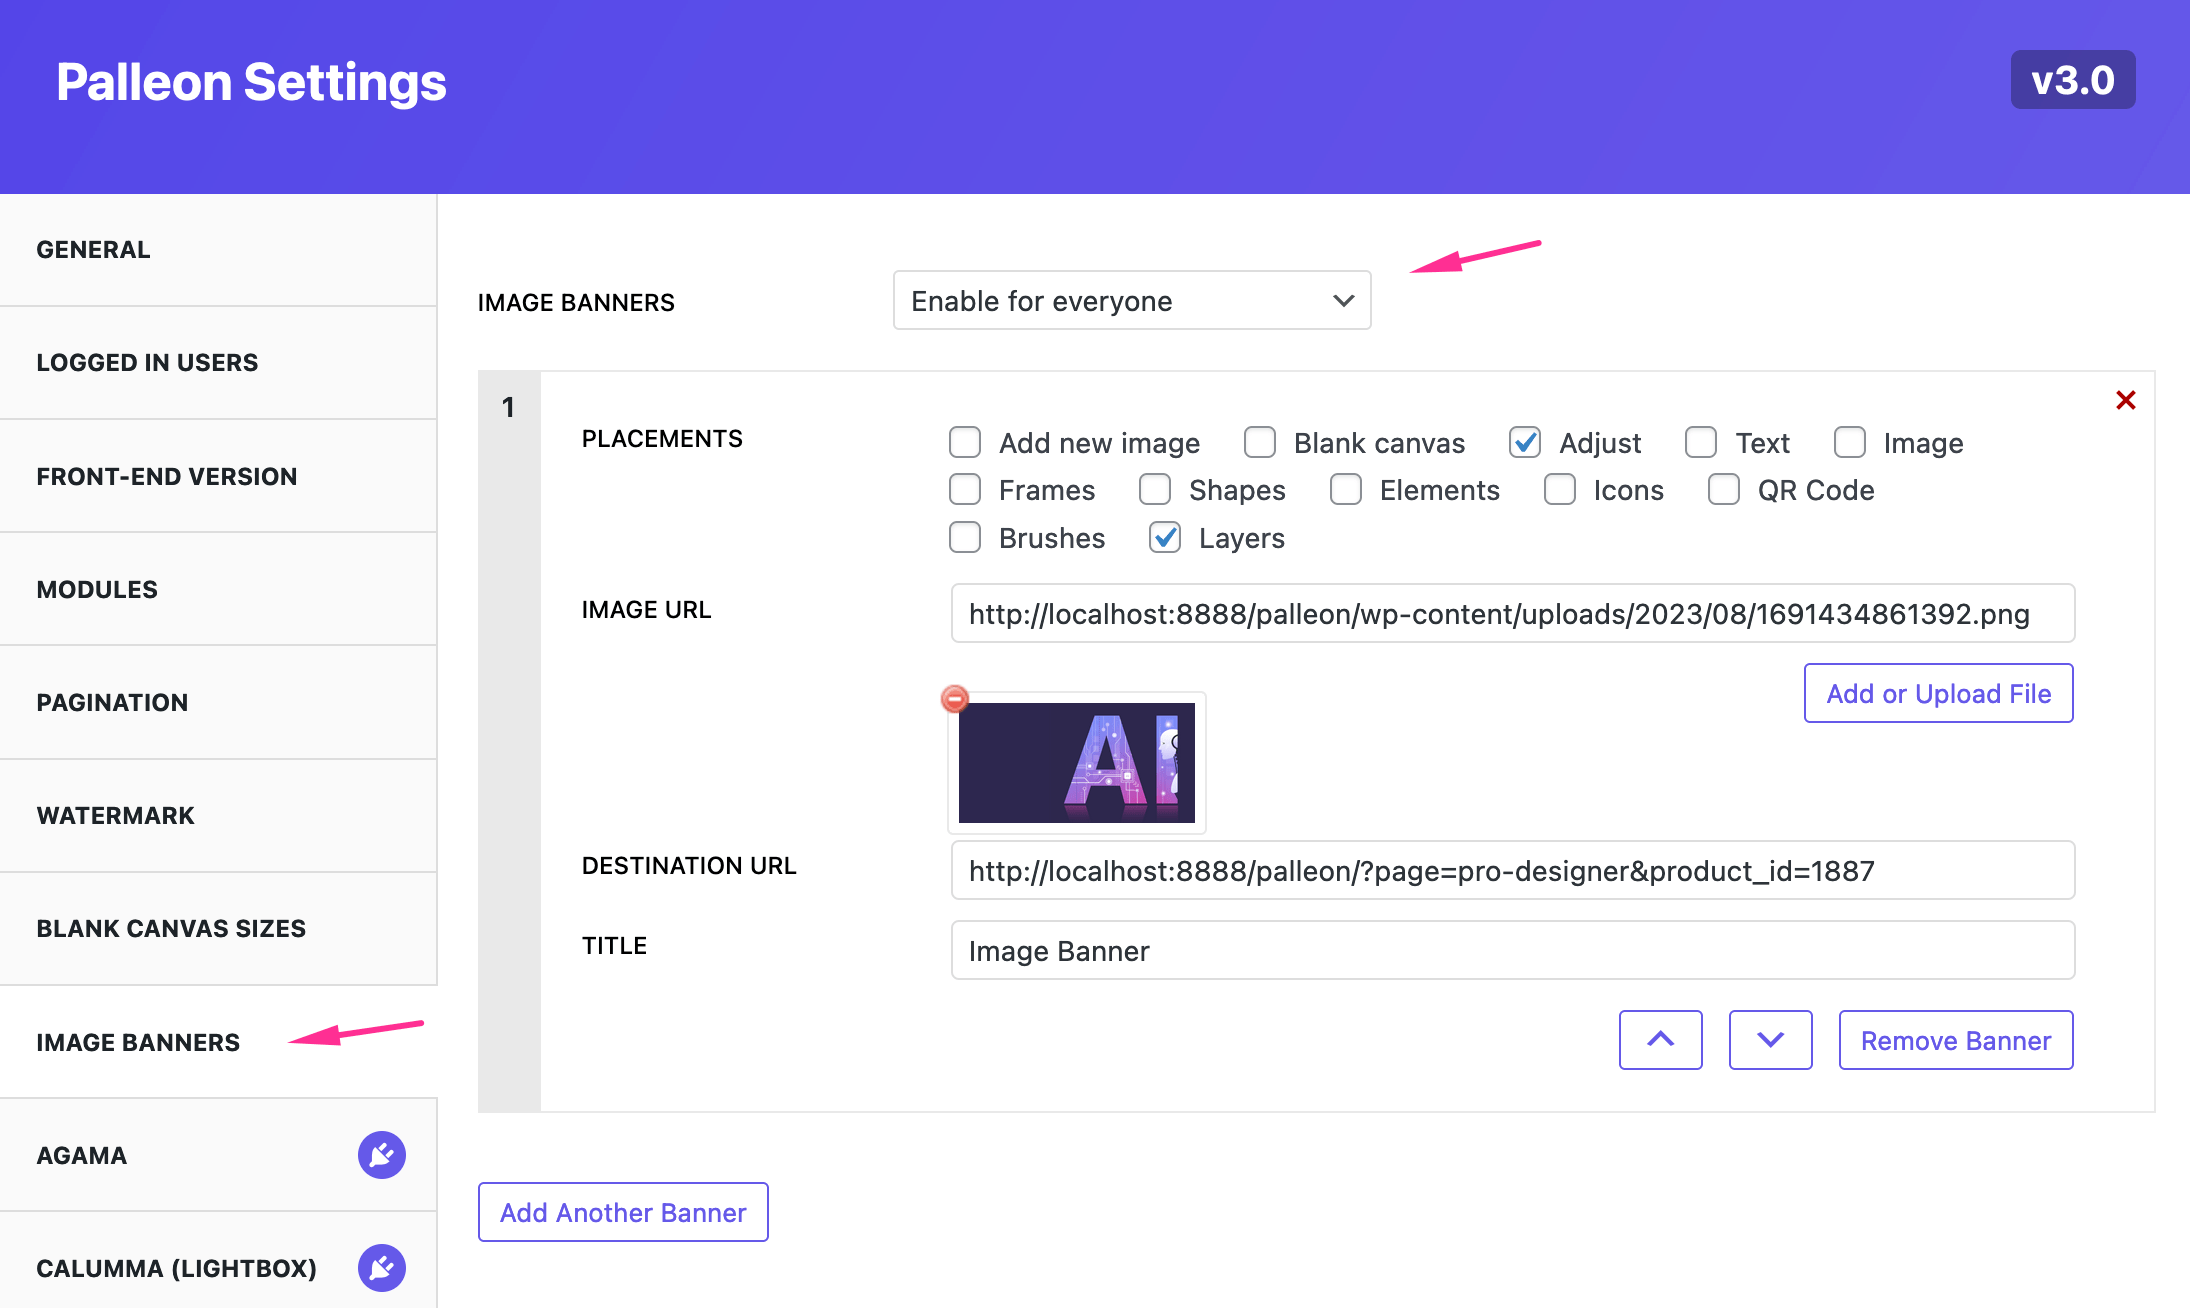
Can I add banner ads?
Yes, you can add image banners to the available fields from plugin settings. Image banner fields are compatible with the membership plugins. You can select membership levels which will use Palleon without ads from plugin settings.
Note: If you add more than one banner in the same area, they will be displayed randomly.
How can I add custom fonts?
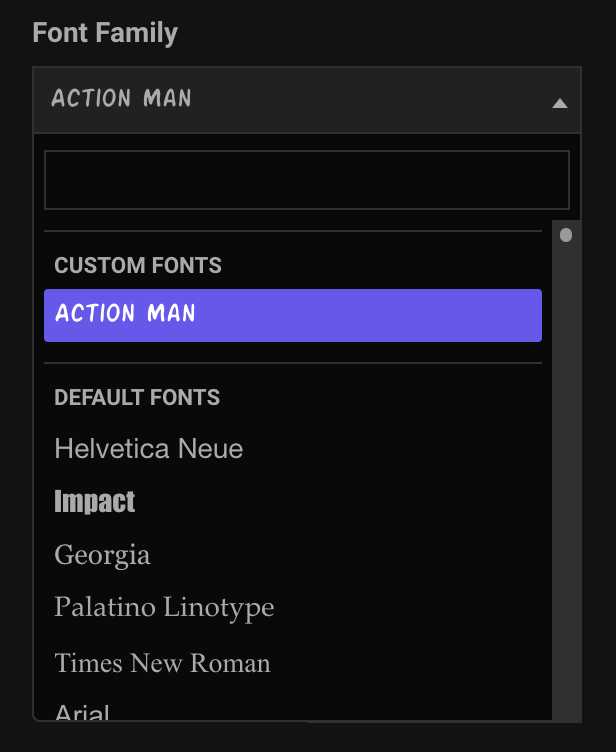
Palleon comes with hundreds of Google Fonts. If you still want to add more fonts, you can use the Custom Fonts plugin;
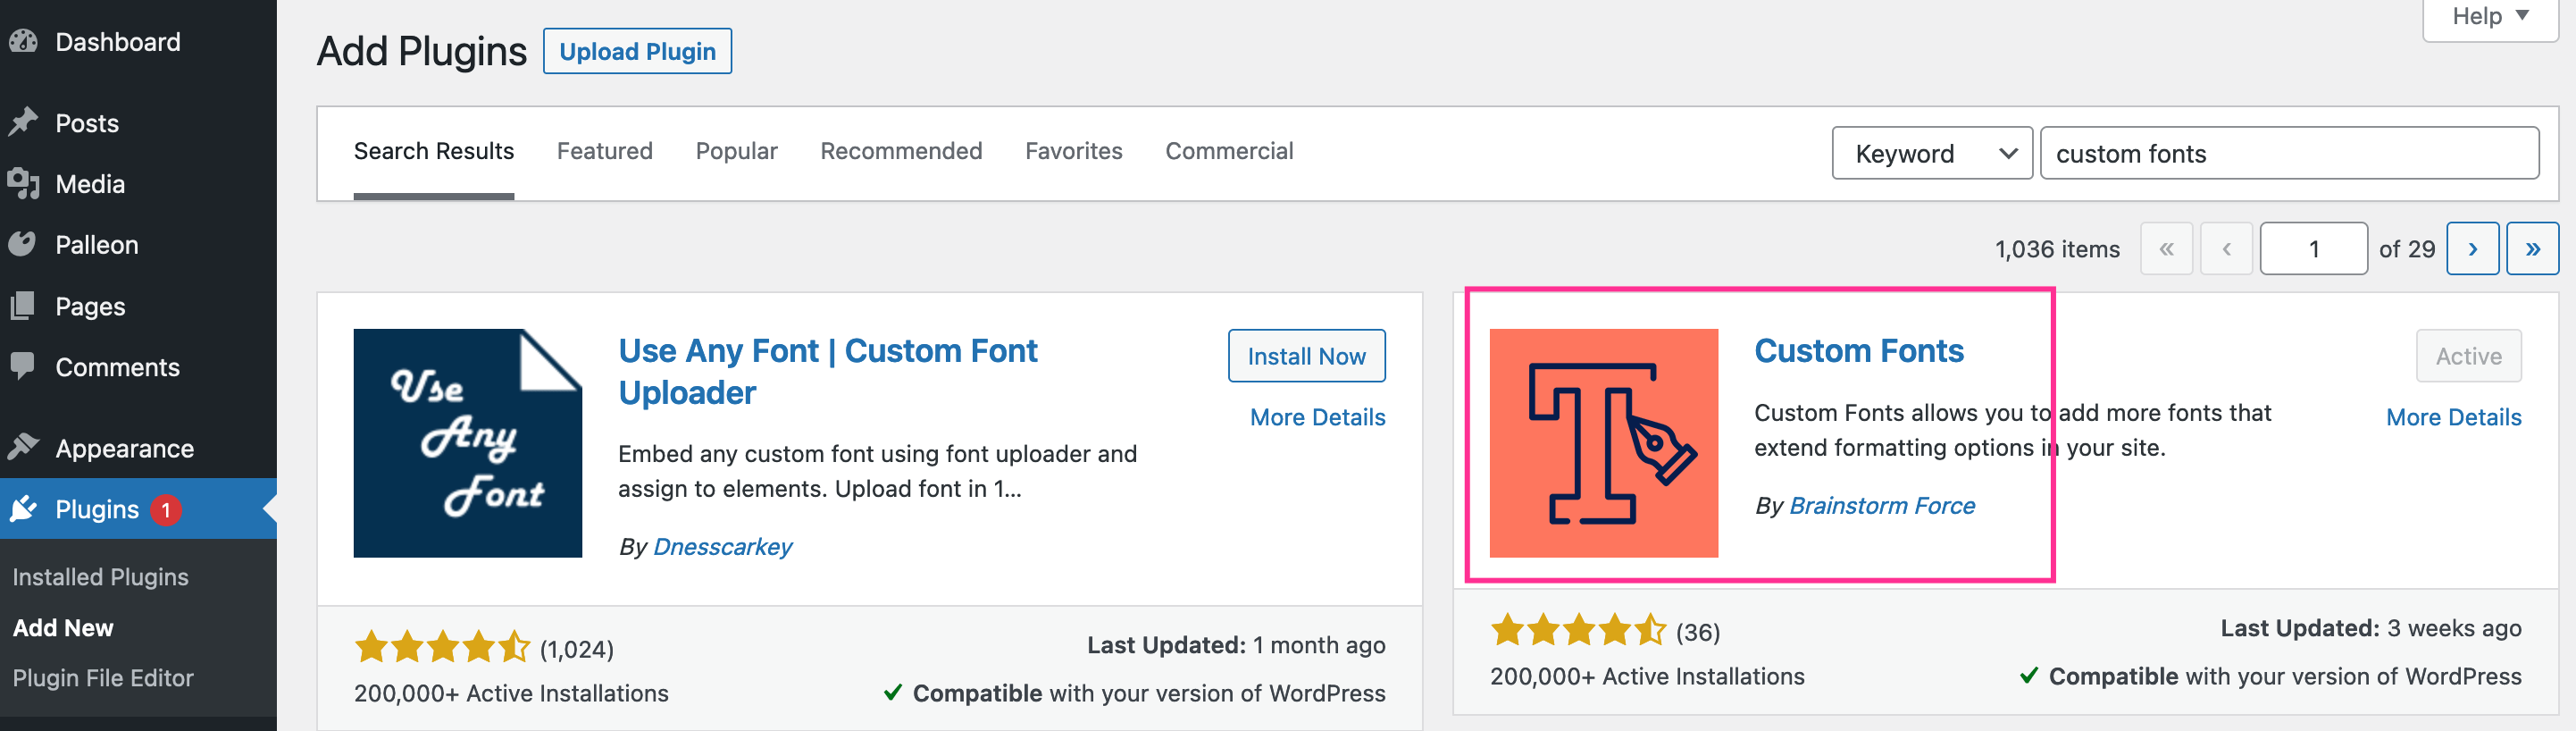
After the plugin activation, go to Appearance->Custom Fonts and click "Add New Font" button. Then, enter a font name, upload your font files and save the new font.
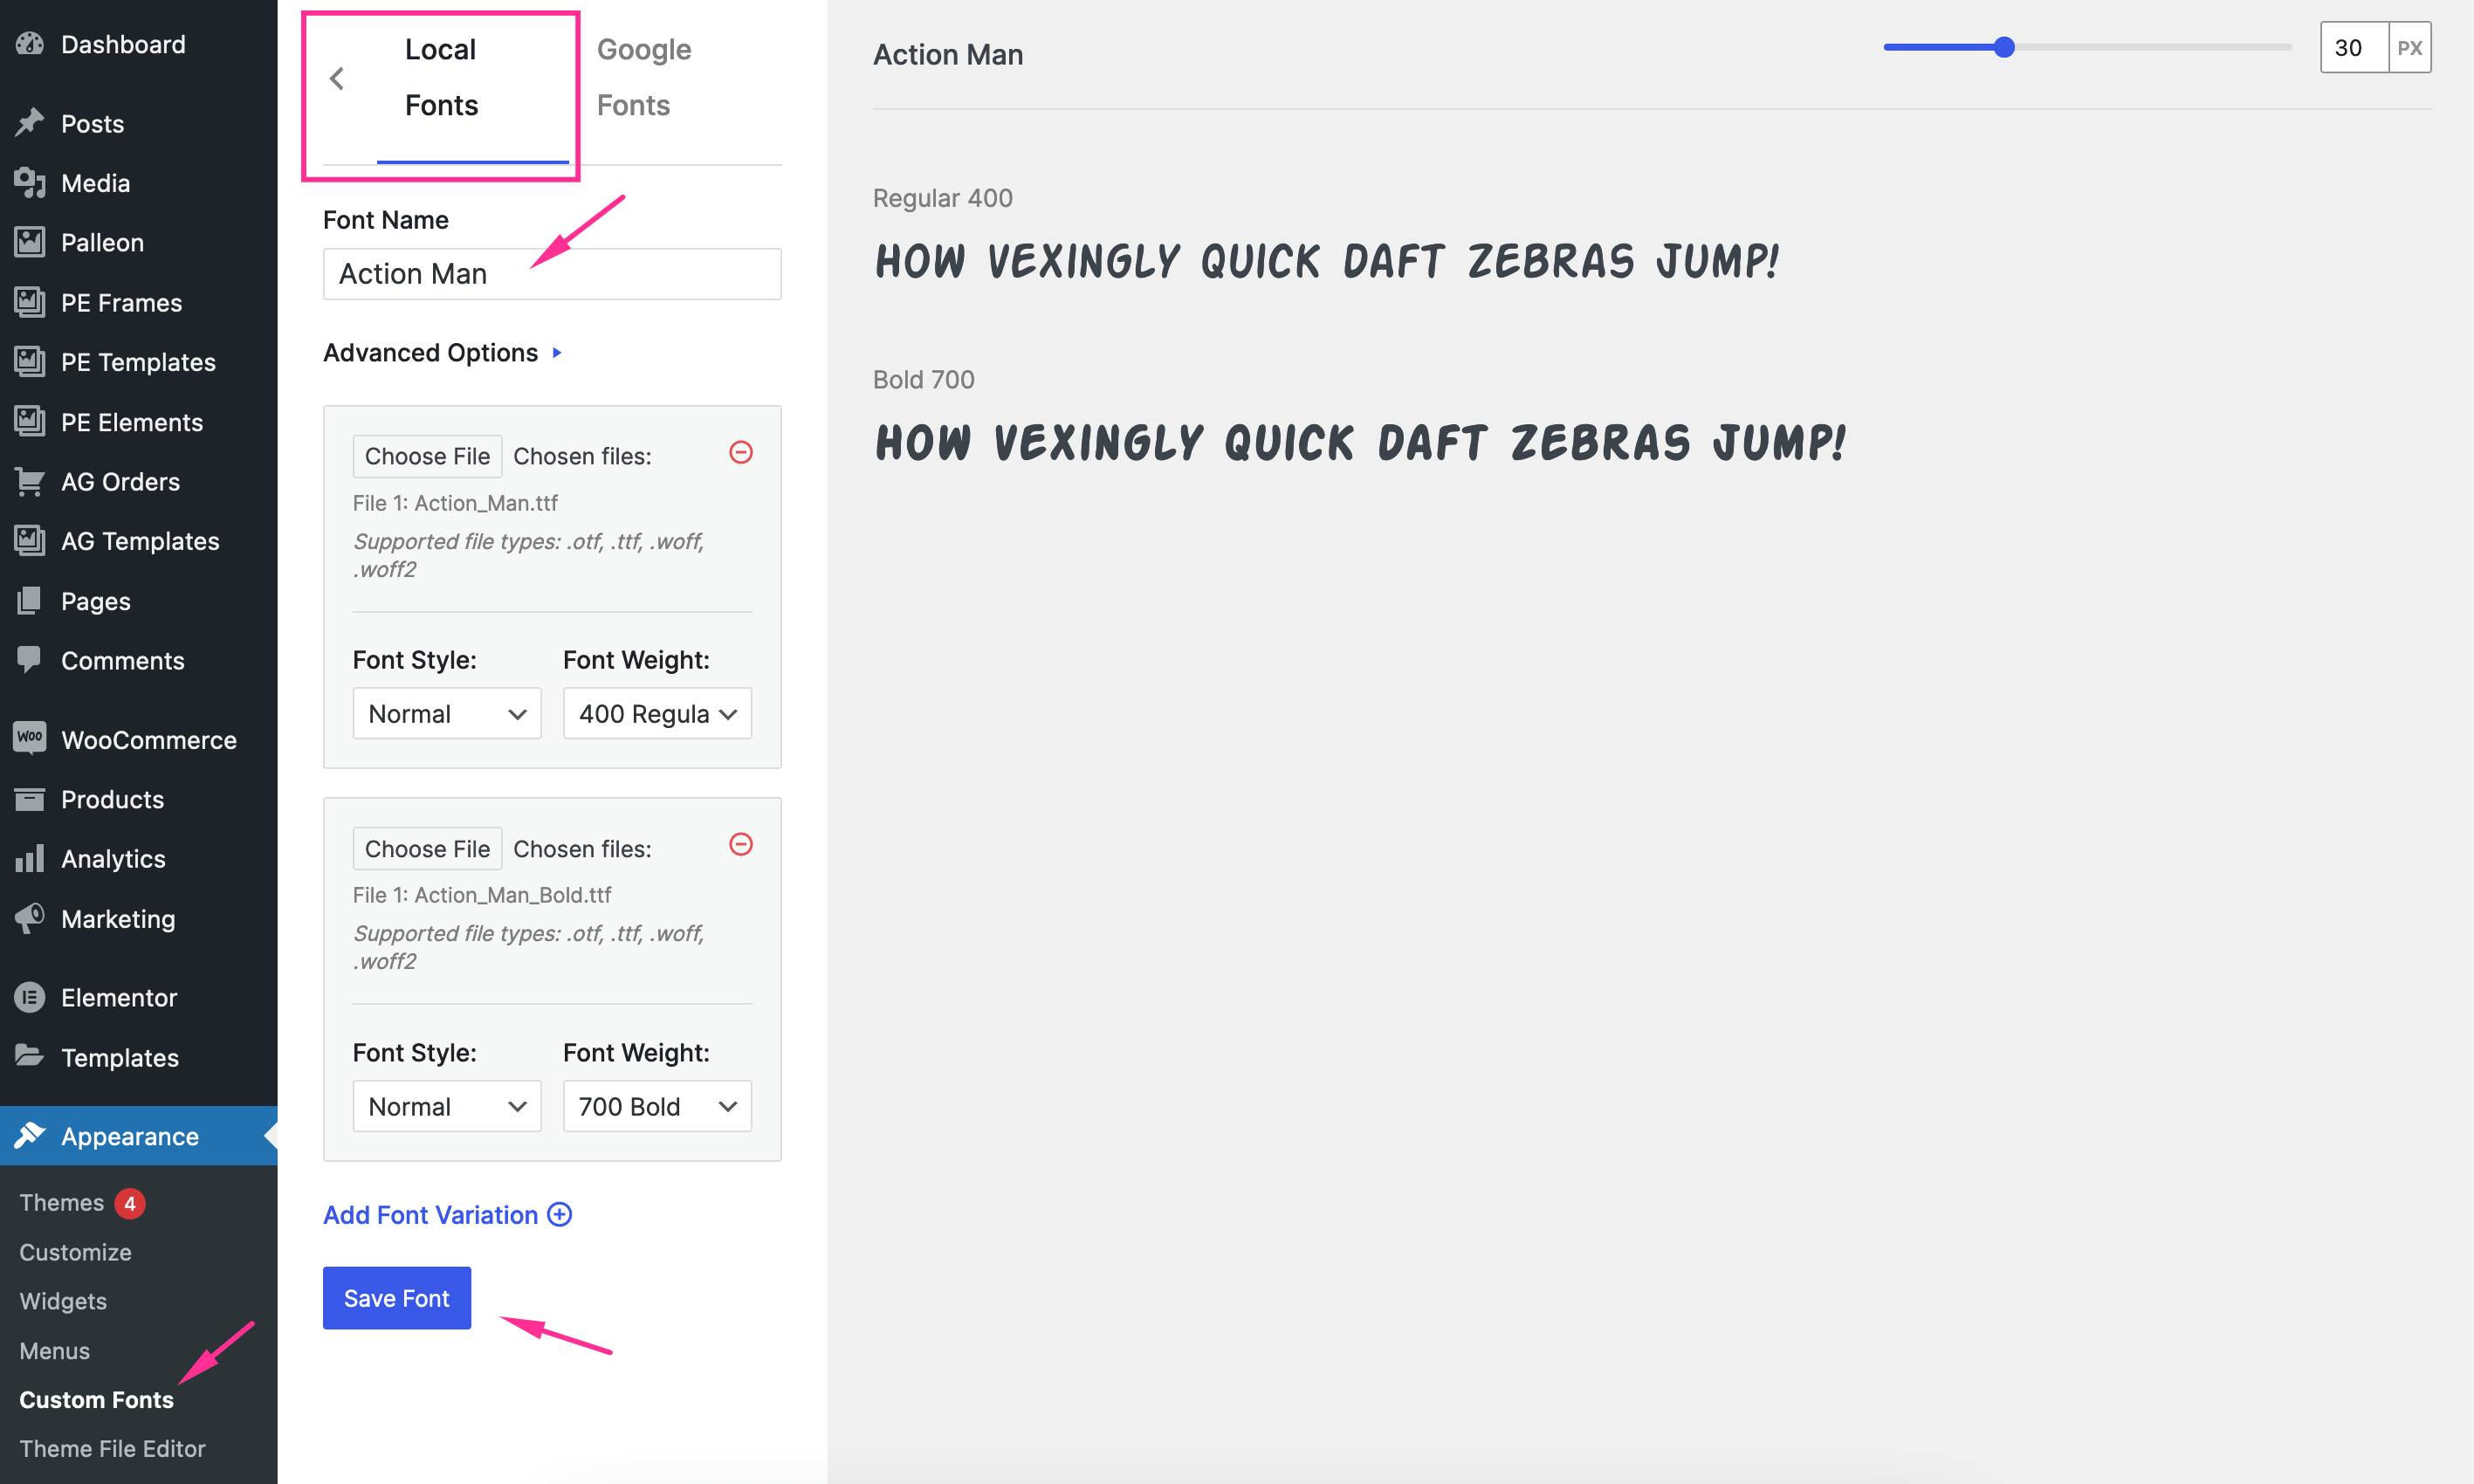
Tip: You can use an online tool to convert your font file to various formats. For example; Font Squirrel
Developer
How can I add templates to the template library?
First, create a category for your templates using the following filter. Category ID (your-category) must be unique;
function add_my_category($tags) {
    $tags['your-category'] = 'Your Category';
    return $tags;
}
add_filter( 'palleonTemplateTags', 'add_my_category', 99, 2 );
After adding the category, you can add your templates using the following filter;
function add_my_templates($templates) {
    $templates[] = array("UNIQUE_ID", "TITLE", "THUMBNAIL_URL", "TEMPLATE_URL", array('your-category'), "VERSION", "IMAGE_URL");
    return $templates;
}

add_filter( 'palleonTemplates', 'add_my_templates', 99, 2 );
UNIQUE_ID: This must be a unique value. For example, you can use "palleon" as a prefix and add an unique number after that; palleon-1, palleon-2 … etc.
TITLE: Enter your template title here.
THUMBNAIL_URL: Enter url of your thumbnail image (.jpg or .png) here. The thumbnail should be square.
TEMPLATE_URL: Enter url of the JSON file here.
CATEGORY: Category must be an array. For example; array('your-category')
VERSION: Valid values are "free" and "pro".
THUMBNAIL_URL: Enter url of your large image (.jpg or .png) here.
How can I add my custom codes/files?
You can use following functions to add your codes to specific points on the photo editor;
palleon_head
You can use this action to add your custom codes into head tag. For example;
function my_head_function() {
    echo '<link href="MY_CSS_FILE_URL" rel="stylesheet">';
}
add_action('palleon_head', 'my_head_function', 99, 2);
palleon_body_start
You can use this action to add your custom codes after body starts. For example;
function my_body_start_function() {
    echo '<div class="alert">My message...</div>';
}
add_action('palleon_body_start', 'my_body_start_function', 99, 2);
palleon_body_end
You can use this action to add your custom codes before body ends. For example;
function my_body_end_function() {
    echo '<script src="MY_JS_FILE_URL"></script>';
}
add_action('palleon_body_end', 'my_body_end_function', 99, 2);
Need a Customization?
