Installation
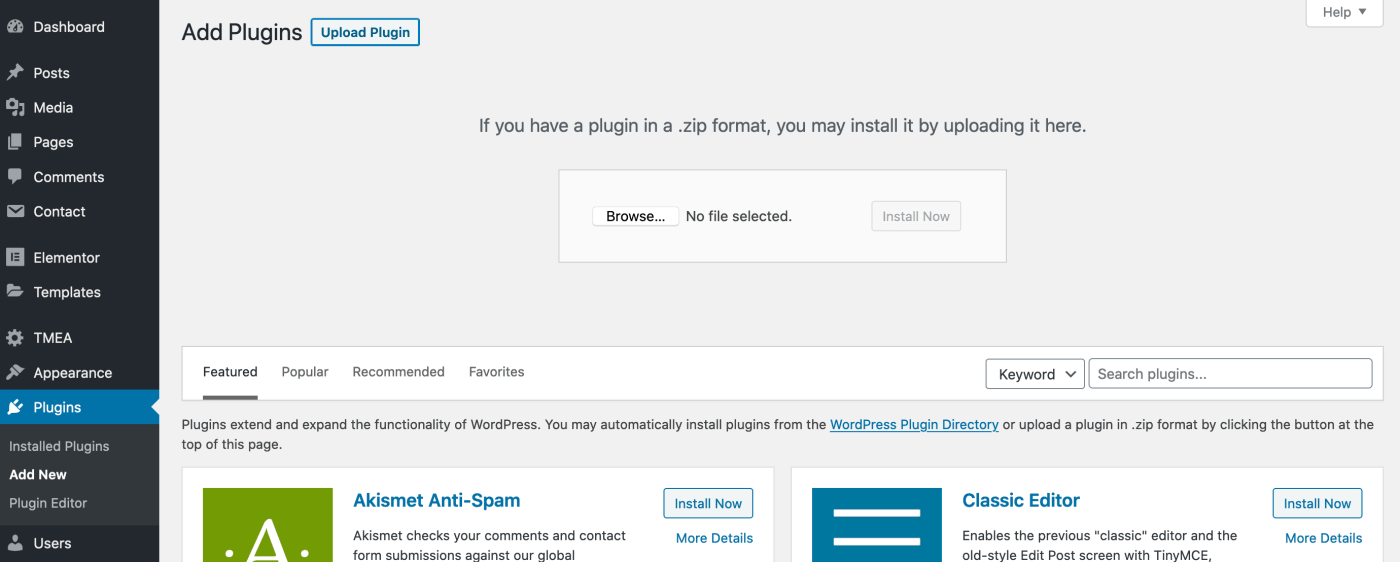
The first thing you need to do when you want to install a new WordPress plugin is to login to your site admin page. Once there, go to Plugins -> Add New. Click "Upload Plugin" button and upload the zip file from your local hard drive.
Maximum Upload File Size
Maximum Upload File Size is crucial because when the customer add the product to the cart, required files are created and uploaded to your media library. If your maximum upload file size limit is low, a server error may occurs. We recommend you to set a high maximum upload size to not have any issue.
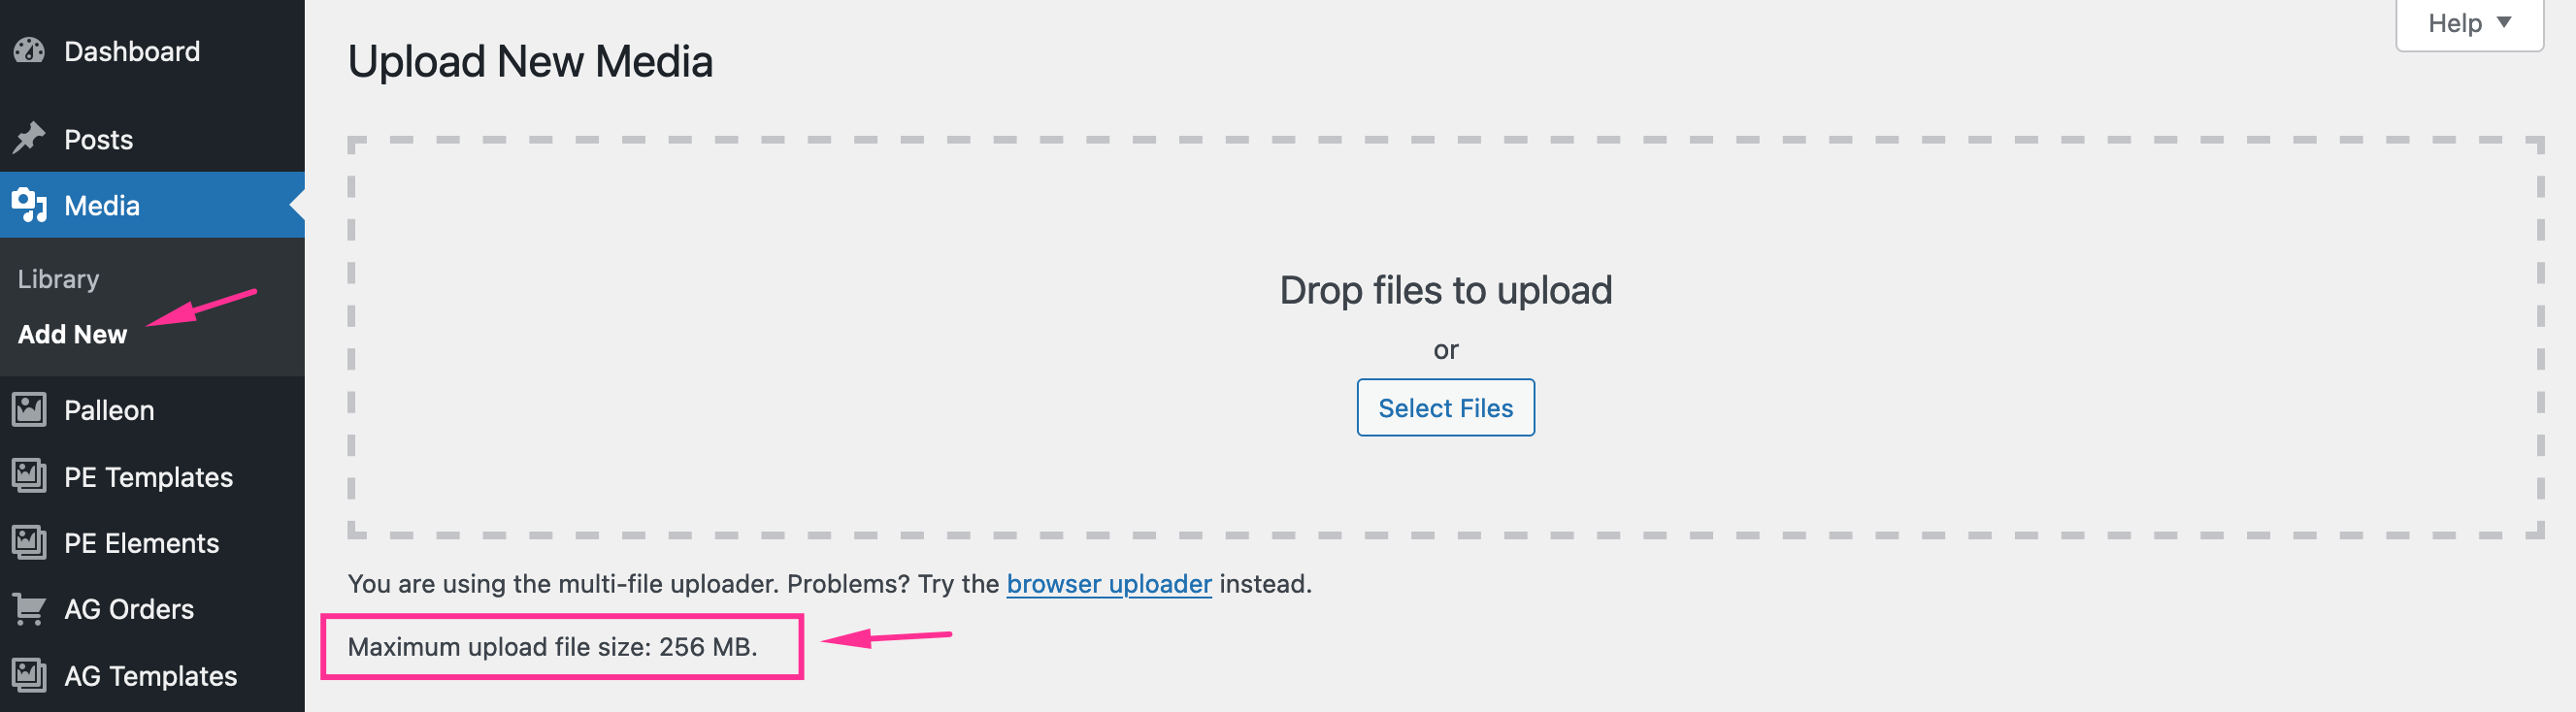
You can find lots of article about how to increase WordPress maximum upload file size on Google. For example; Click here...
Import Demo
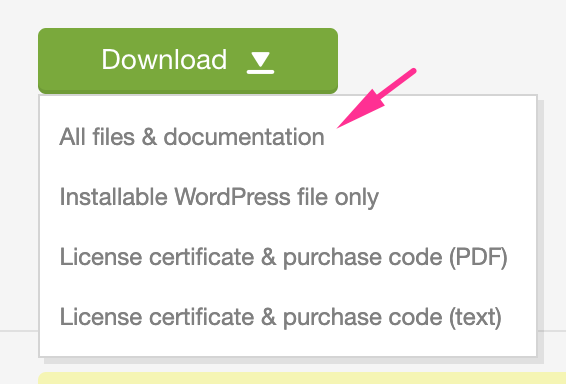
Download "all files" from your Codecanyon account.
Extract the zip file. You will see "demo-files" folder. Open it.
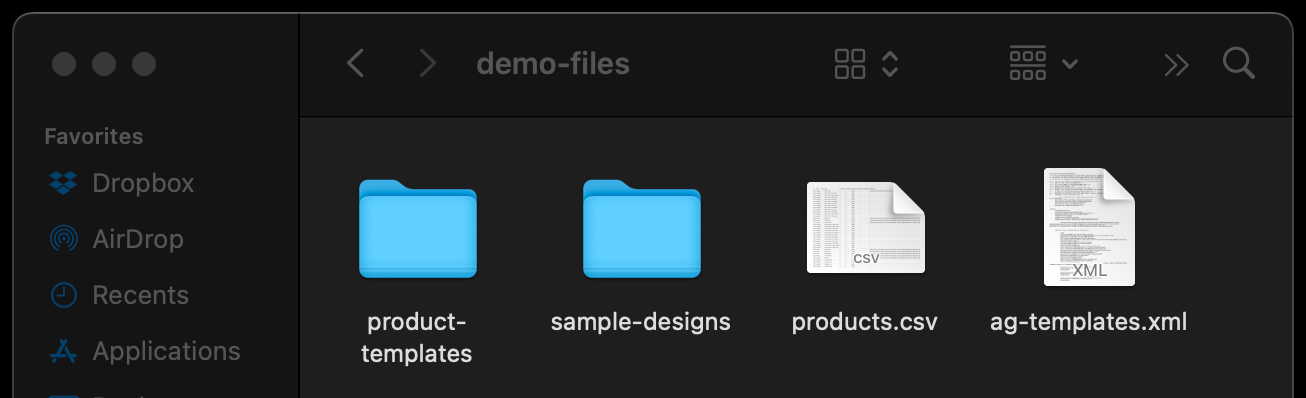
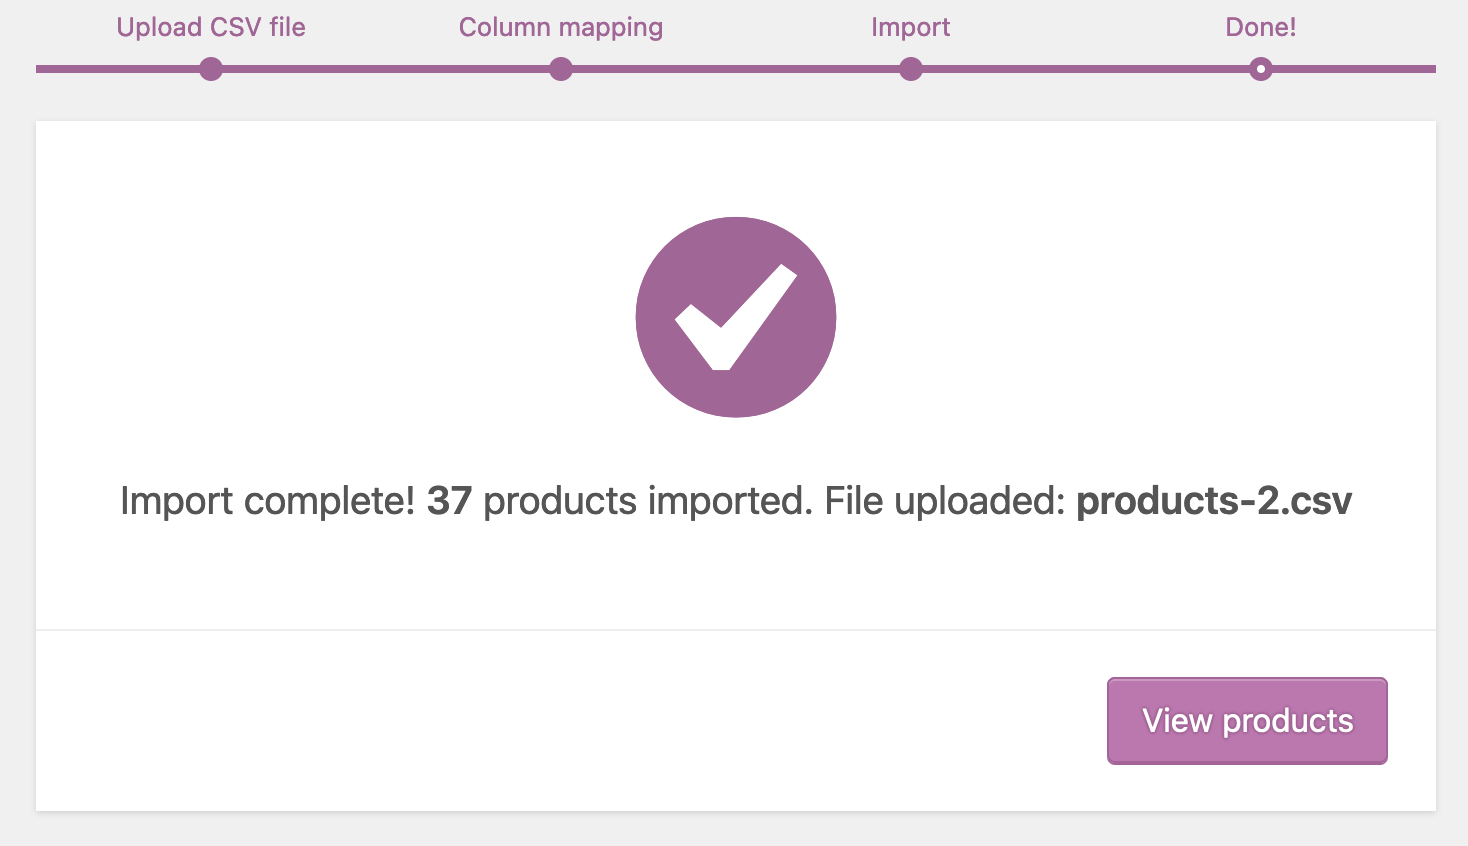
1) products.csv
If you don't want to start from scratch, you can import the products seen on our demo store to your site.
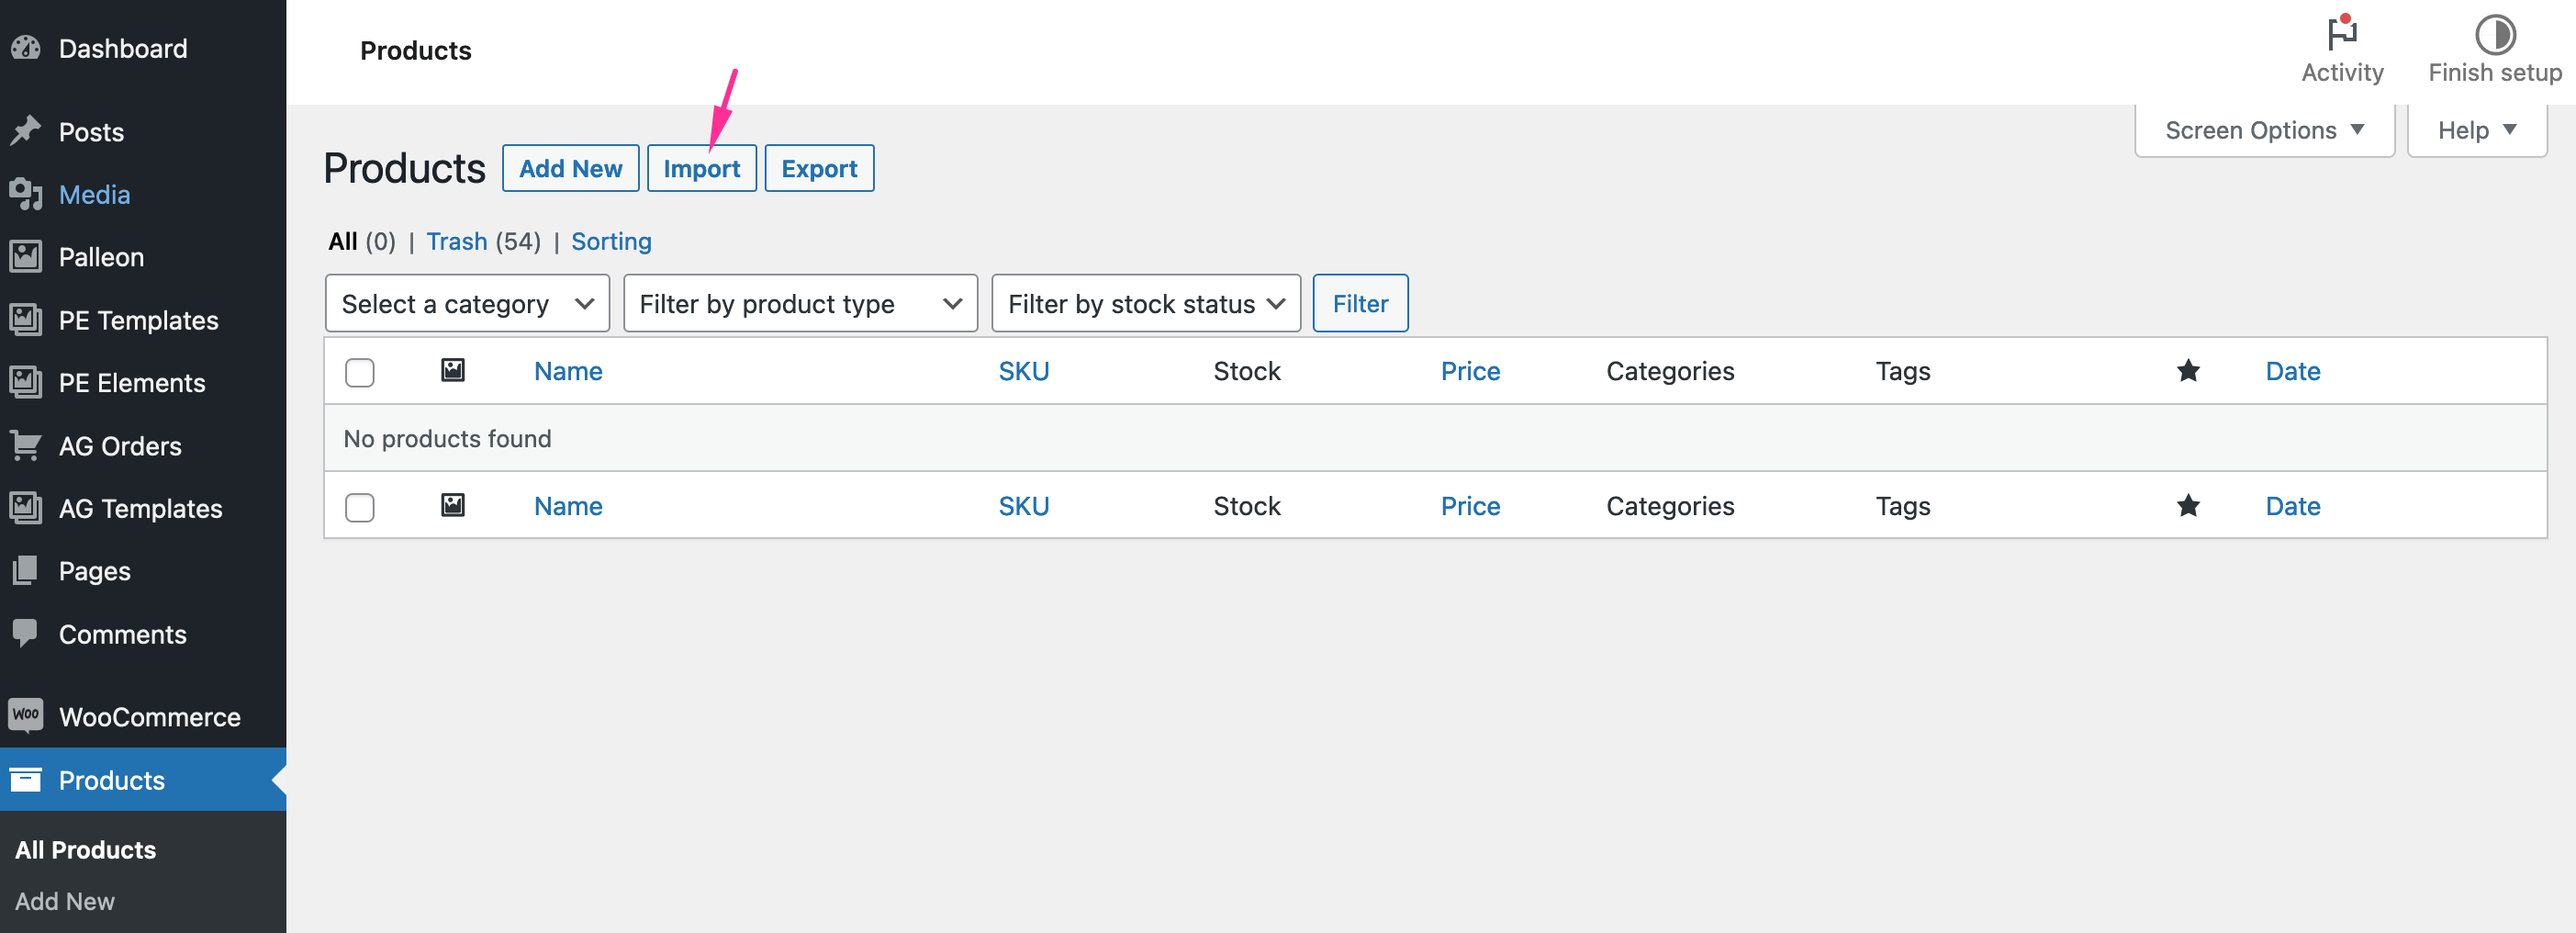

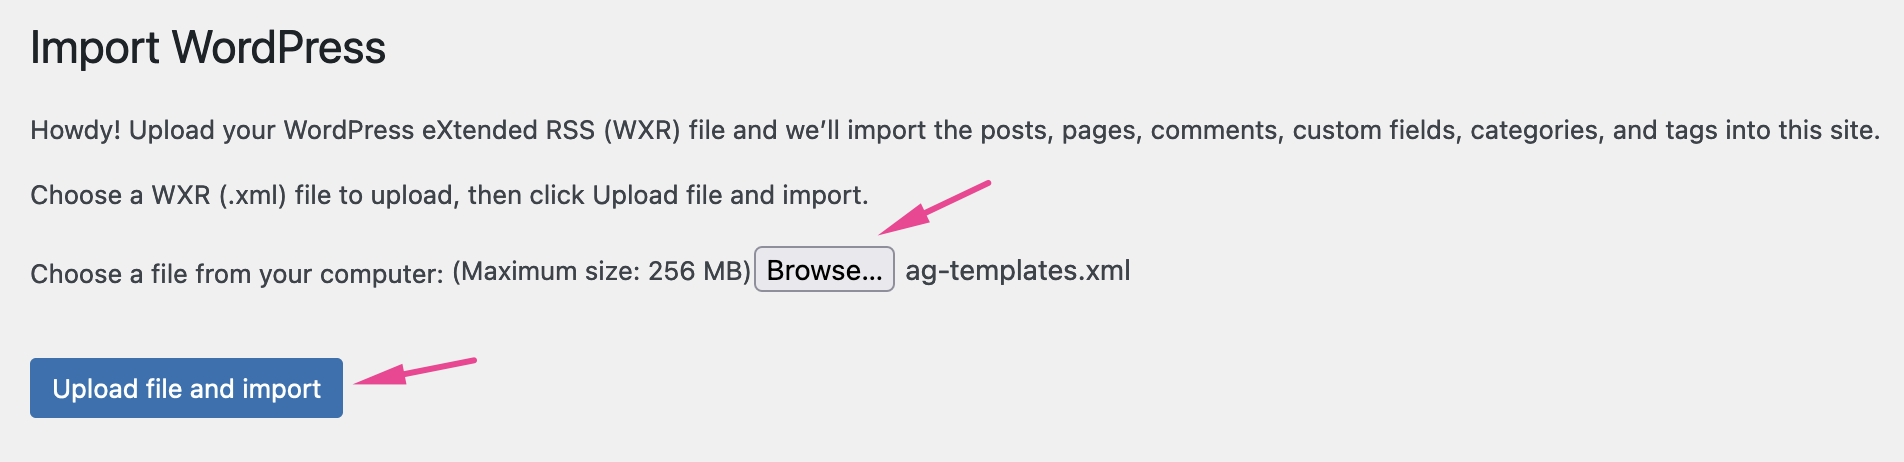
2) ag-templates.xml
You can create your own templates using Palleon but if you want to import the templates seen on our demo to your site, you can use this file.


3) Product templates and sample designs
You can upload these JSON files to Palleon individually to customize and save/download.

Settings
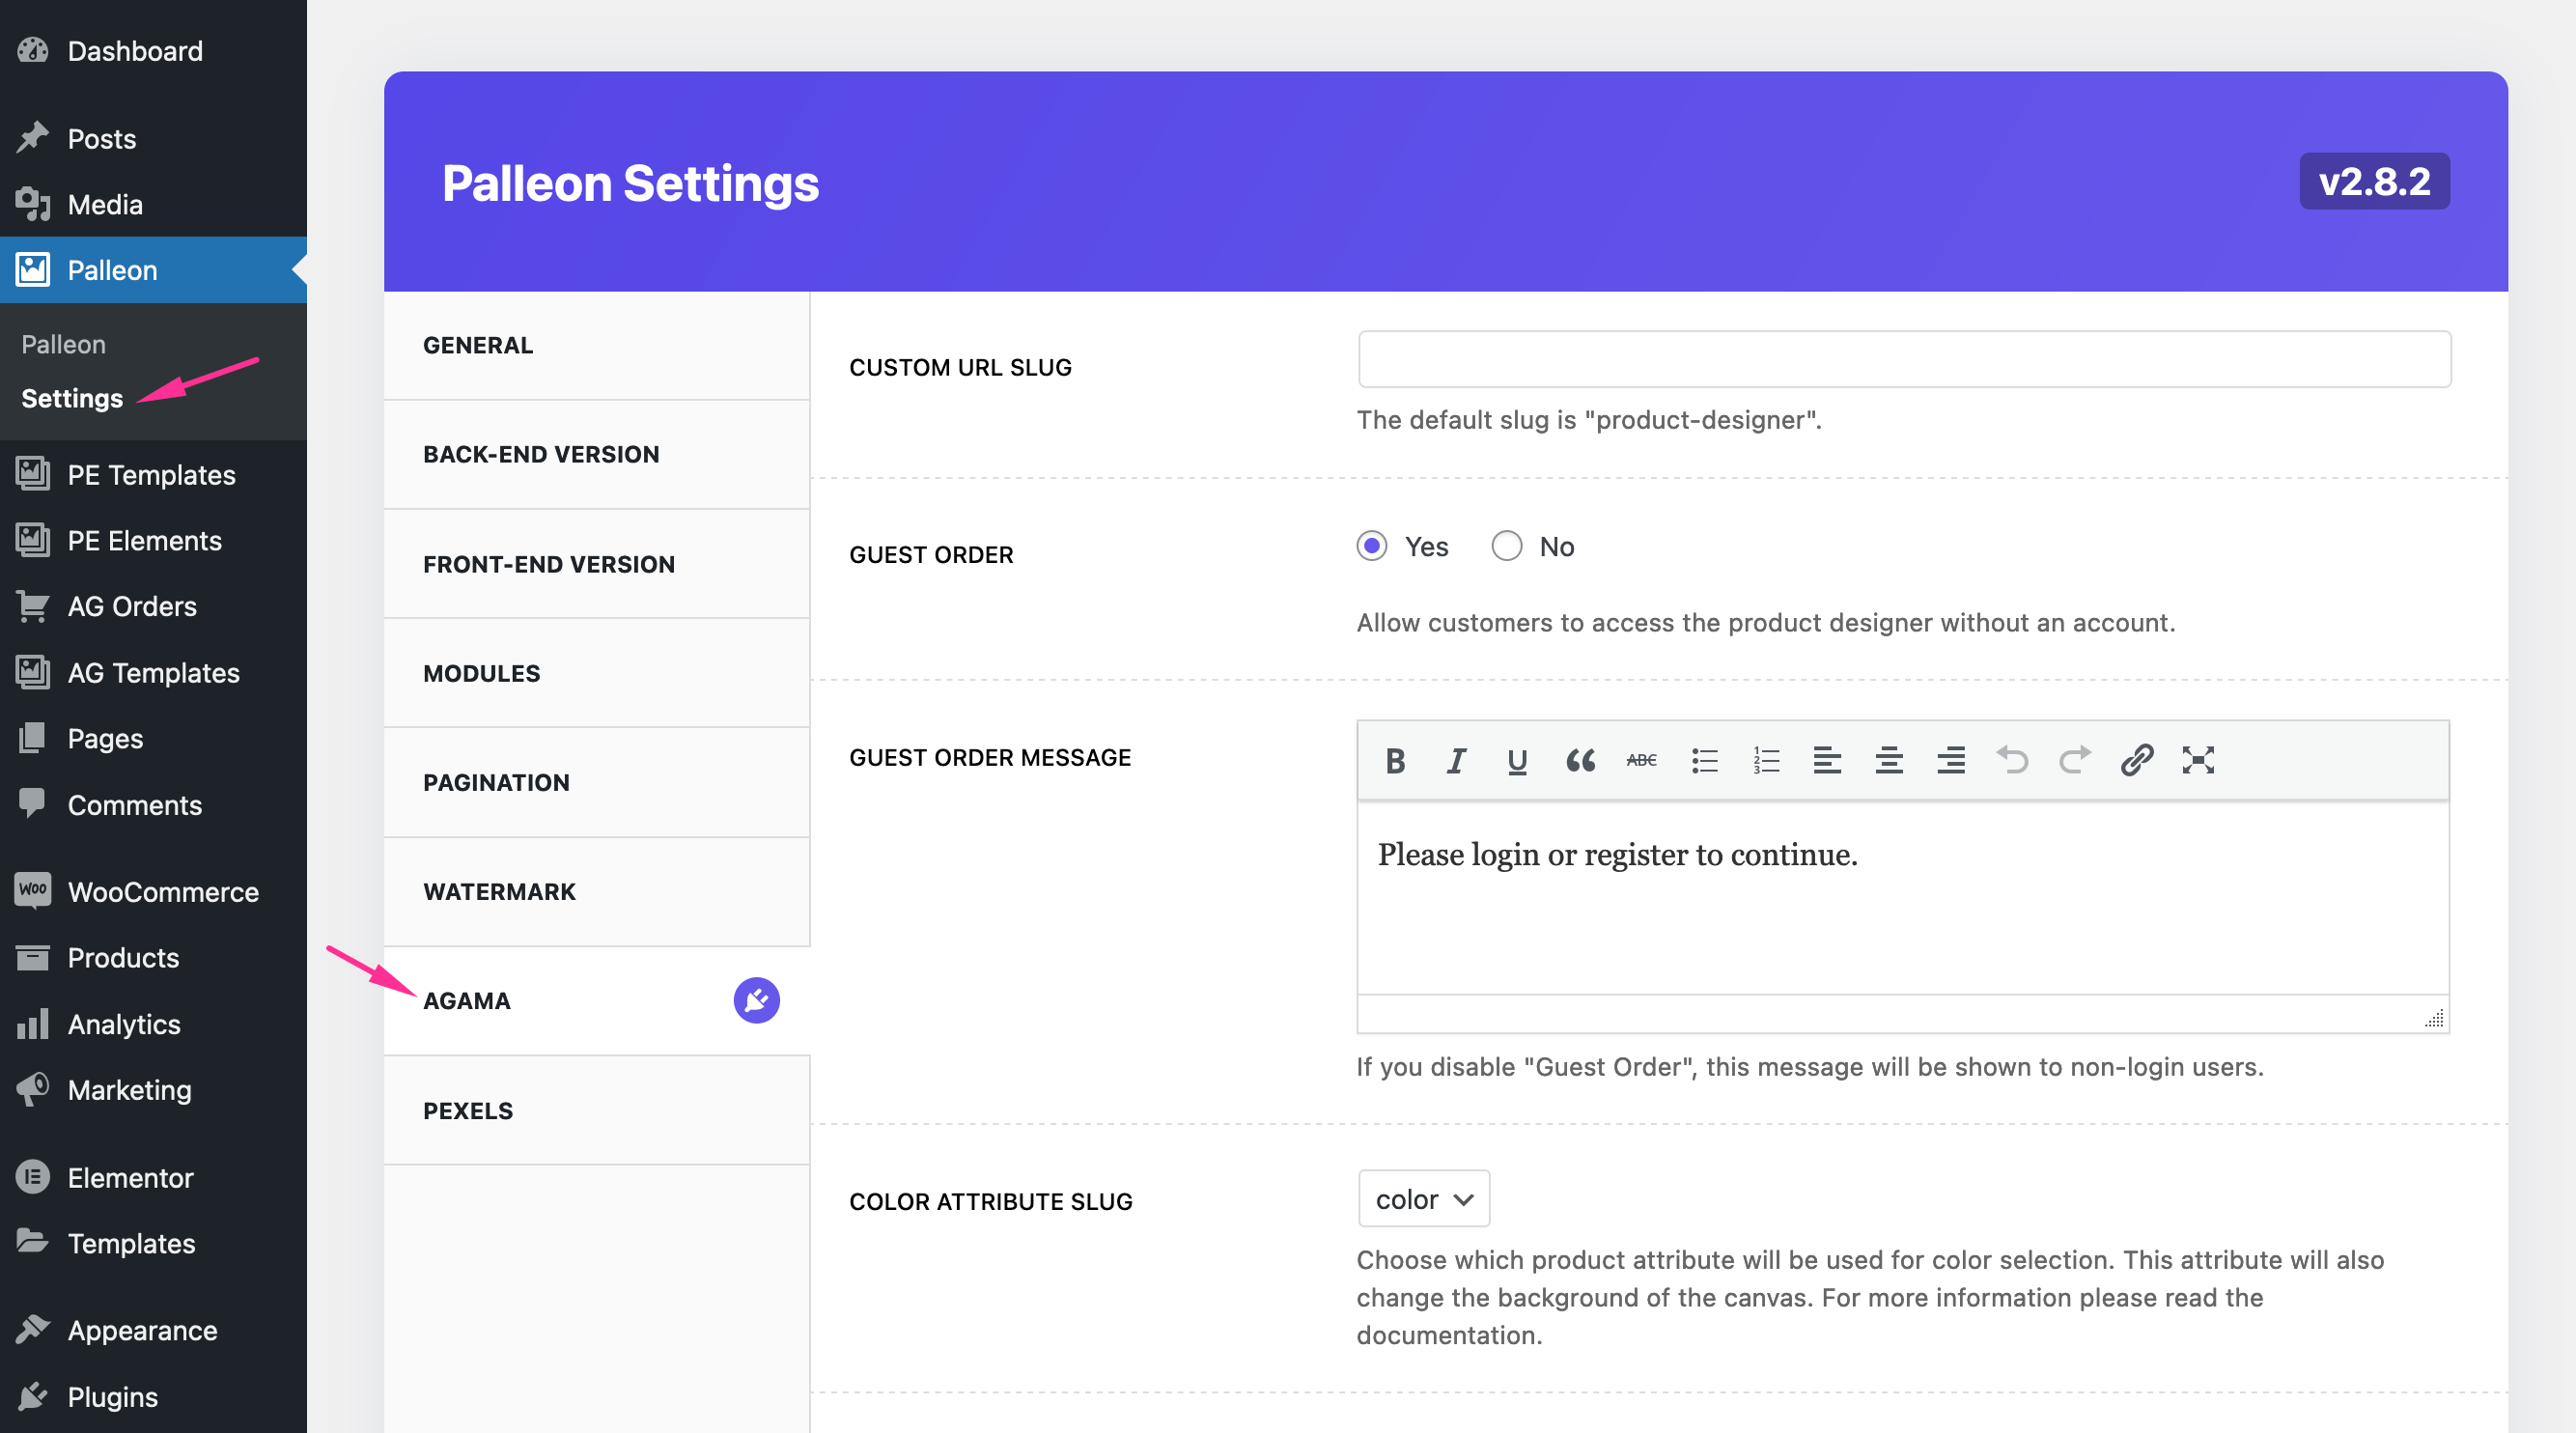
Custom URL Slug
When clicked on a customizable product, the customer is redirected to a custom url created by Agama. This URL is like the following example;
https://demo.palleon.website/?page=product-designer&product_id=1230
You can change "product-designer" part with any slug you want (Only Latin characters, digits, hyphen and underscore are allowed.)
Guest Order
Allow customers to access the product designer without login.
Guest Order Message
If you disable "Guest Order", this message will be shown to non-login users.
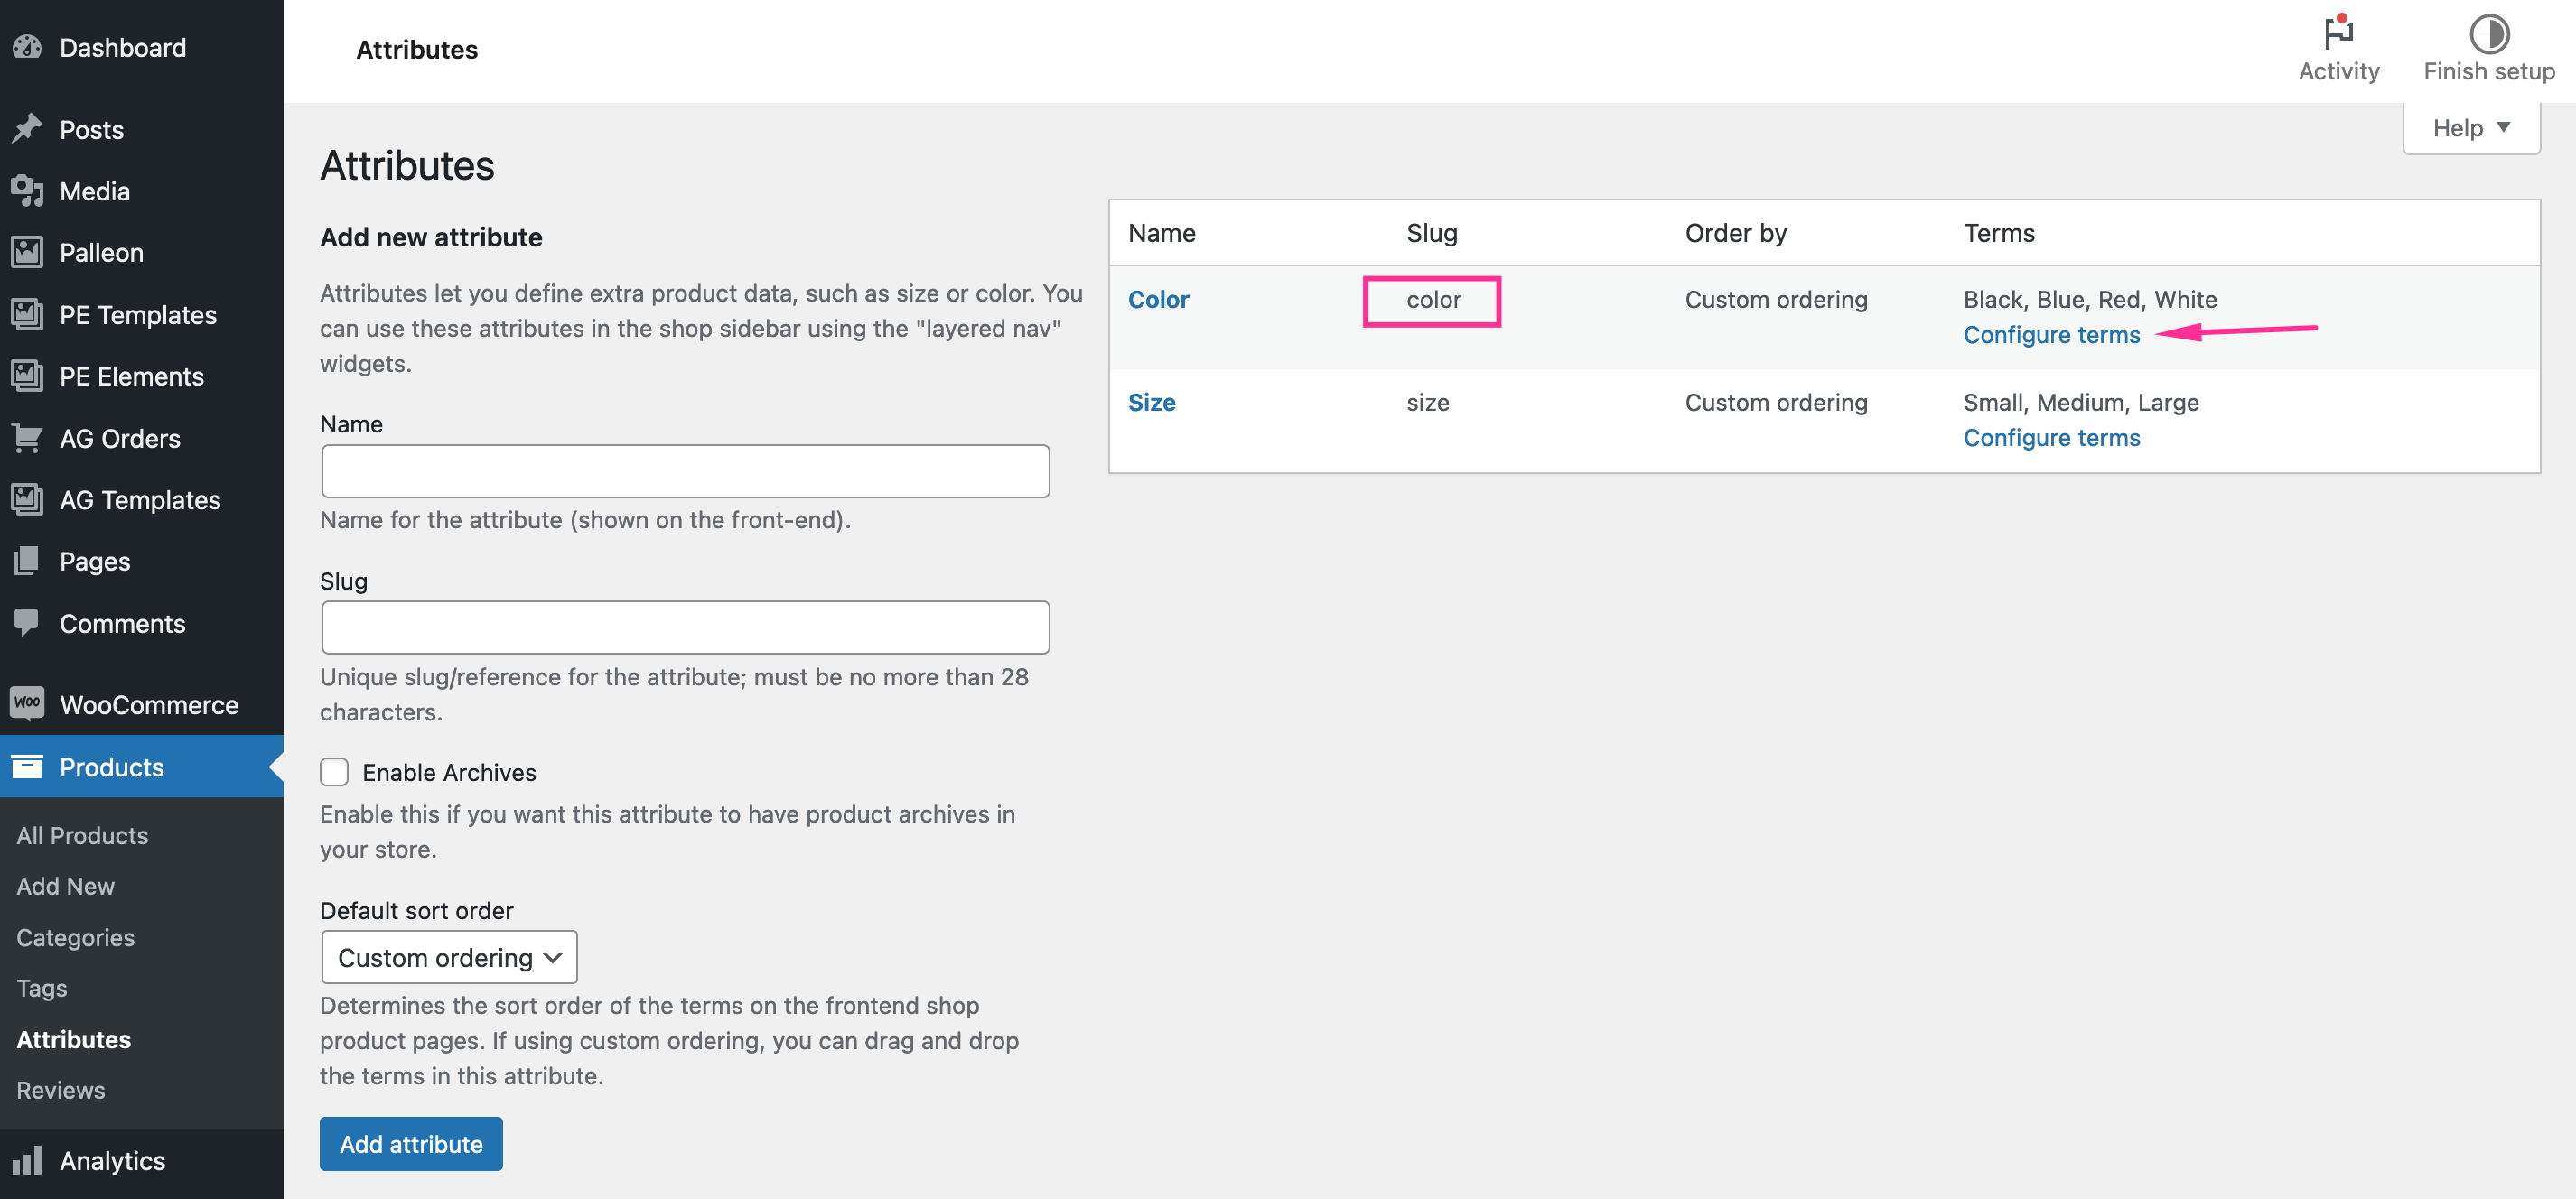
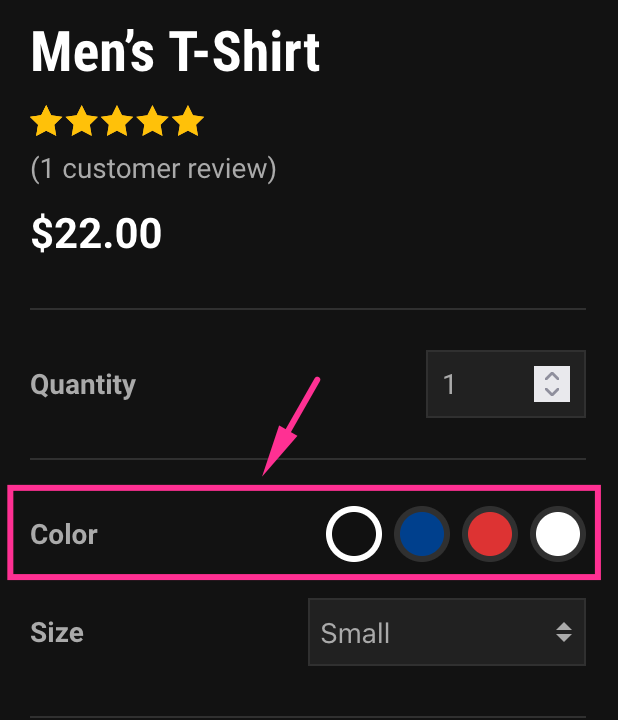
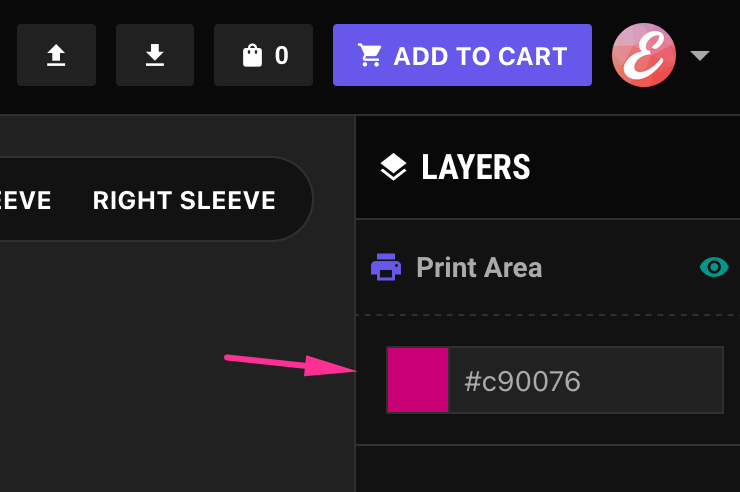
Color Attribute Slug
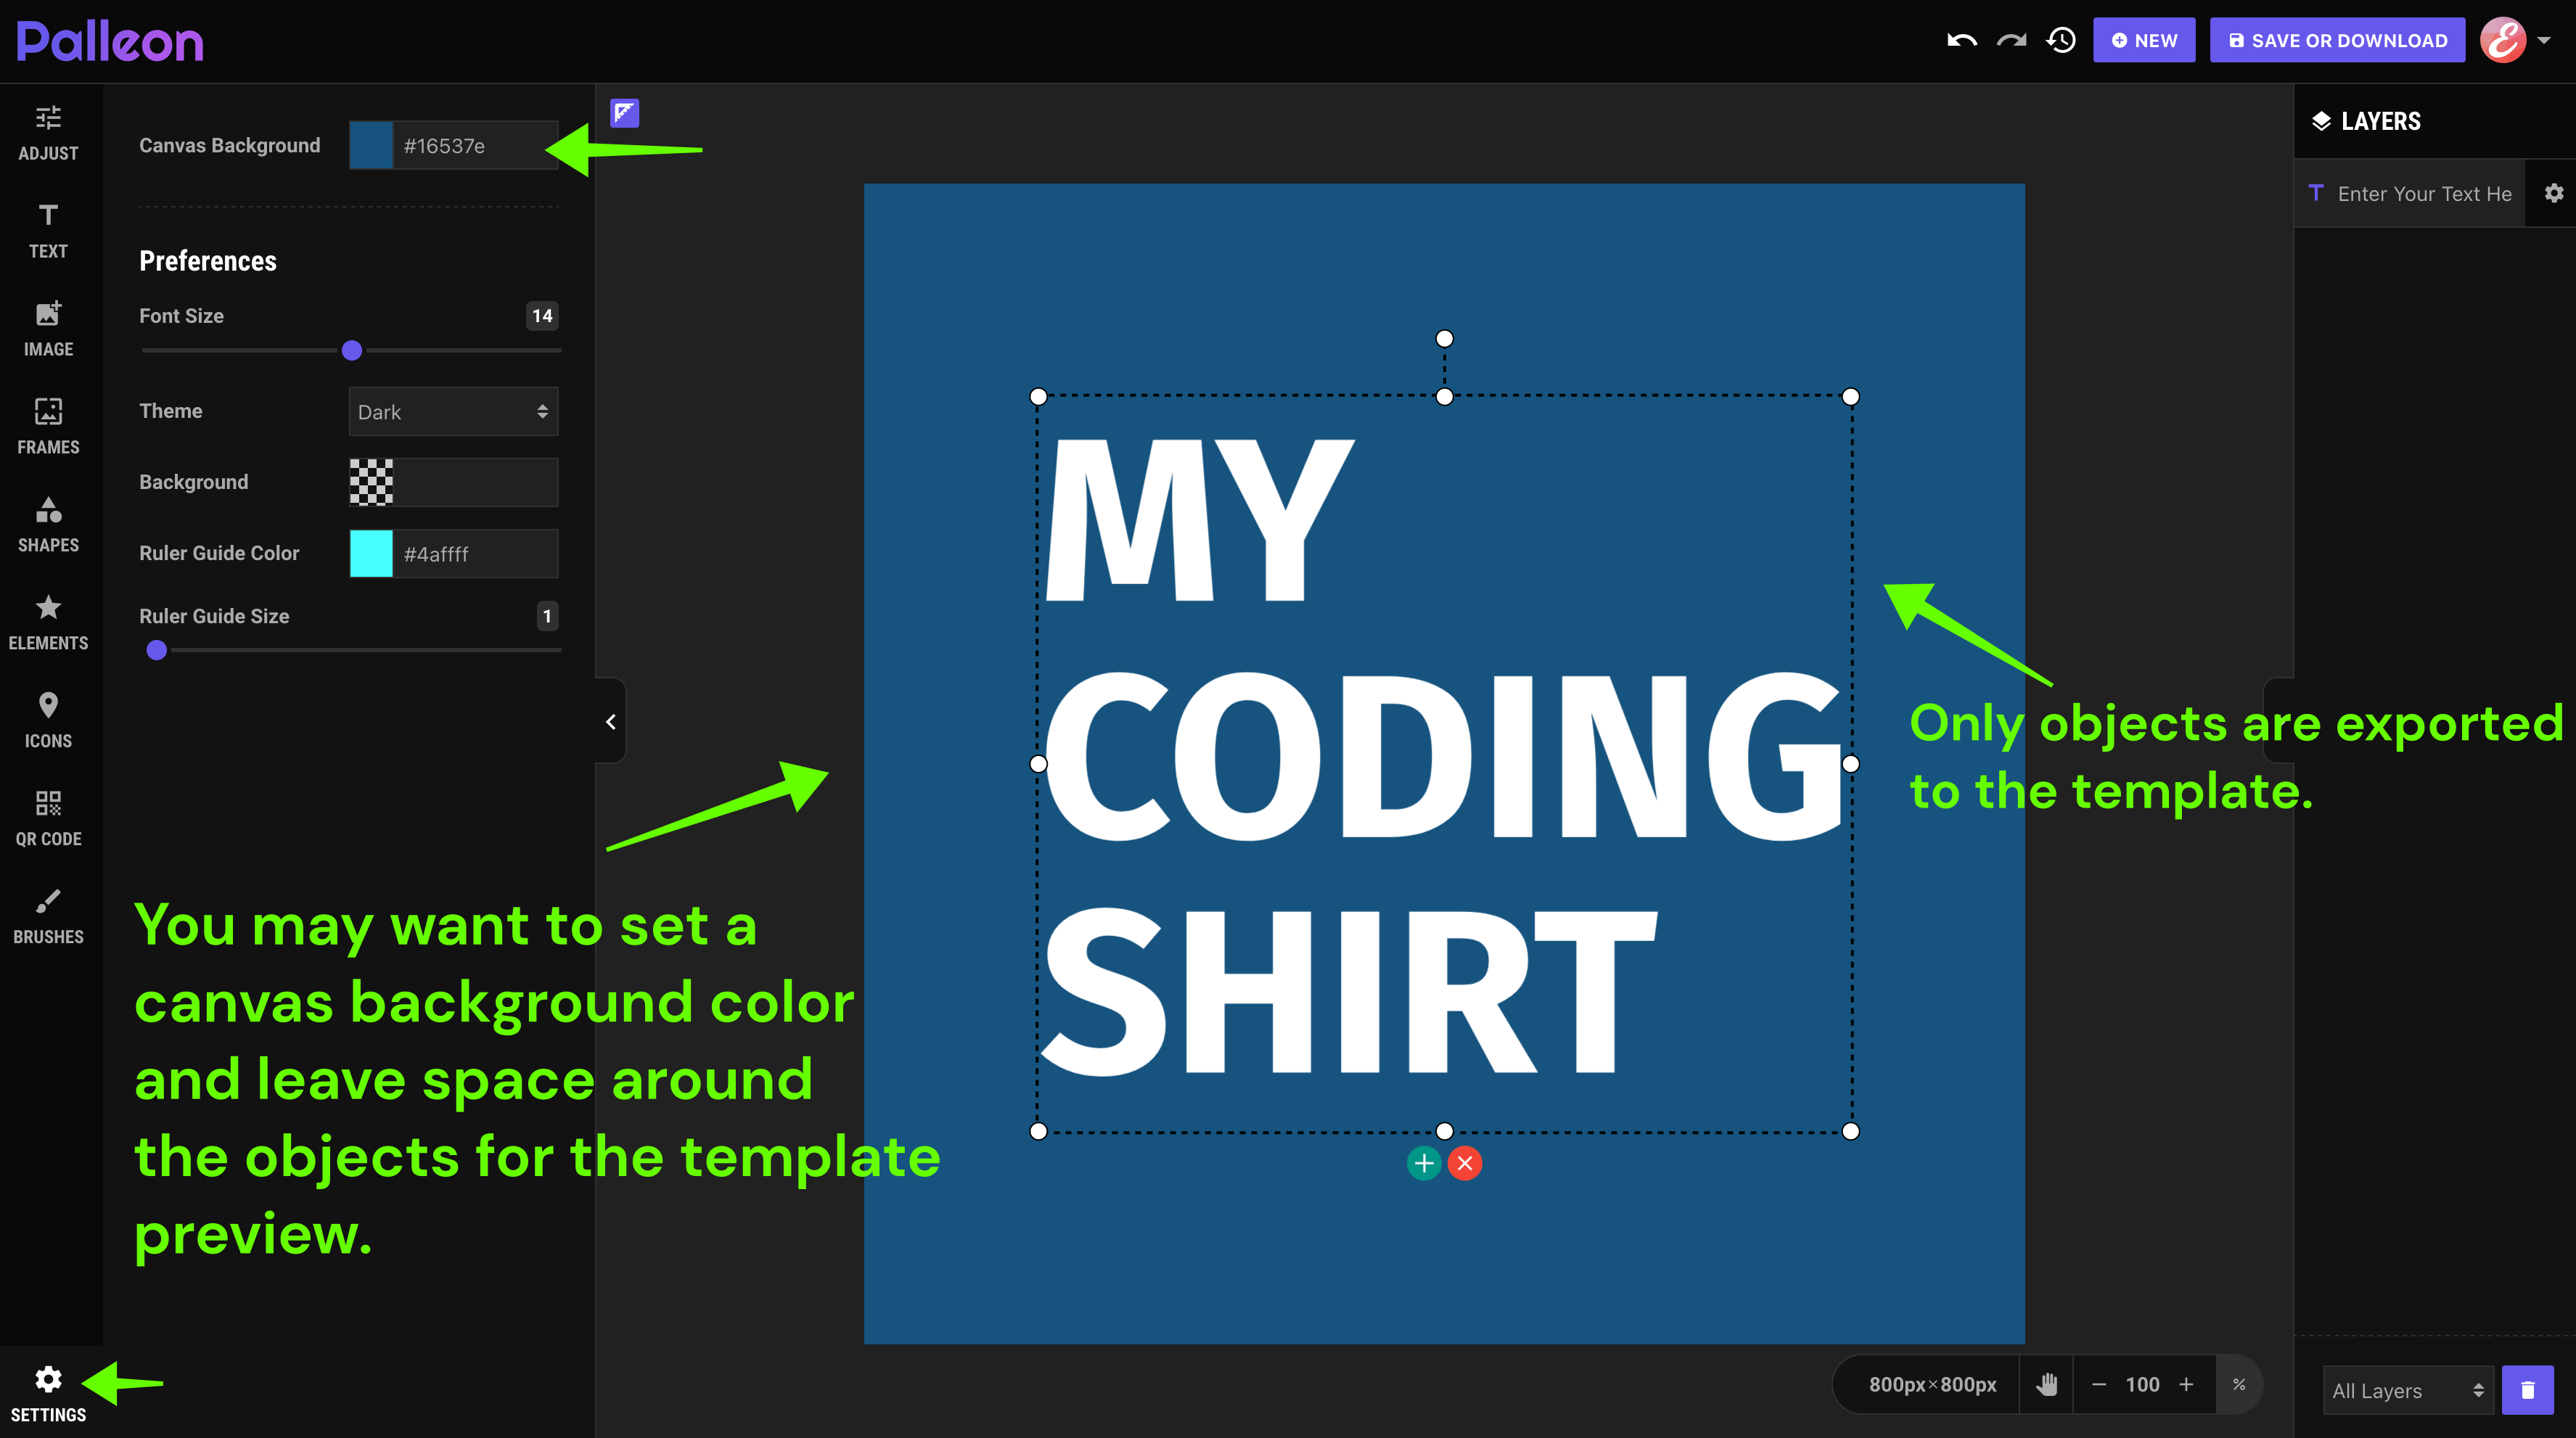
Choose which product attribute will be used for color selection. This attribute will also change the background of the canvas.

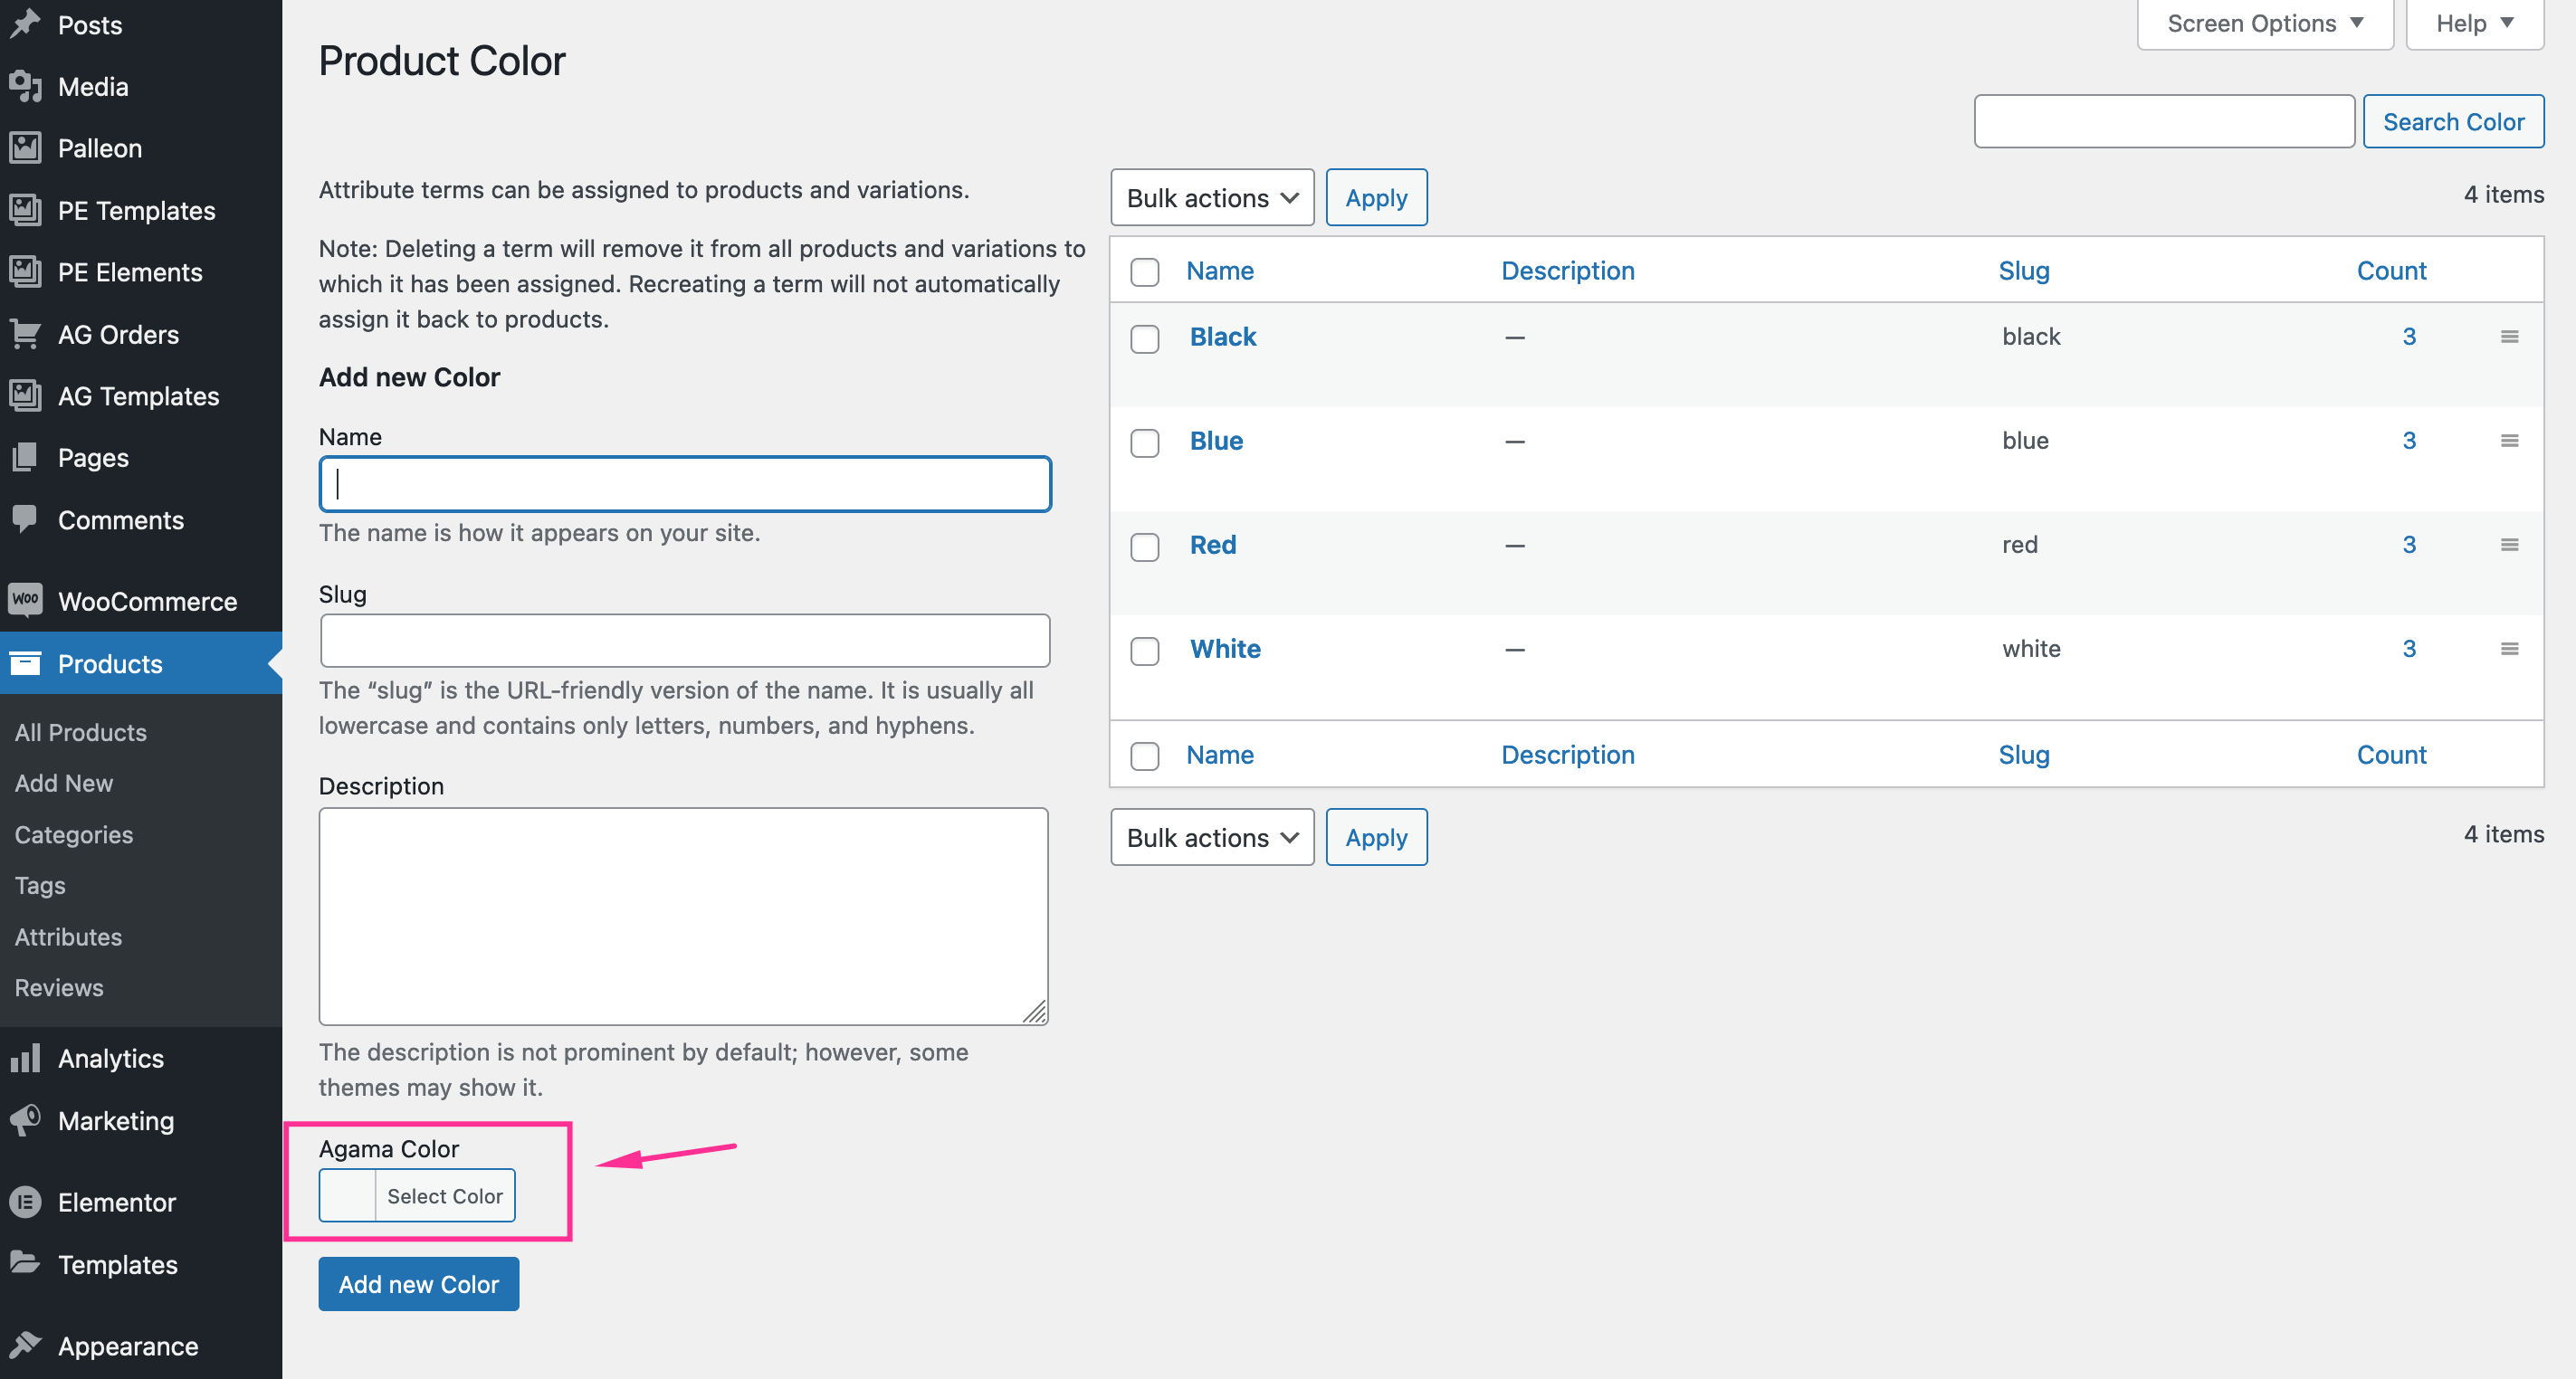
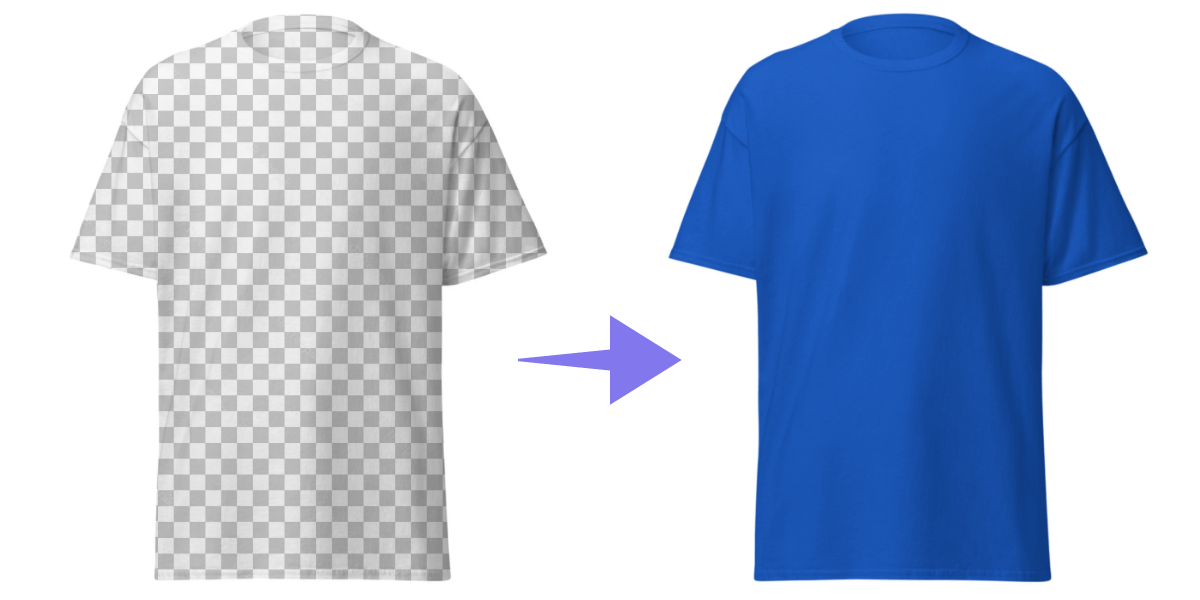
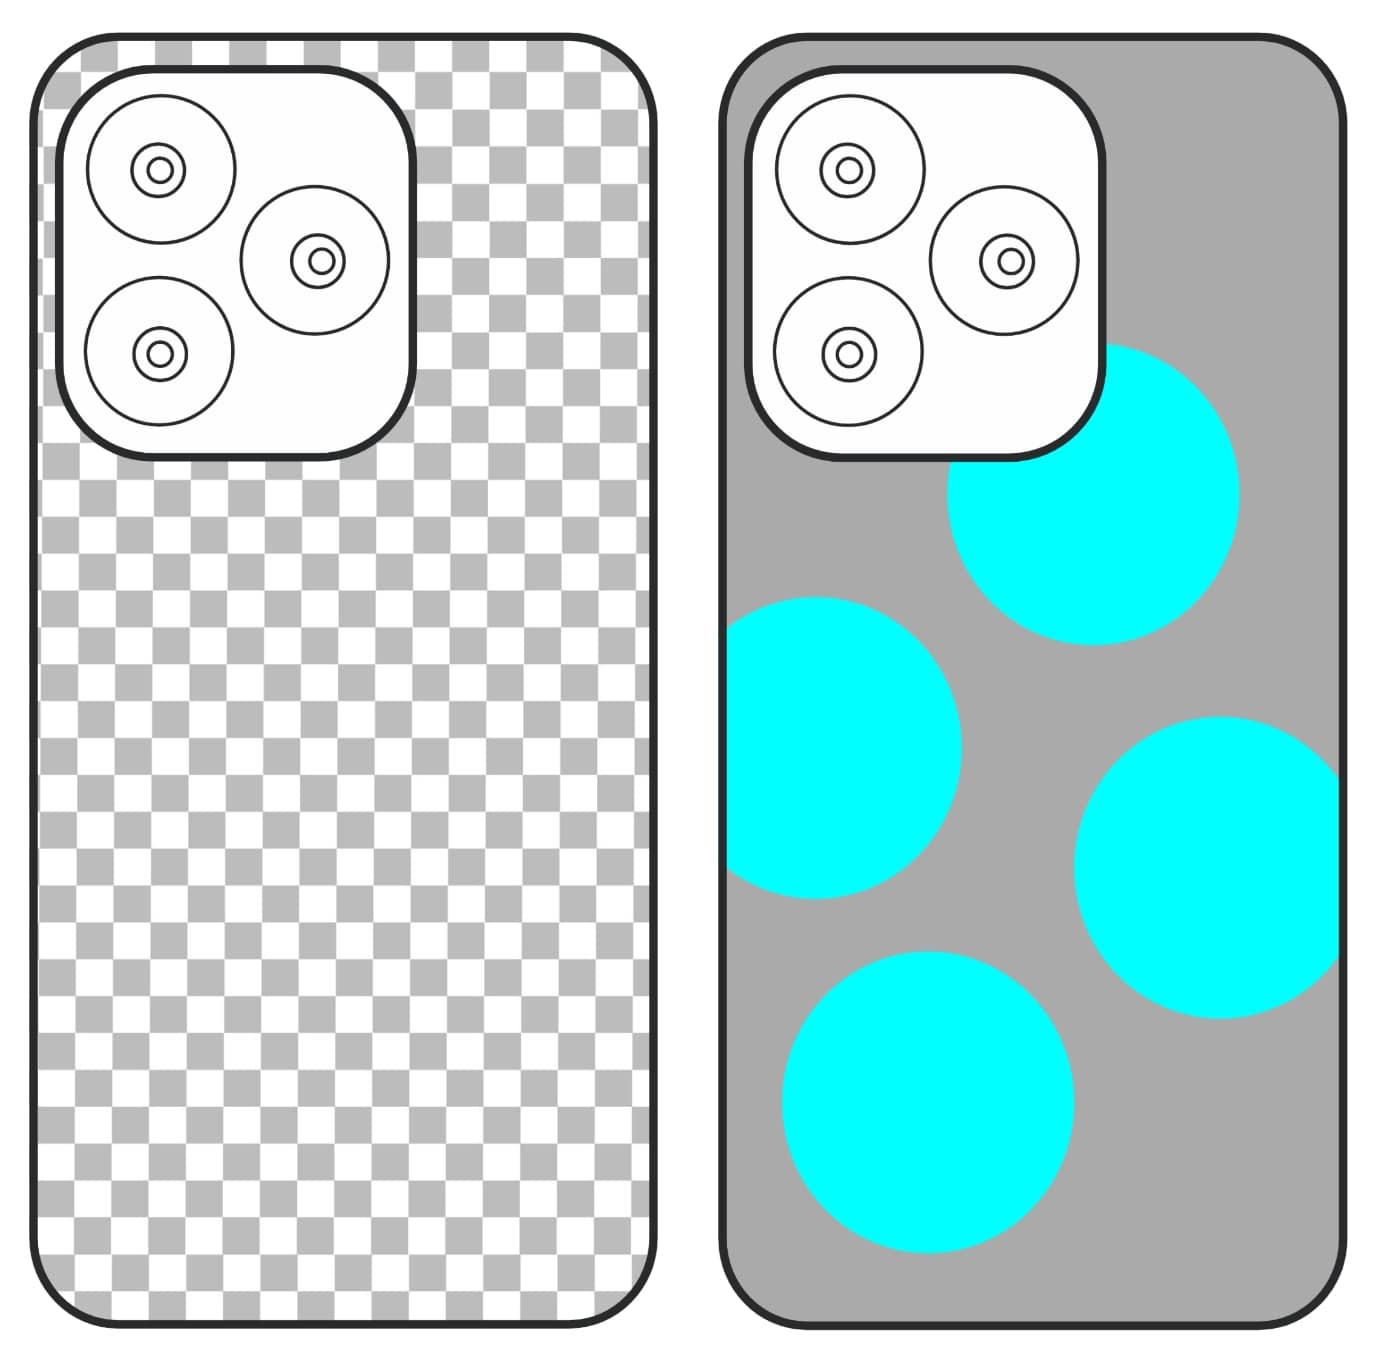
This feature is useful if you have a mask product image which has transparent parts.
If you need help to create mask images for your products, we suggest you to hire a freelancer. For example; Fiverr
Upload/Download Template
If enabled, users can download the design to upload later using buttons on the top bar.

Modules
You can enable or disable any Palleon module but please keep in mind that if you enable a module from Palleon Settings -> Modules, even if you enable it for Agama, it keeps disabled.
Image Multiplier and DPI
Instead of saving a single big print-ready image, Agama saves 2 files for each print area. A preview image and a Palleon template. You can edit and resize the design as you need with Palleon and download as a 300 DPI print-ready file. This unique process, saves your bandwidth and server resources.
Default image multiplier value is 0.5. Lets say your print area size is 600x900 px. The output image size will be 300x450 px which is enough for the preview images. But if you adjust this value as 10 and adjust "Image DPI" to 300 DPI, the output image will be a print-ready big 6000x9000 px image.
We highly recommend you not to change these settings and use Palleon templates to create print-ready files. In this way "add to cart" process will be fast and stable.
Product Designer
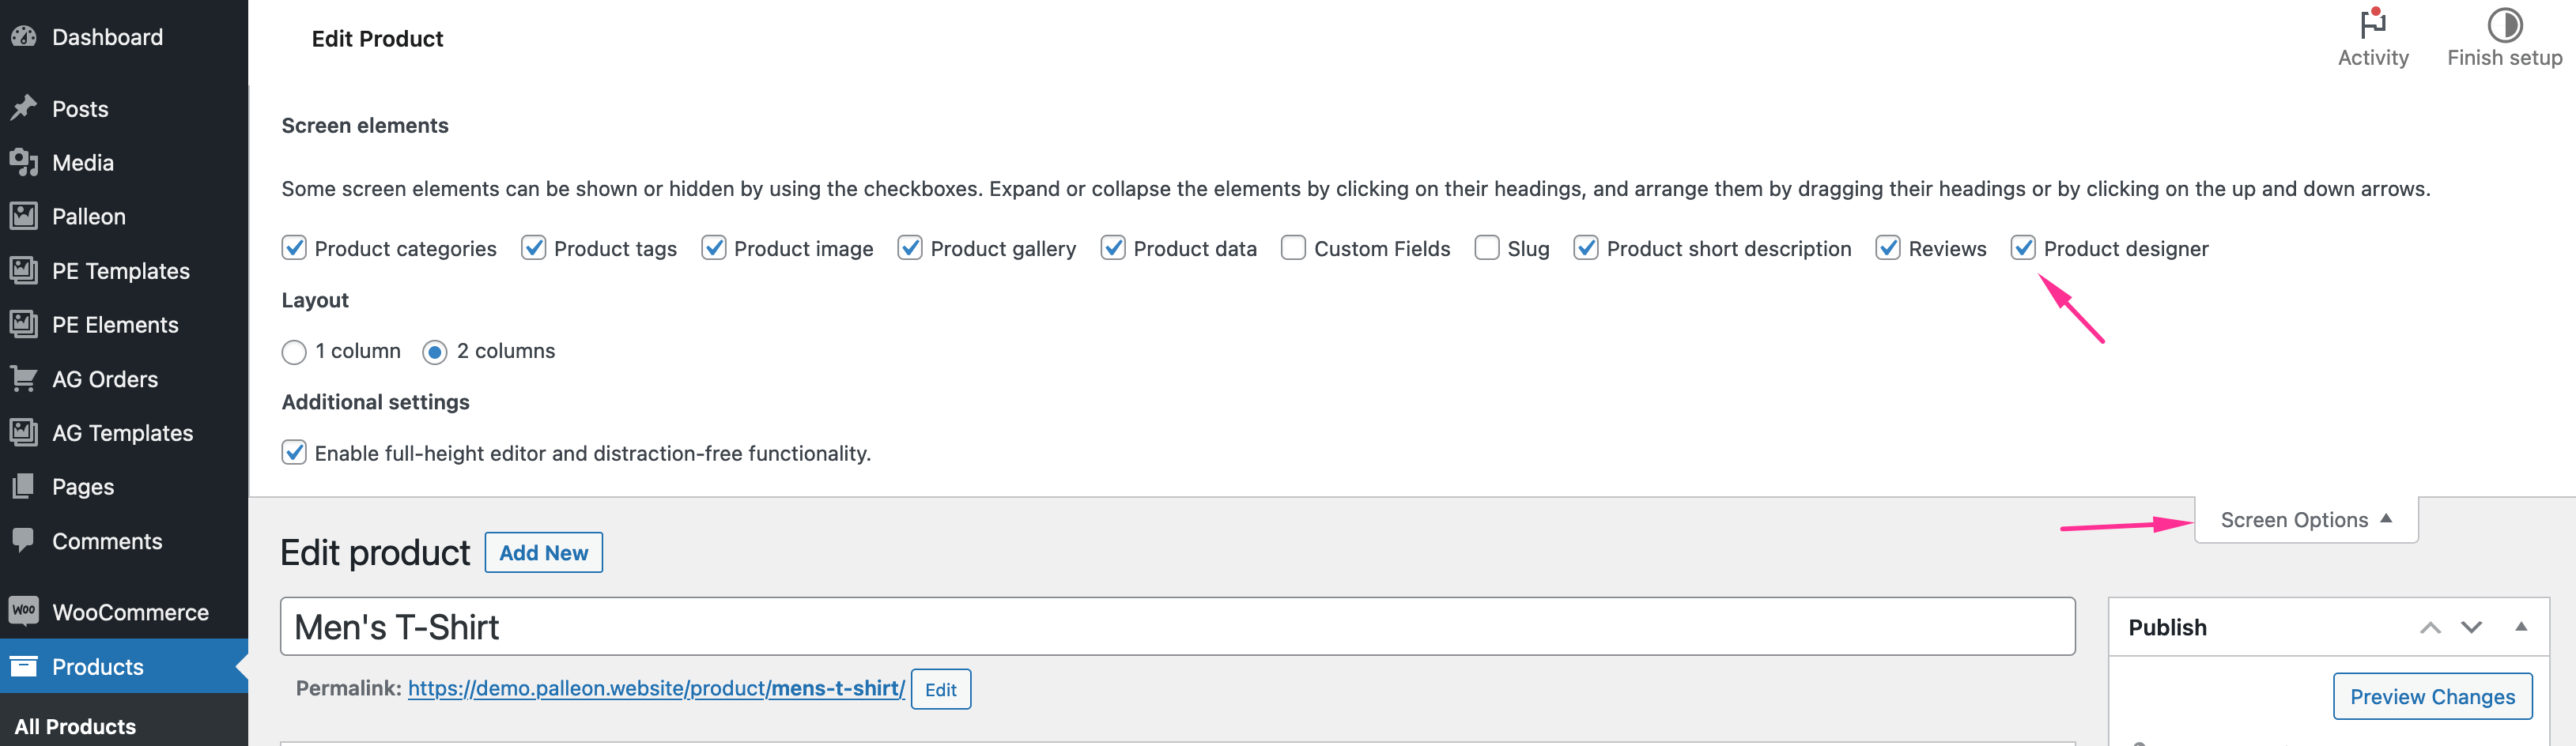
After the plugin activation, you will see a new meta box at the bottom of the product edit screen.

If you can't find the meta box, click "Screen Options" and make sure that "Product Designer" is checked.
1) Enable the product designer.
2) Enter a name and upload the product template which you have created using Palleon. These fields are required because there must be at least one print area user can edit on the product.
3) Additional options are optional.
Choose Disable if the product has single print area and has no variant.
Choose Print Areas if the product has multiple printable areas. For example for a t-shirt, you can add front, back, left sleeve and right sleeve print areas. All these fields (except the first one) will be optional.
Choose Variants if the product has different types and they need to have individual templates. For example for a phone case; You can add iPhone 14, iPhone 13 etc. There will be only one print area user can edit.
Product Template
How to create a product template?
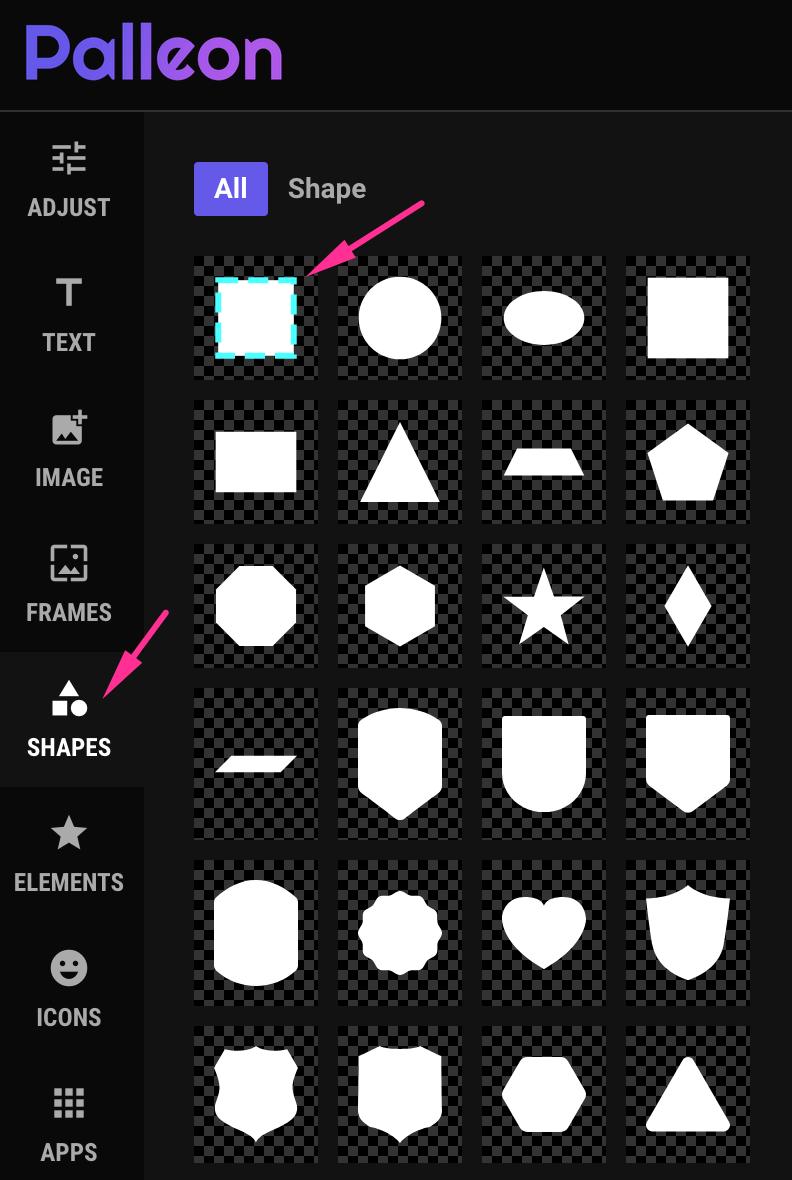
1) Open Palleon image editor.

2) Upload the image you want to add a print area on it or create a blank canvas.
3) Click "Shapes". Select "Print Area" from the dropdown menu and add the shape to the canvas.
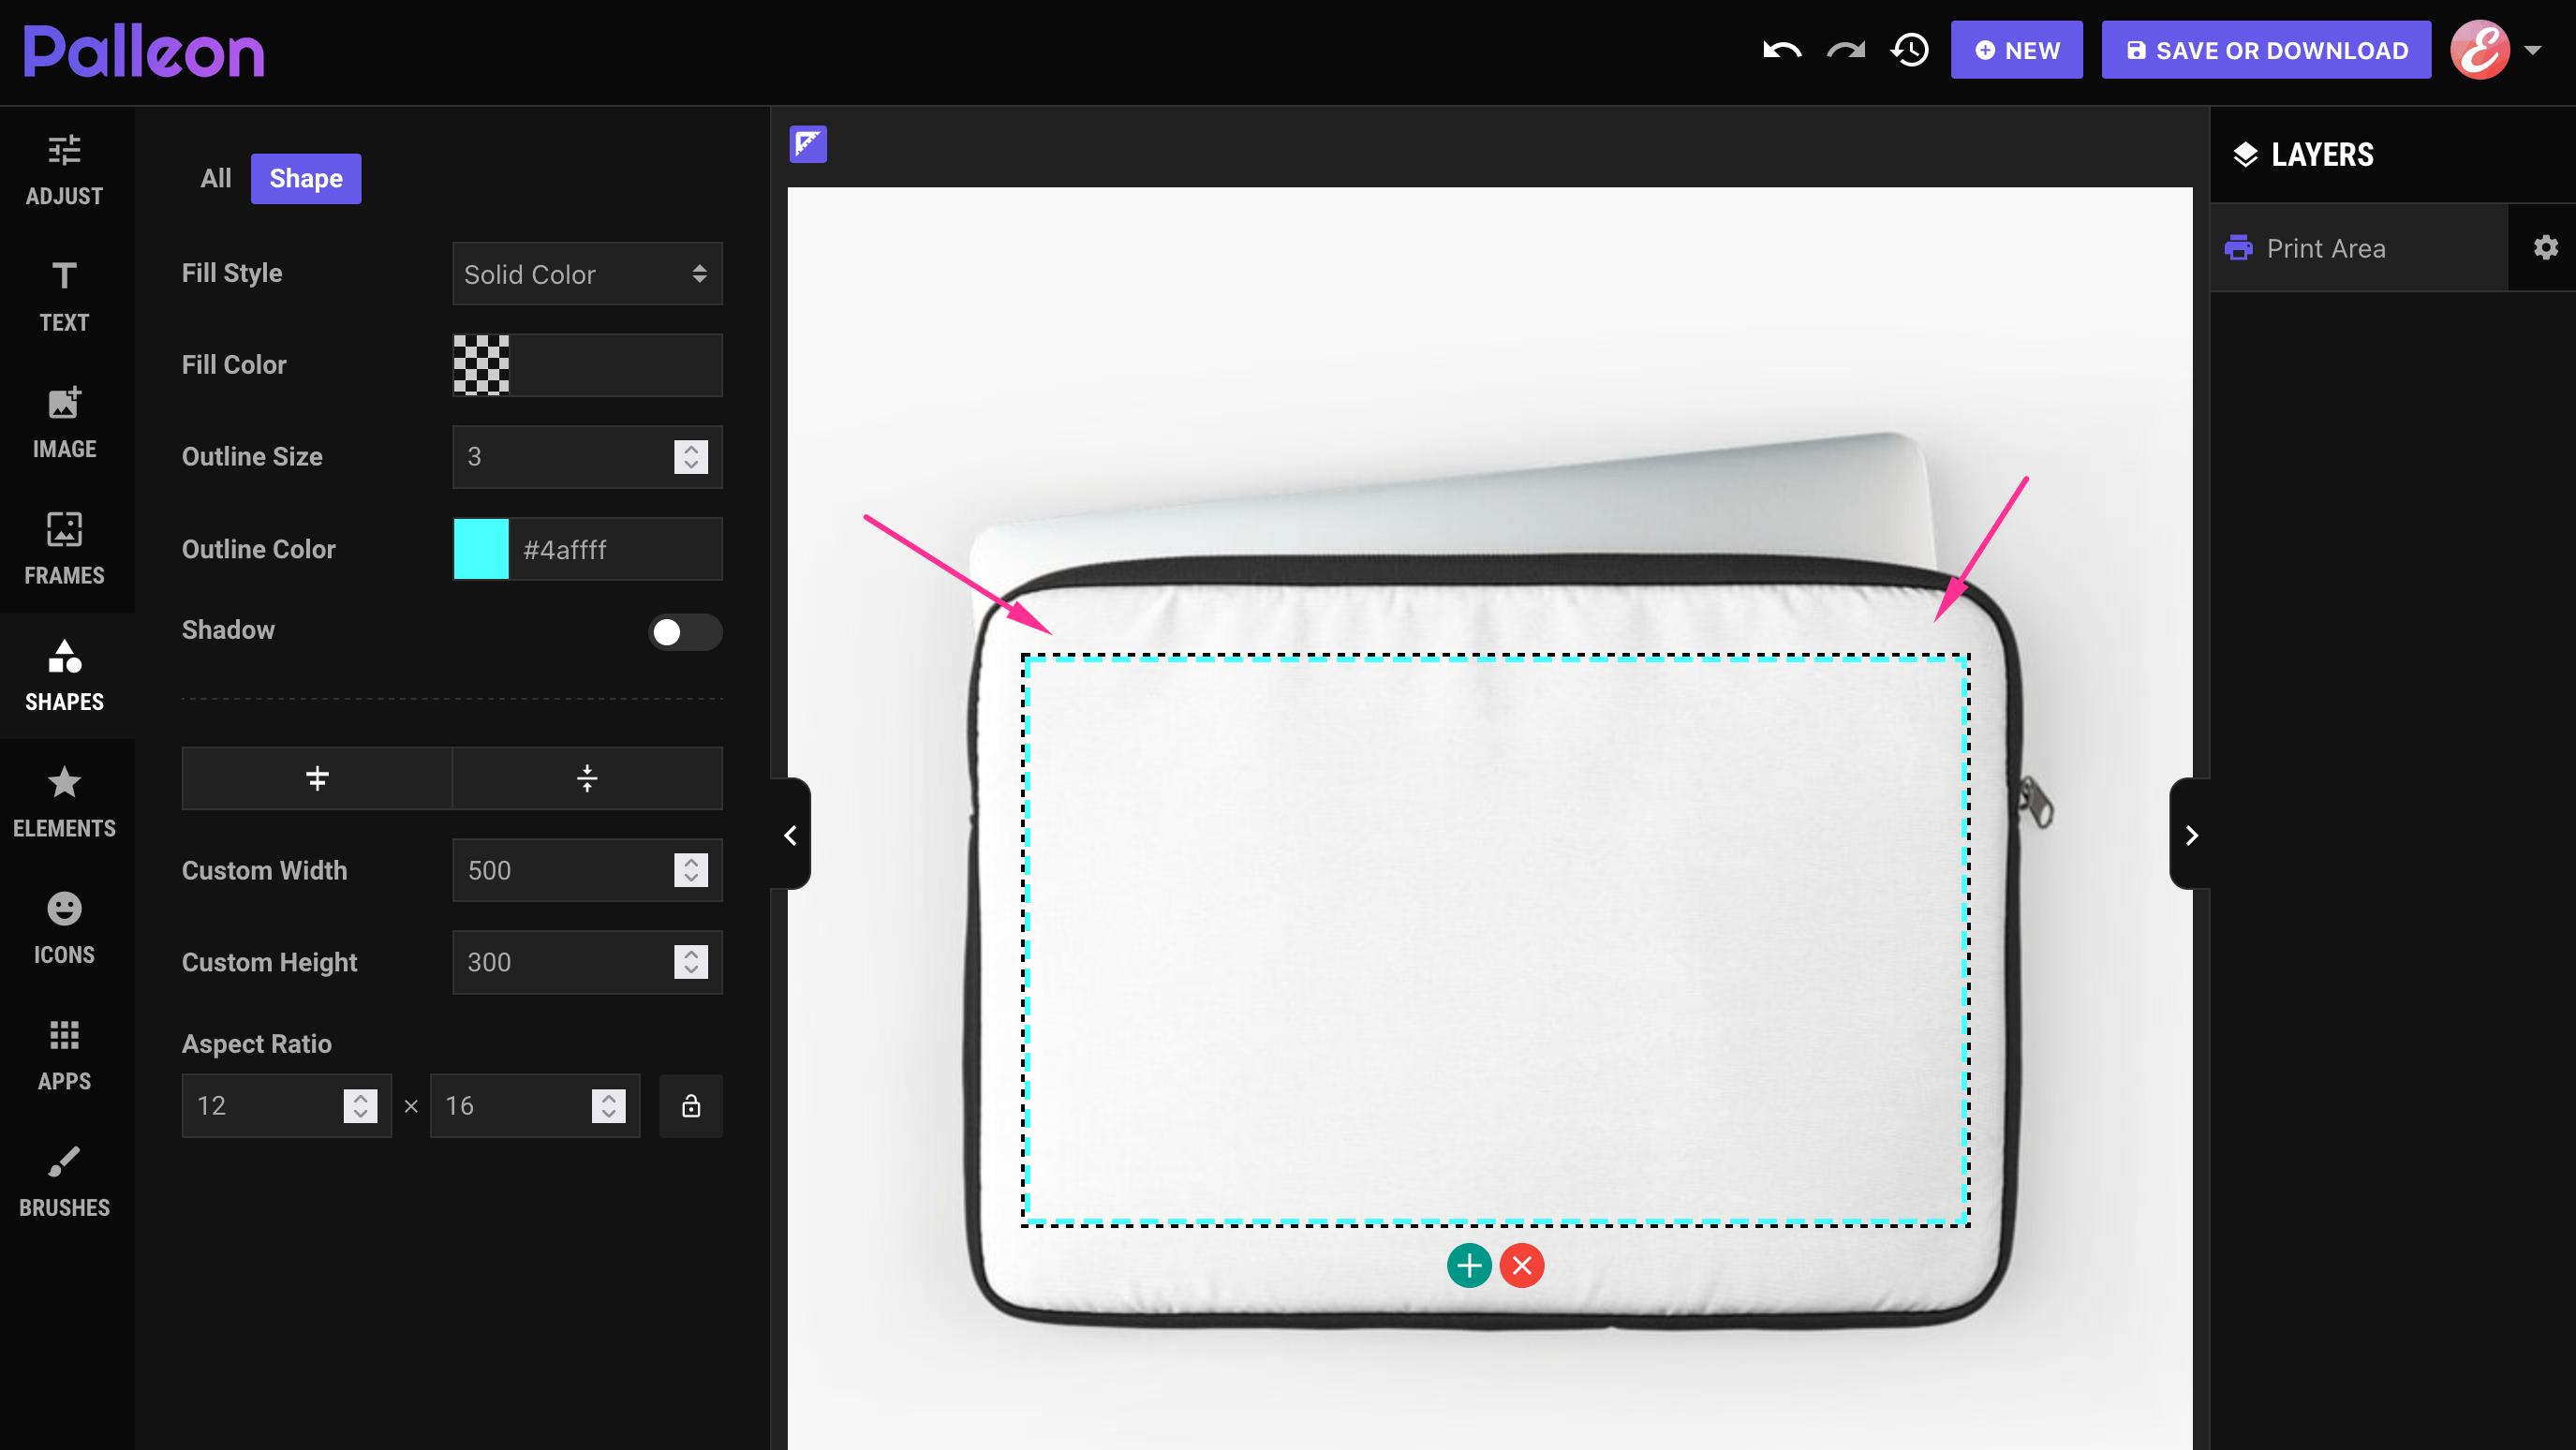
Fill Color: The background color of the print area. It is optional. Your customers will able to change it from the product designer.
Outline: As default there is a dashed border around the print area. You can change its size and color. If you want to make it invisible, enter 0 to "Outline Size" field.
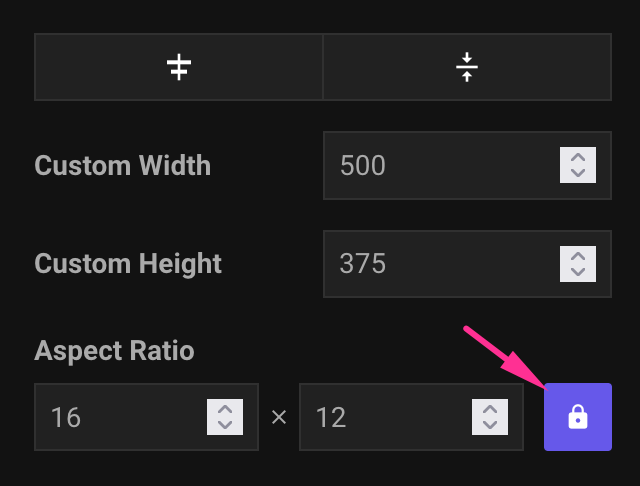
Resize the print area:
Custom Width and height are in pixels but the actual size is not important. You will be able to resize the print area with Palleon before downloading the print-ready file. The important thing is the aspect ratio.
To resize the print area to a specific aspect ratio, enter the values to required fields (first one is width, second one is height) and click "lock" button.
When the aspect ratio is locked, if you enter a value to one of custom width or custom height fields, other value will be recalculated automatically.
4) Lock the layer (print area): This is important. You should lock the print area layer before save or download template.

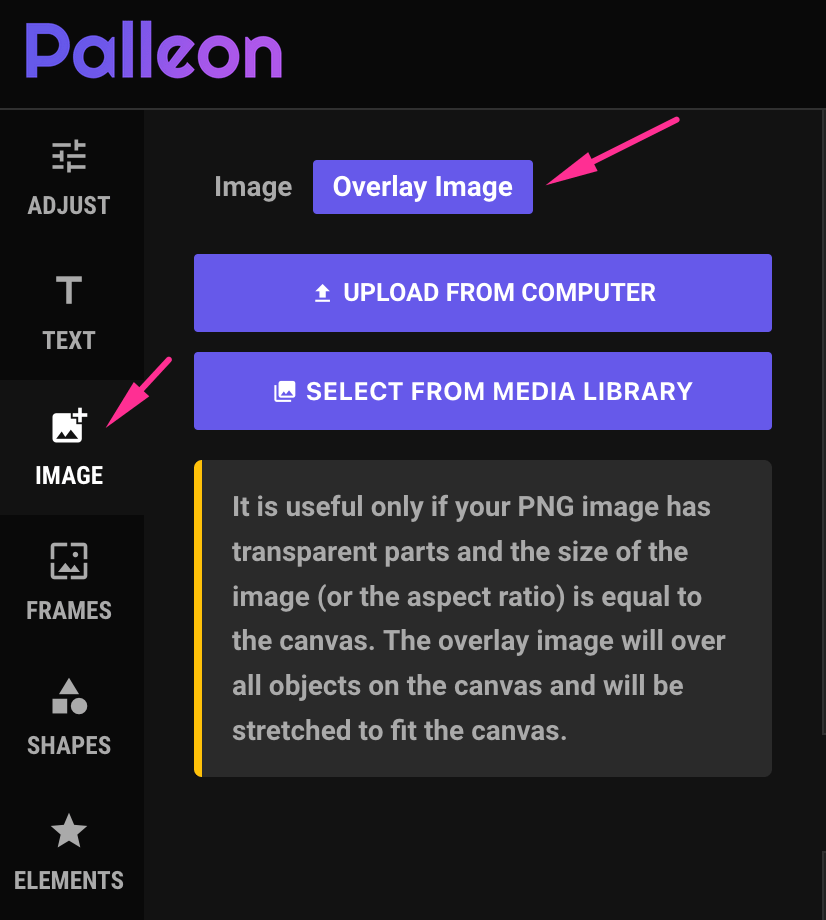
Overlay Image (Optional)
Overlay image is useful only if your mask image (PNG) has transparent parts and the size of the image (or the aspect ratio) is equal to the canvas. The overlay image will over all objects on the canvas and will be stretched to fit the canvas.
5) Save or download: Click "Save or Download", and save or download file "as template". Then you can add the template to the related field on product meta box.

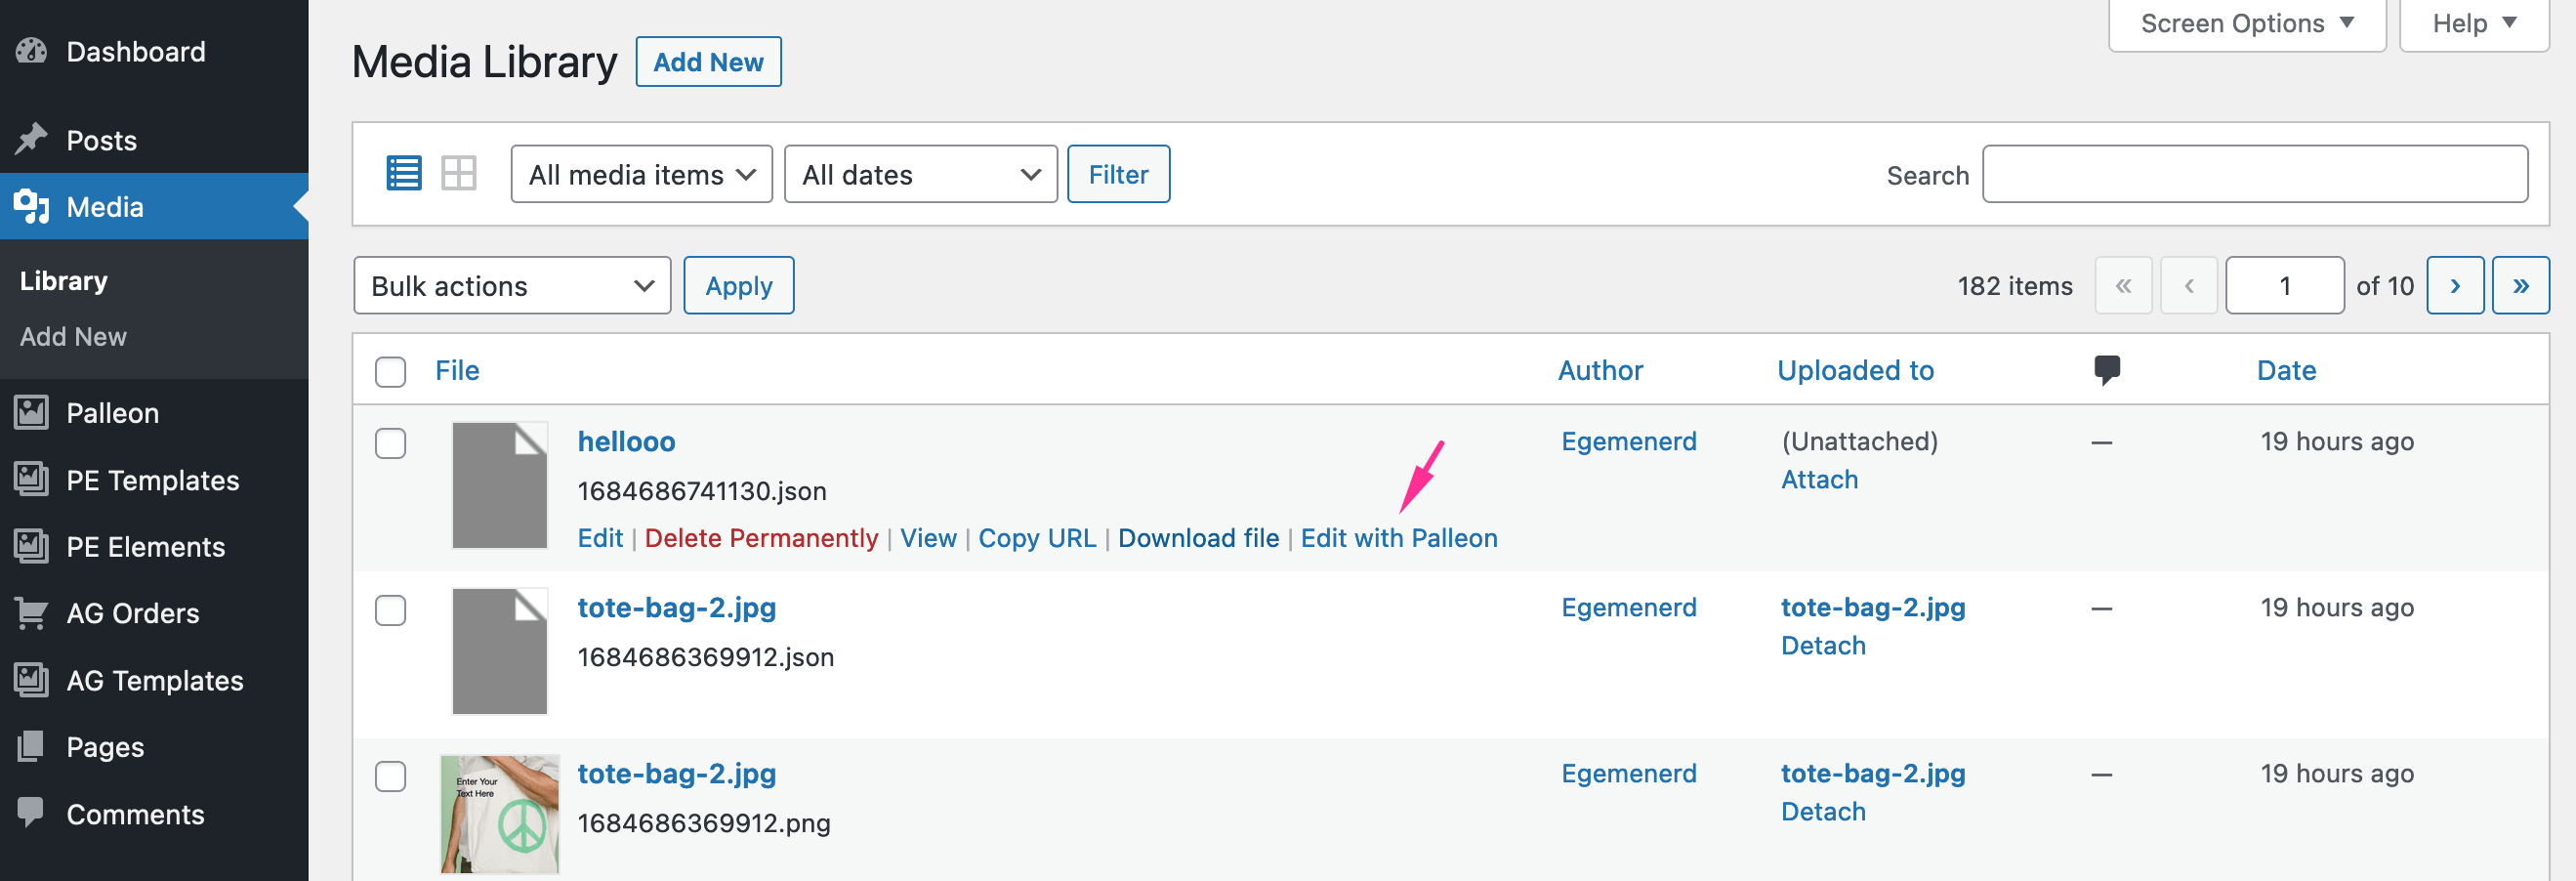
How to edit saved templates?
Go to Media Library, find the template file (.json) you want to edit and click "Edit with Palleon" link.
AG Templates
To create your own template;
1) Open Palleon image editor.
2) Create a blank canvas
3) Create a design using Palleon tools such as text, shape, element etc.
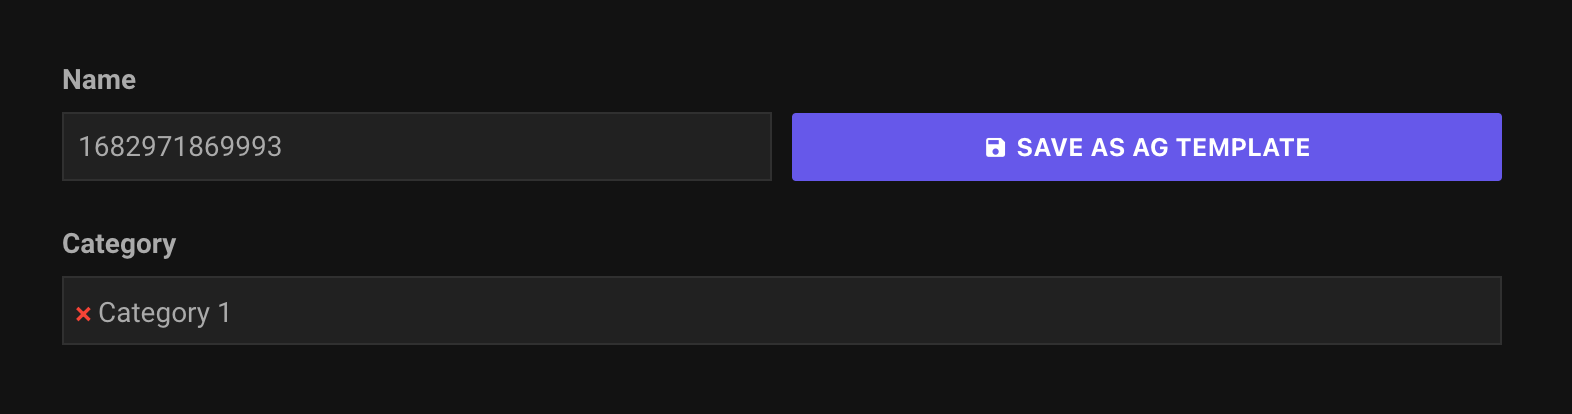
4) Click "Save or Download" when you're done. Then click "Save as AG Template" button to save the template.
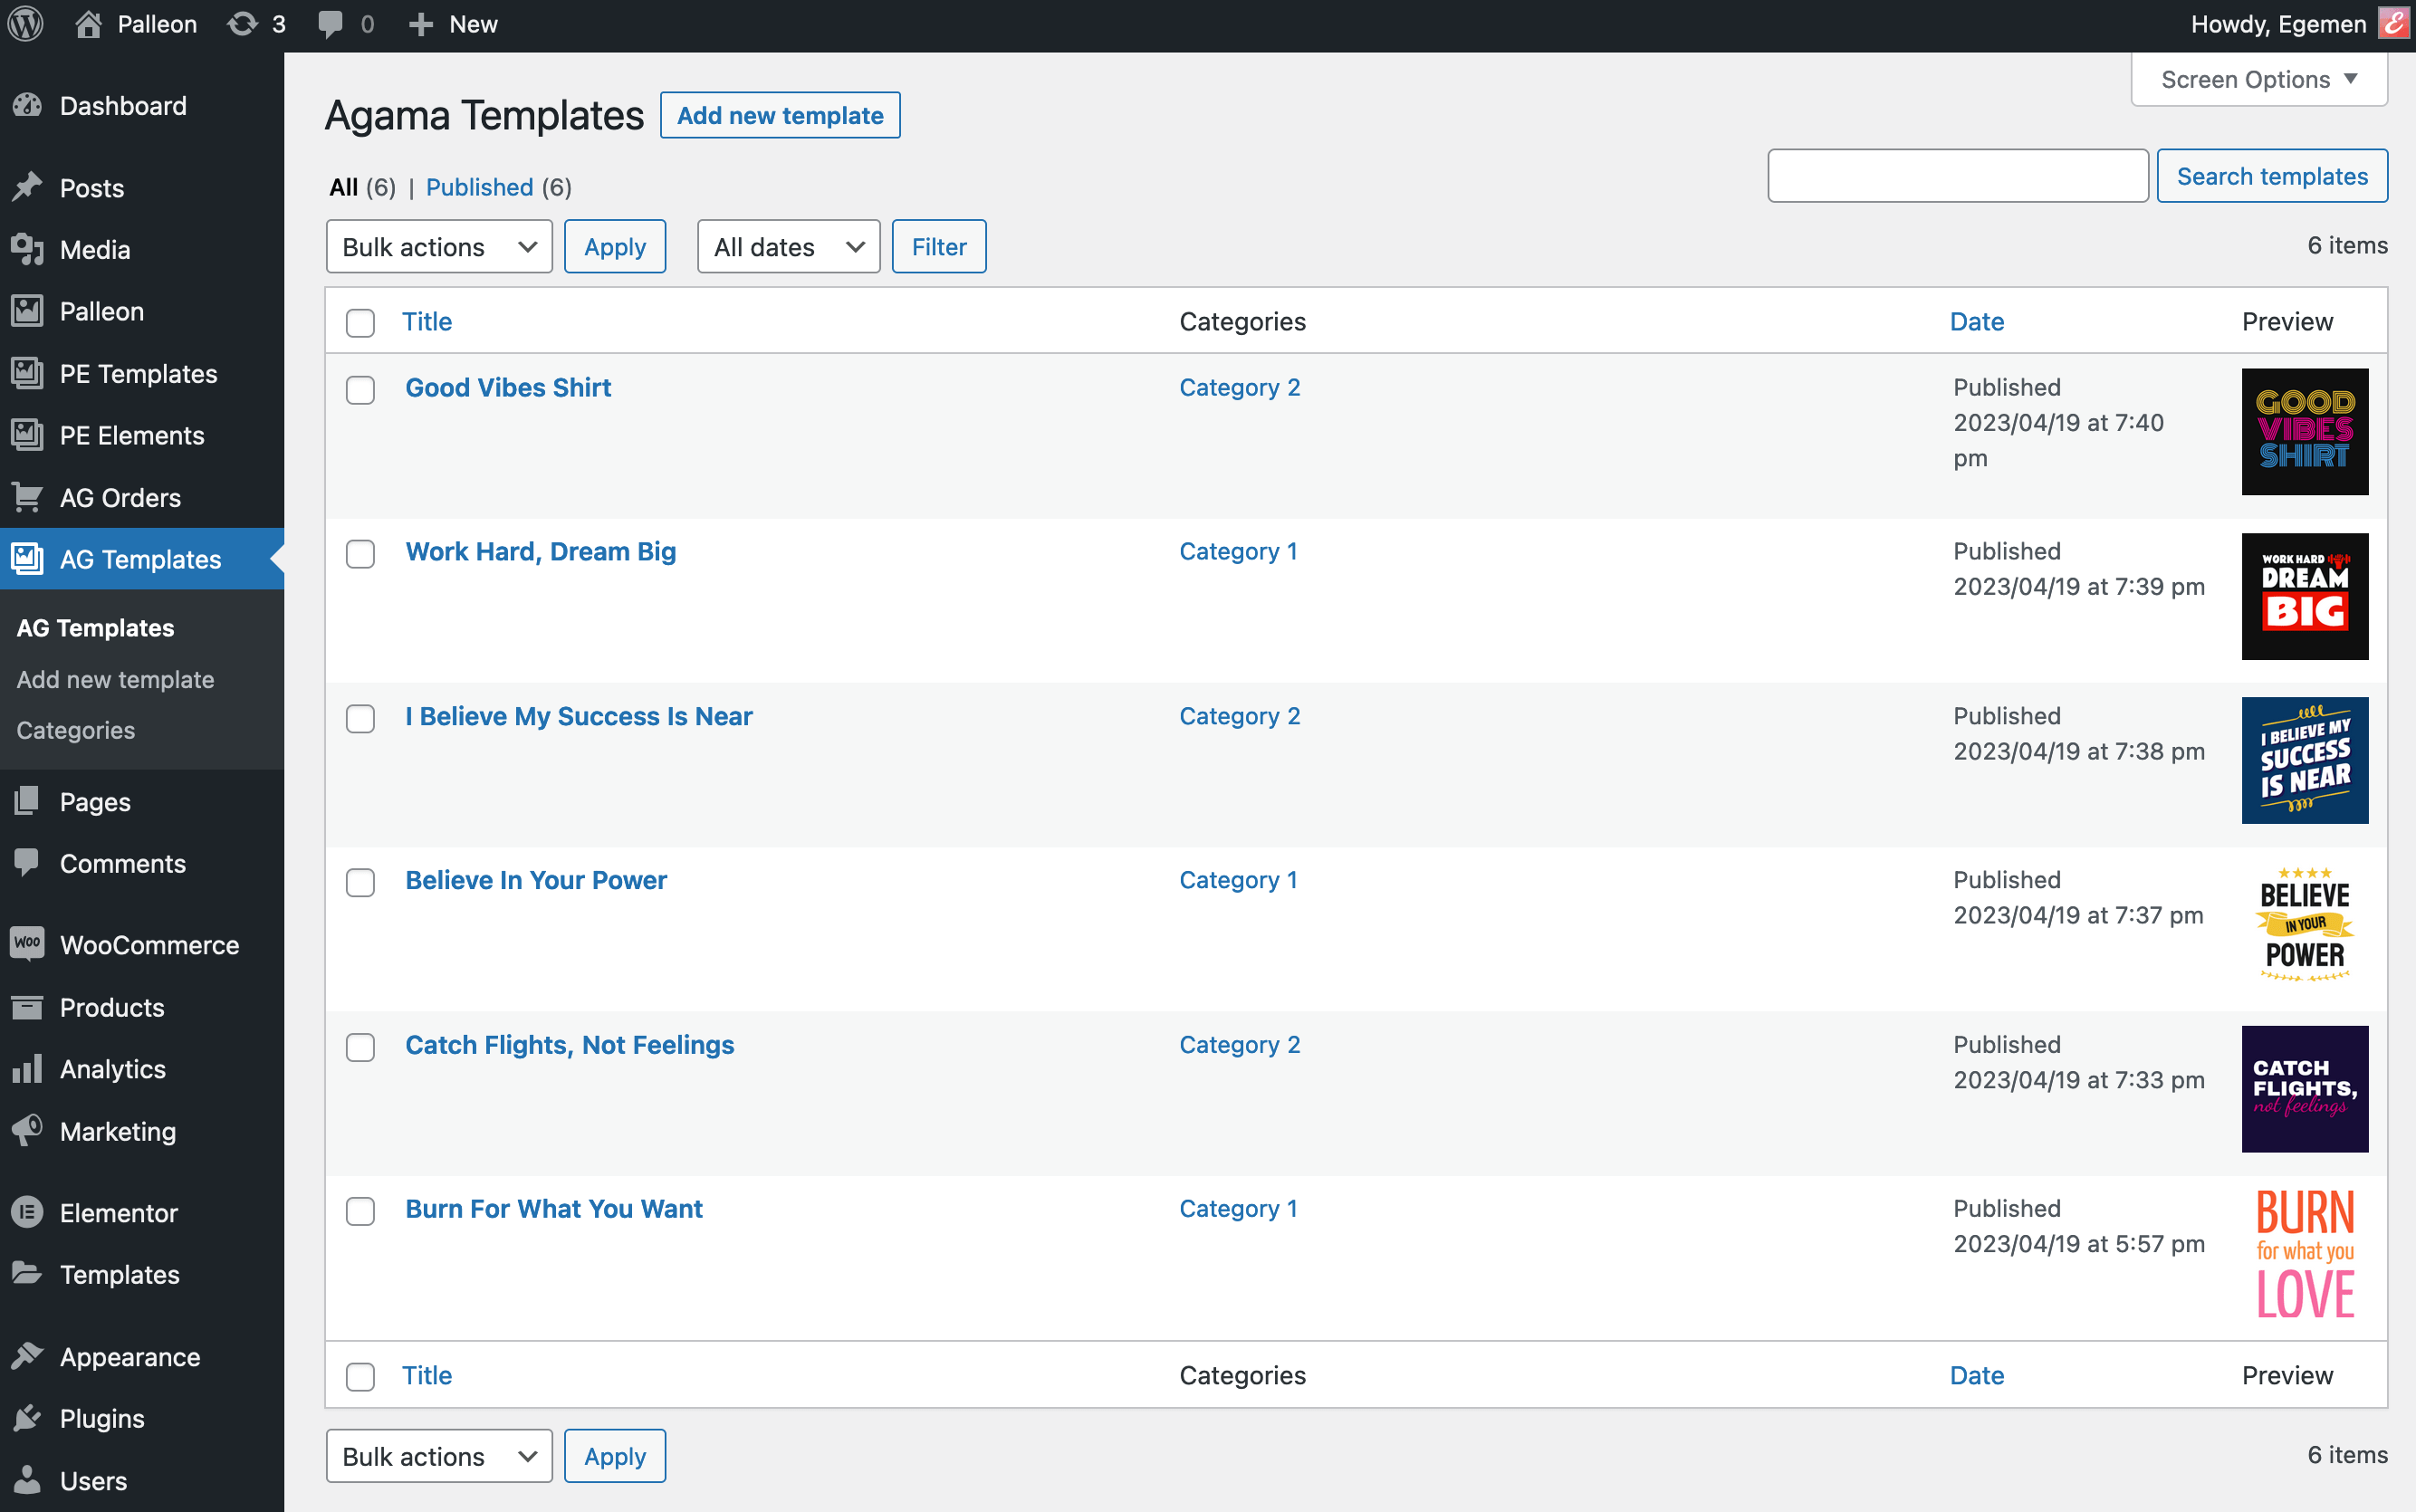
You can edit or delete the templates from "AG Templates" on your WordPress dashboard. You can also create categories for your templates.
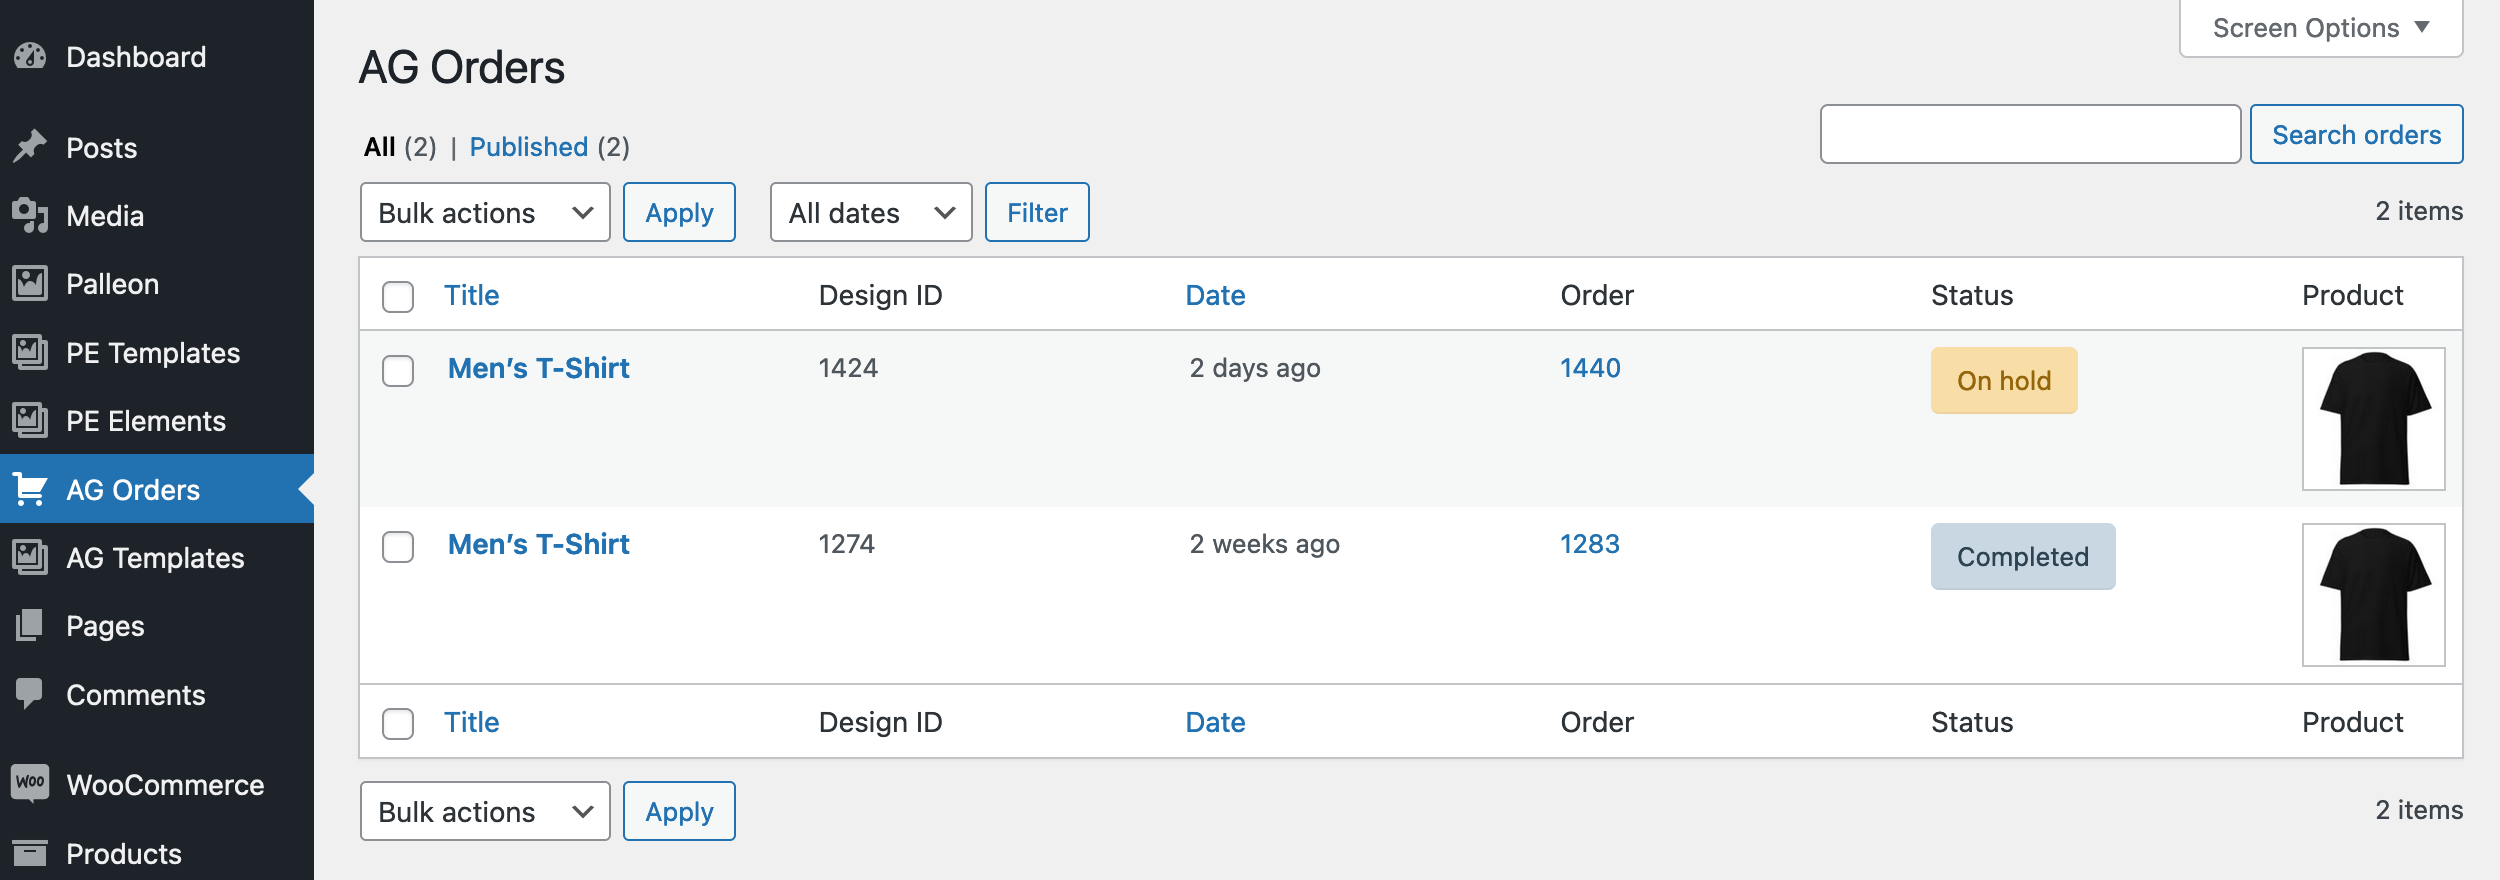
AG Orders
When the customer finish the customization of the product and click "Add to Cart" button, a new AG order is created automatically.
Post status;
Draft: The product has been customized and added to the cart by the customer but not ordered yet.
Trash: The product has been removed from the cart by the customer.
Published: The product has been ordered by the customer.
Please keep in mind that when you permanently delete an AG order, all the attachments are deleted from your media library.
1) Click "Edit & Download With Palleon" button. You will redirect to Palleon.
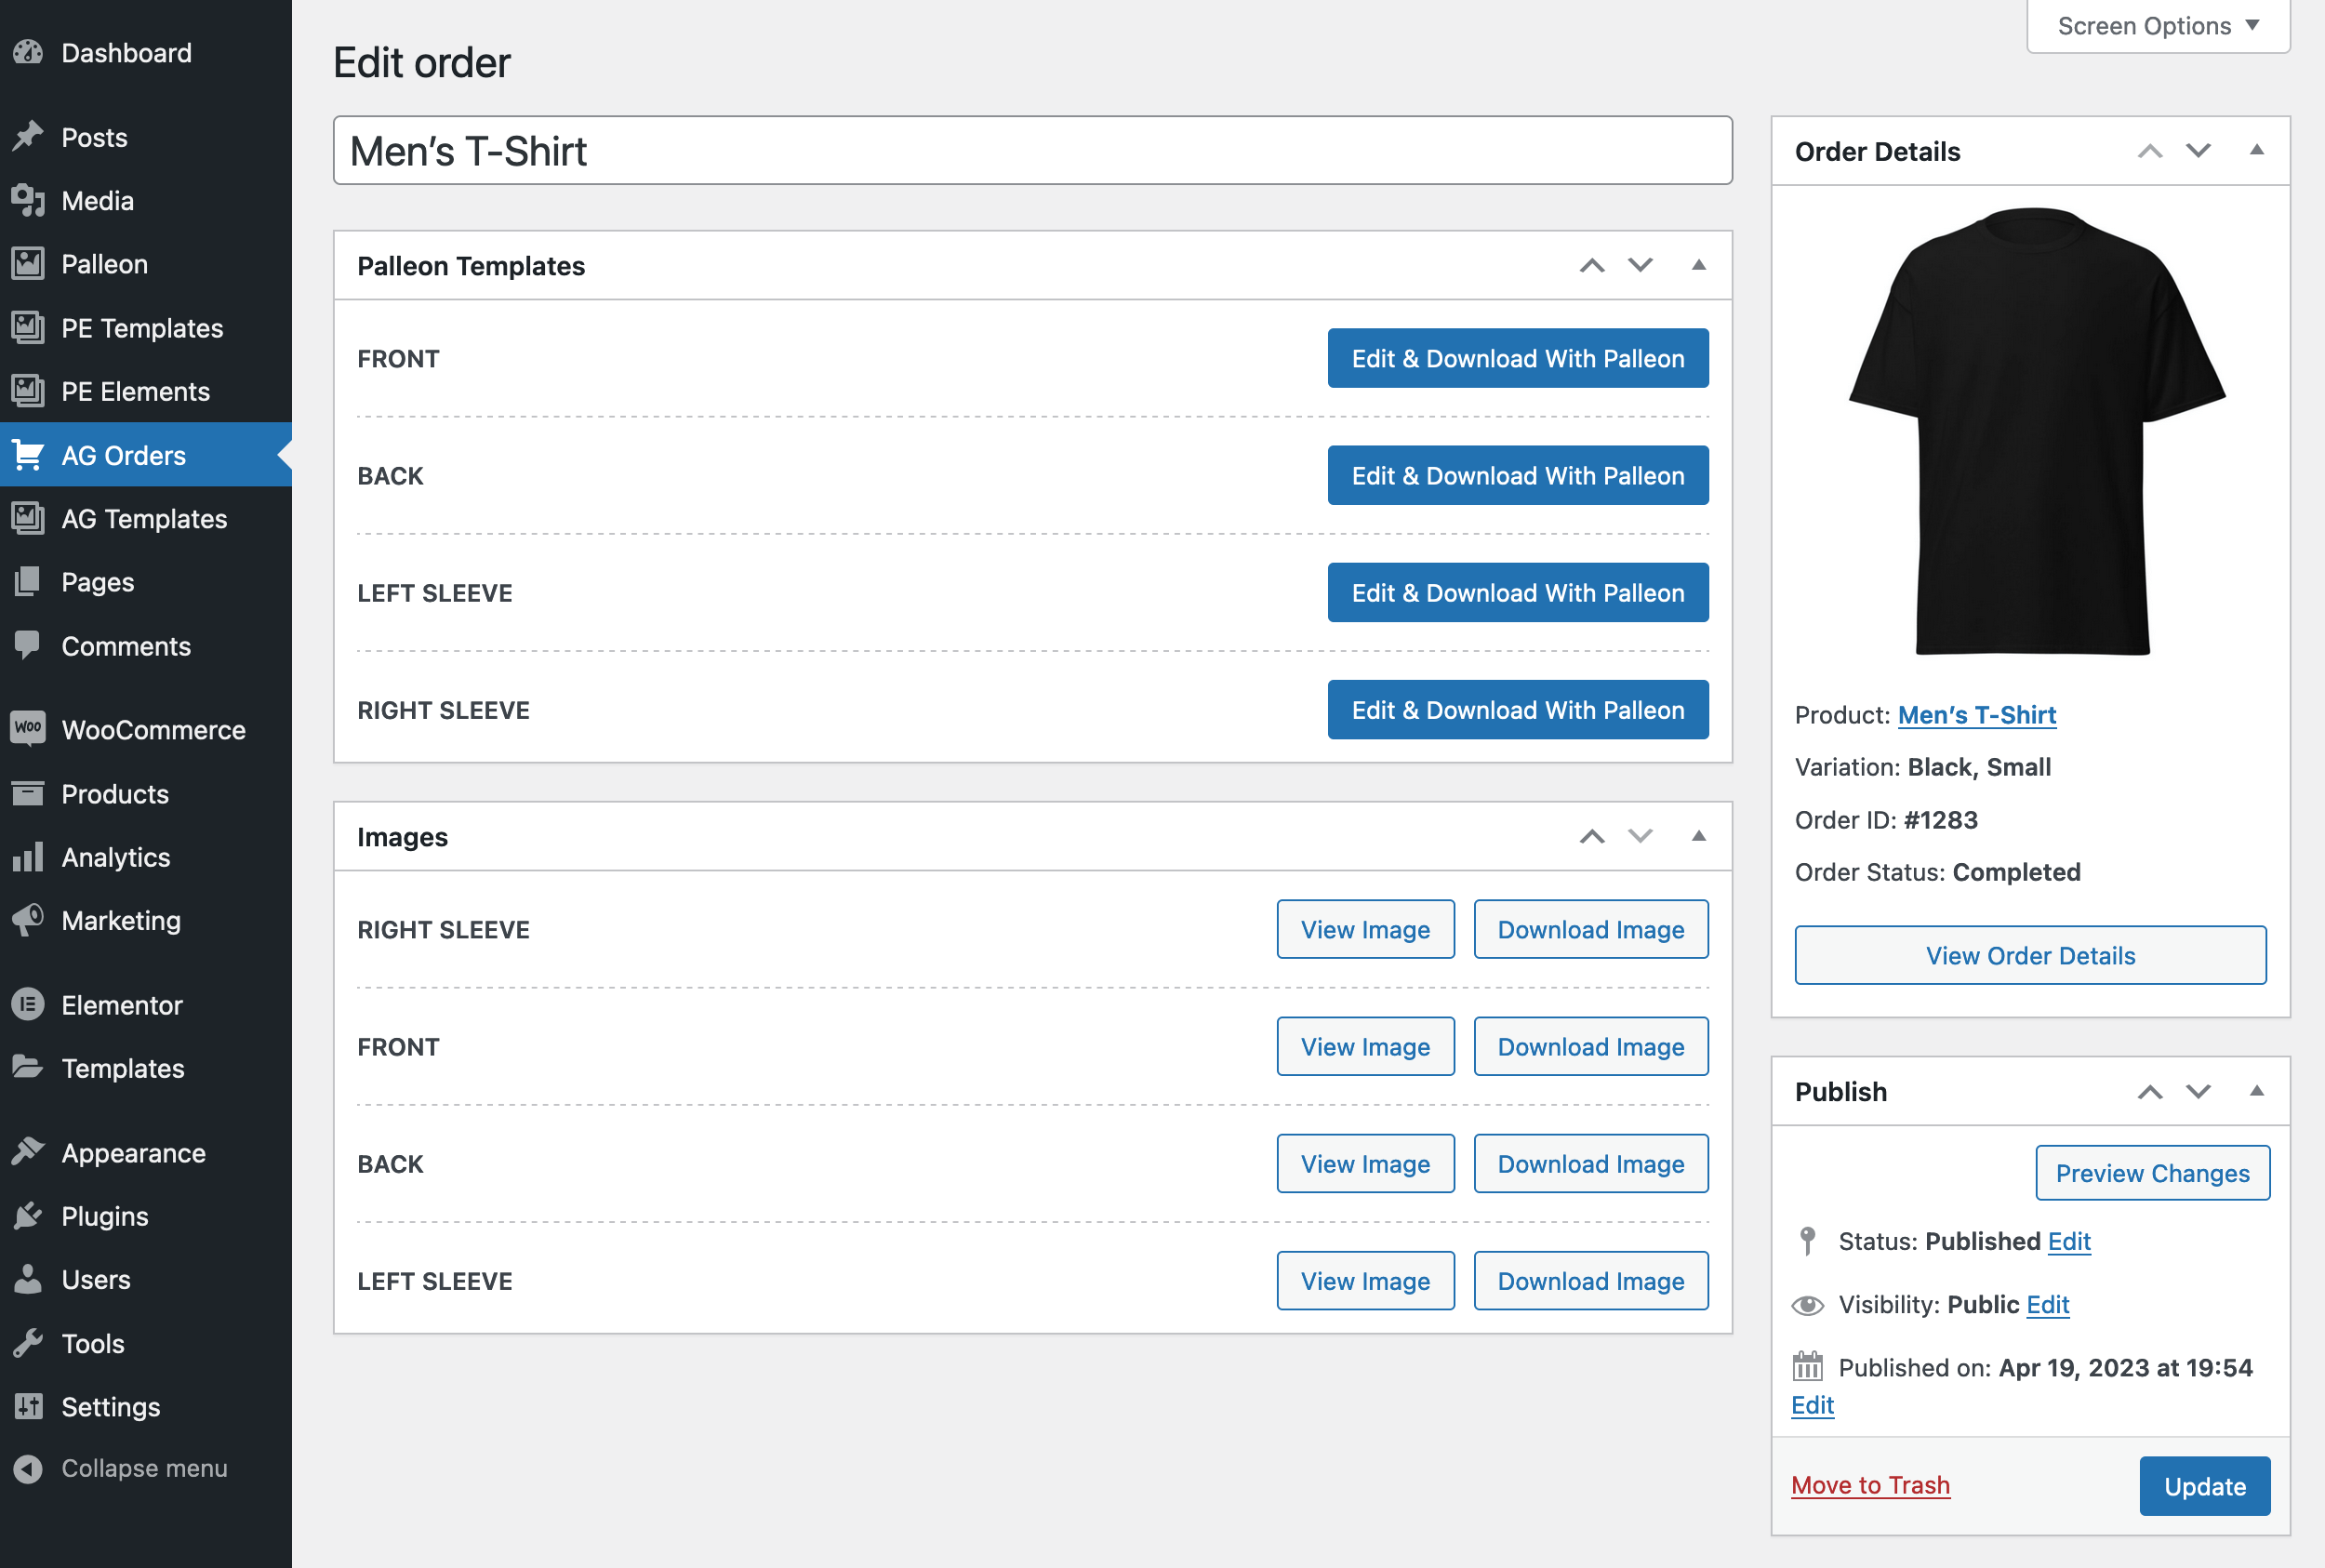
2) Check the user generated design and edit anything you want.
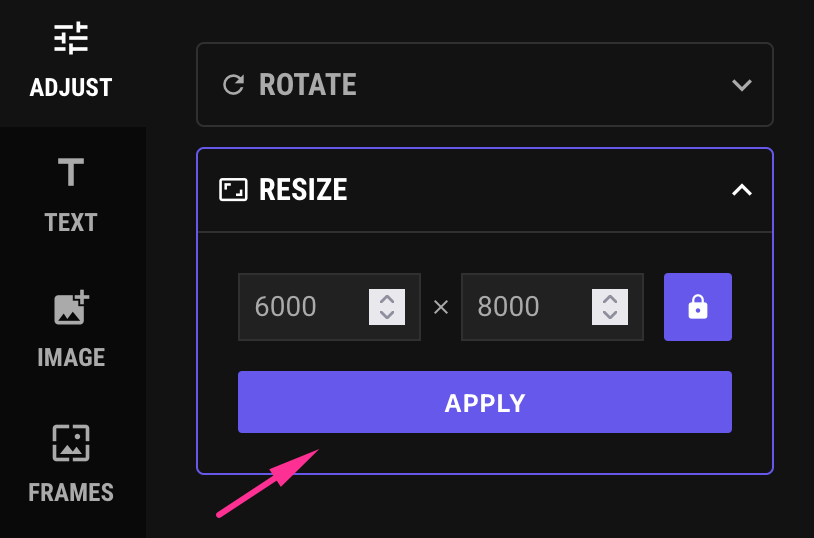
3) Resize the canvas to get a high resolution image.
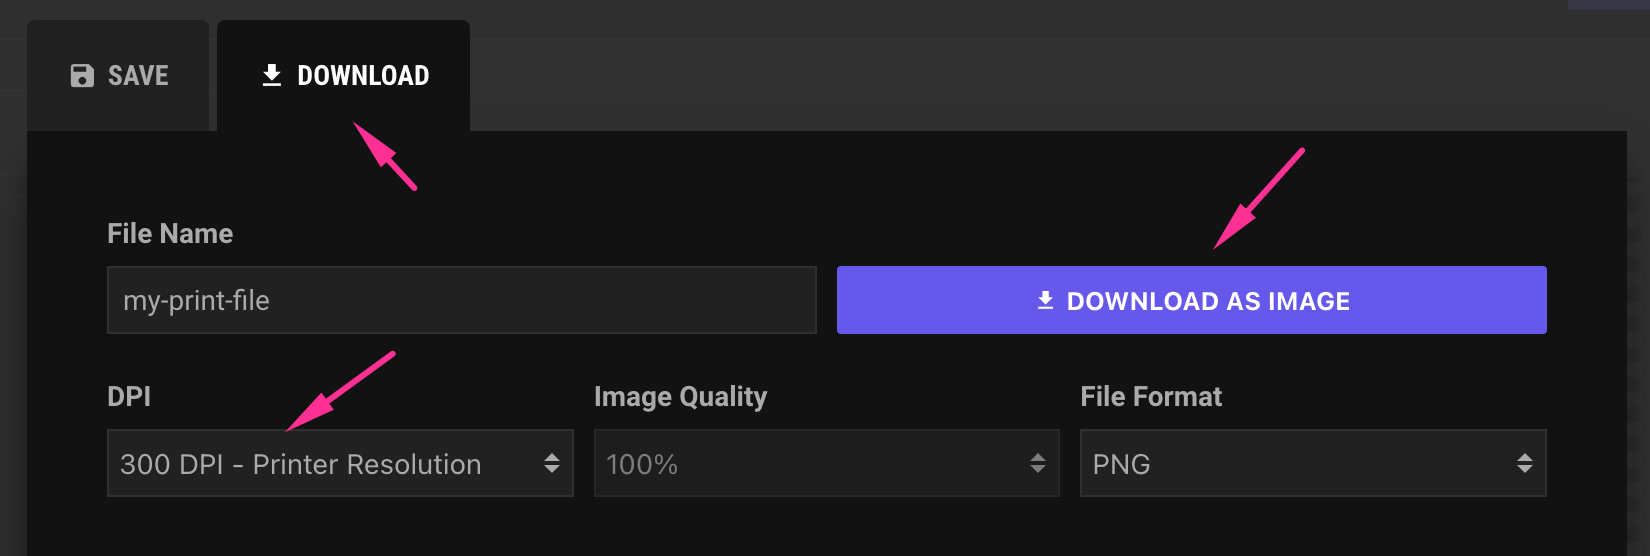
4) Click "Save or Download" button.
5) Click "Download". Select 300 DPI and click "Download As Image" button.
Frequently Asked Questions
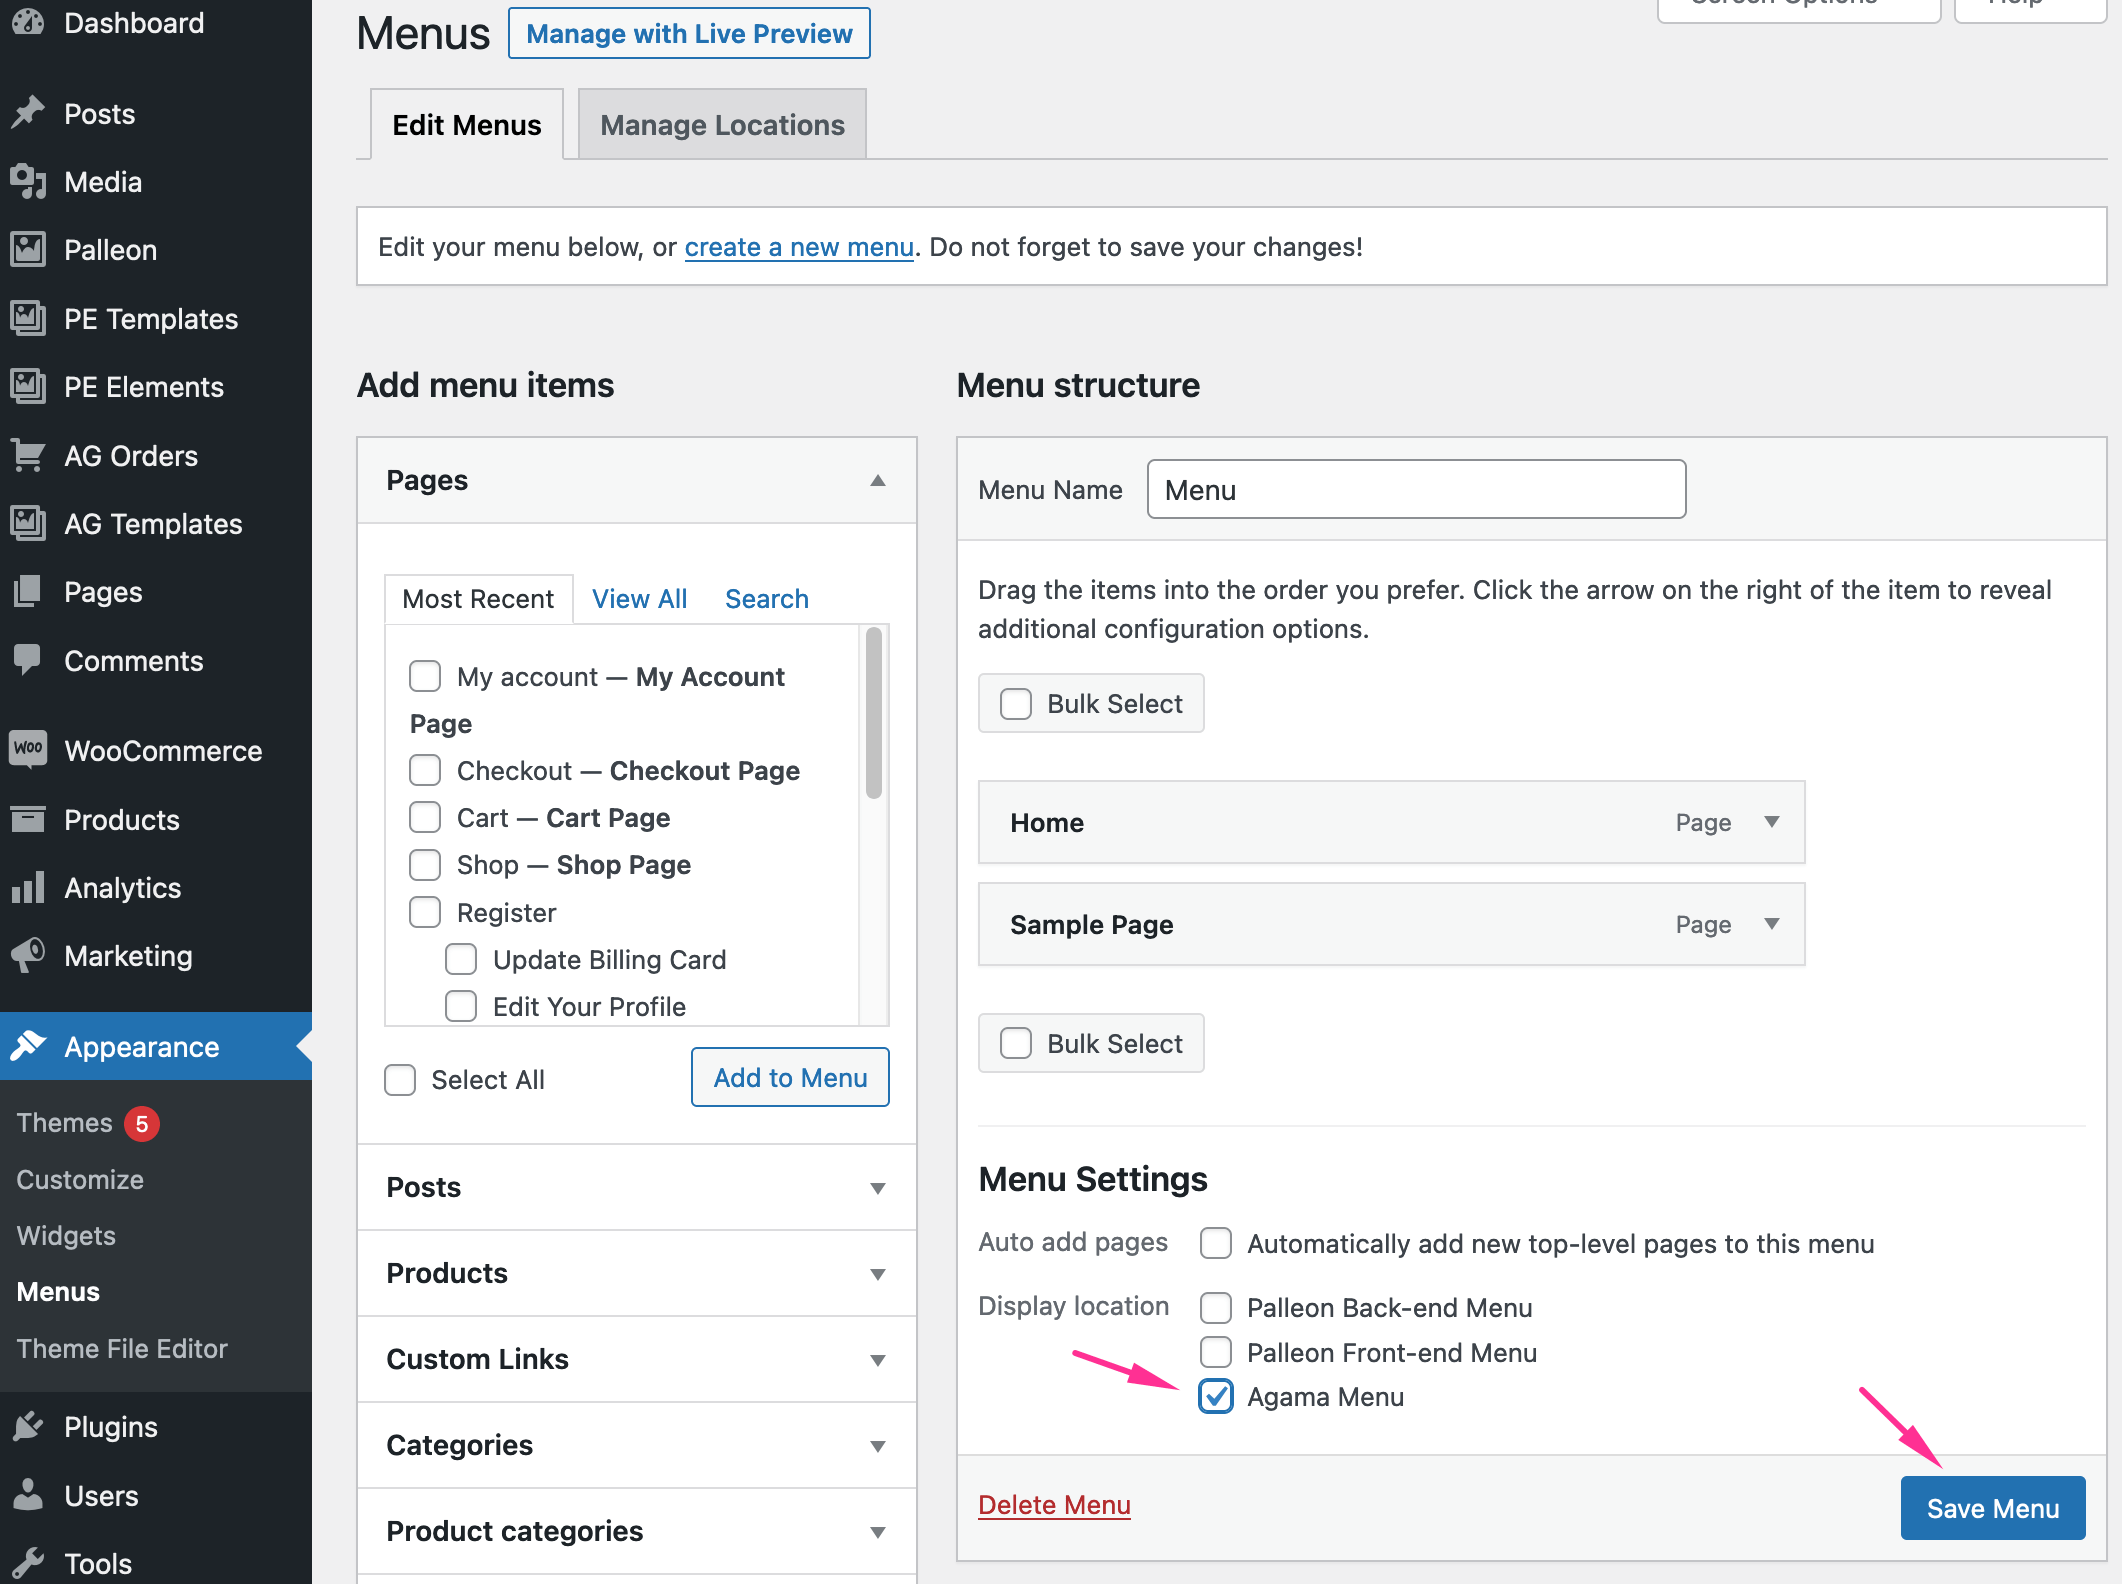
Can I edit the user menu?
As default, WooCommerce account menu is displayed to logged in users.
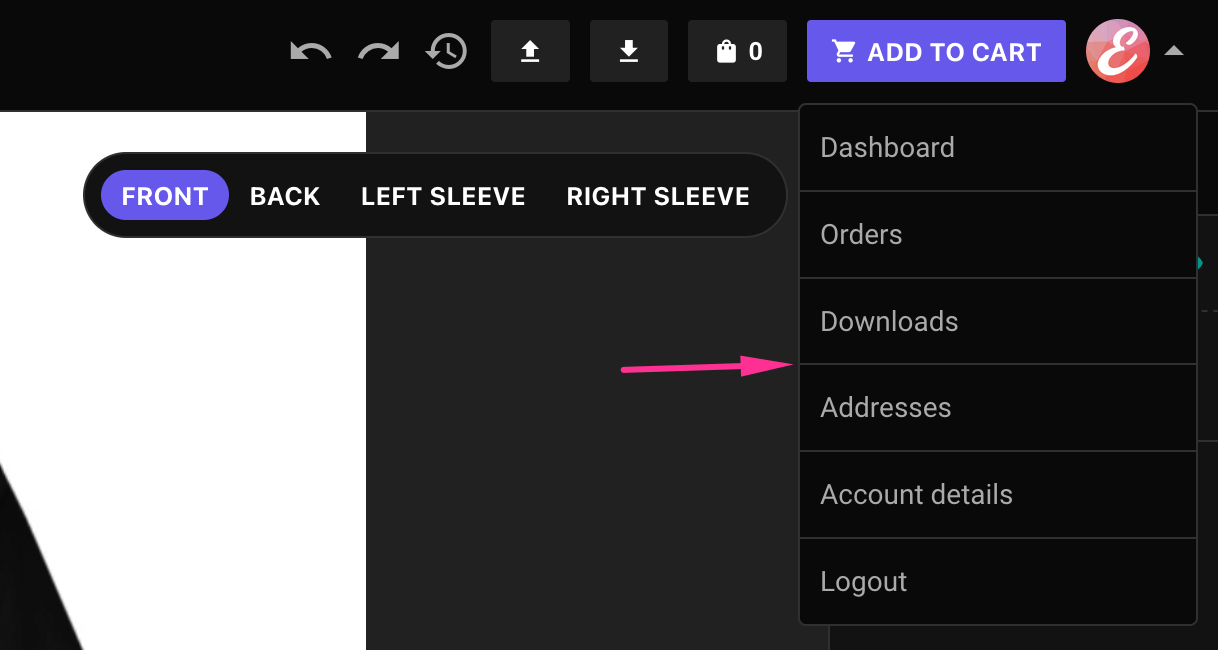
If you want to add the links manually; Go to Appearance -> Menus, create a menu and set display location as "Agama menu". Save changes.
Need a Customization?
